Bu sürüm, hatalı düzenlemeler içerebilir. En son doğrulanmış bellek kopyası dönün.
Neye ihtiyacın var
-
Bu adım çevrilmemiş. Çevrilmesine yardım edin
-
Jack up the front of the car and place it on jack stands.
-
Use an impact wrench or tire iron to remove the five 19 mm lug nuts from the front wheel.
-
Pull the front wheel off the wheel lugs and set it aside.
-
-
Bu adım çevrilmemiş. Çevrilmesine yardım edin
-
Use a socket wrench or impact gun to remove the 15 mm nut on the front sway bar endlink.
-
-
Bu adım çevrilmemiş. Çevrilmesine yardım edin
-
Grab the front edge of the bracket with a pair of locking pliers.
-
Remove the 12 mm bolt that holds the bracket in place with a socket wrench.
-
-
Bu adım çevrilmemiş. Çevrilmesine yardım edin
-
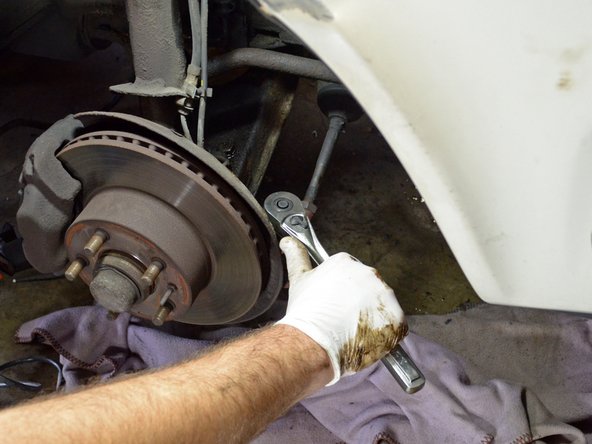
Use a socket wrench or impact gun to remove the 19 mm tie rod end nut.
-
-
-
Bu adım çevrilmemiş. Çevrilmesine yardım edin
-
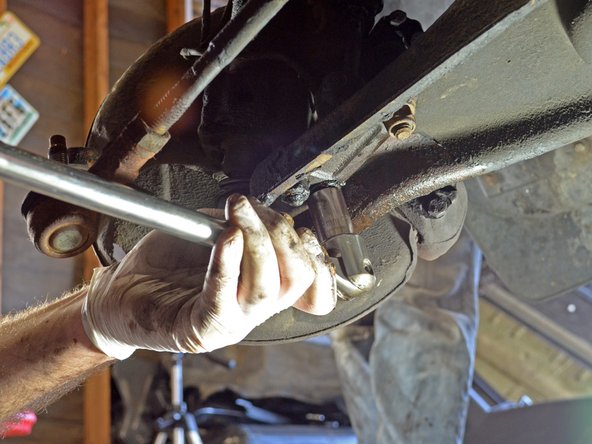
Place a tie rod end puller over the exposed threads of the tie rod end and turn the puller with a socket wrench to push the tie rod end out of the steering knuckle.
-
-
Bu adım çevrilmemiş. Çevrilmesine yardım edin
-
Remove the bottom two nuts with a breaker bar or long wrench.
-
Place a breaker bar over the gold nut on the bottom of the control arm.
-
Place an 18 mm box end wrench over the bolt on top of the control arm.
-
Turn the breaker bar and the wrench in their respective counterclockwise directions to loosen and remove the third ball joint-to-control arm bolt.
-
-
Bu adım çevrilmemiş. Çevrilmesine yardım edin
-
Place a jack underneath the ball joint to support it once you remove the 3 ball joint-to-control arm bolts.
-
-
Bu adım çevrilmemiş. Çevrilmesine yardım edin
-
Open the hood and locate the three strut mounting bolts on the strut tower.
-
Make an alignment mark on the shoe at the dimple in the top of the strut tower before removing the mounting nuts.
-
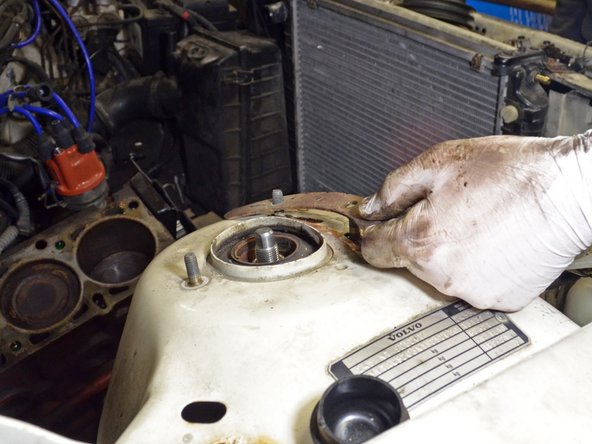
Use a ratcheting socket wrench or impact wrench with a 13 mm deep socket to remove the three nuts.
-
-
Bu adım çevrilmemiş. Çevrilmesine yardım edin
-
Slowly lower the jack and guide the strut assembly down and out of the car.
-
-
Bu adım çevrilmemiş. Çevrilmesine yardım edin
-
Place spring compressors on opposite sides of the spring.
-
Alternate tightening the spring compressors evenly until you are able to move the entire spring up and down.
-
-
Bu adım çevrilmemiş. Çevrilmesine yardım edin
-
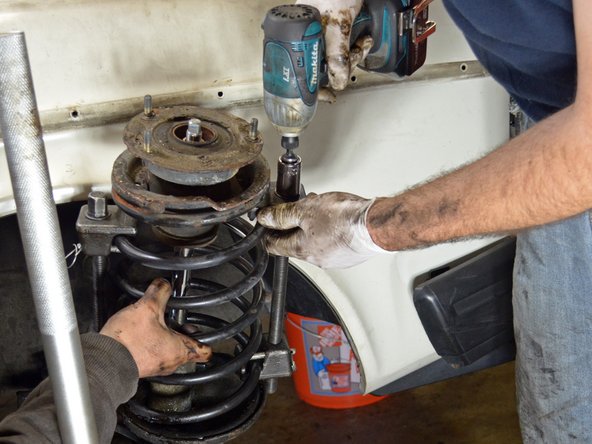
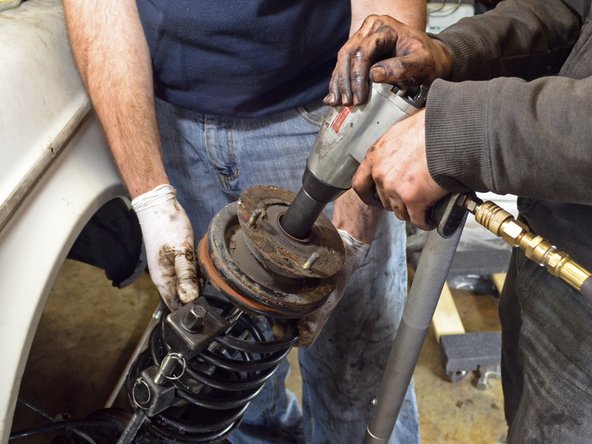
Use an impact wrench to remove the 24 mm nut at the top of the strut assembly.
-
Remove the strut mount from the strut assembly.
-
-
Bu adım çevrilmemiş. Çevrilmesine yardım edin
-
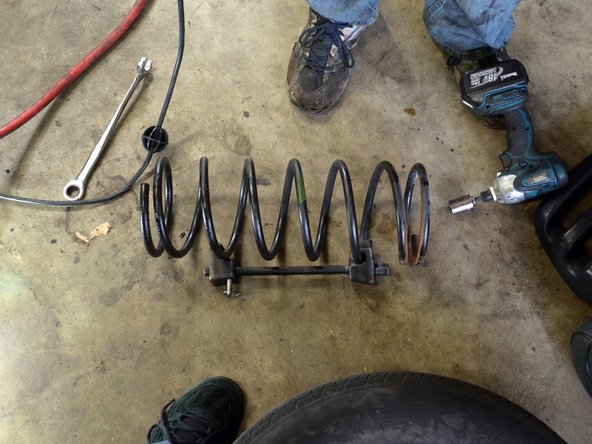
Remove the upper spring seat and pull the spring off the strut assembly.
-
If you are installing new springs you will need to remove the spring compressors. Loosen each spring compressor evenly, alternating from side to side until they are off the spring completely.
-


İptal et: Bu kılavuzu tamamlamadım.
4 farklı kişi bu kılavuzu tamamladı.
