Bu sürüm, hatalı düzenlemeler içerebilir. En son doğrulanmış bellek kopyası dönün.
Neye ihtiyacın var
-
Bu adım çevrilmemiş. Çevrilmesine yardım edin
-
Identify the hood release button within your vehicle. For 2003 models, this button is located underneath the driver's wheel, near the hinge of the door.
-
Once located, activate the hood release by pressing the button - you should hear a slight click noise as the hood pops up slightly.
-
-
Bu adım çevrilmemiş. Çevrilmesine yardım edin
-
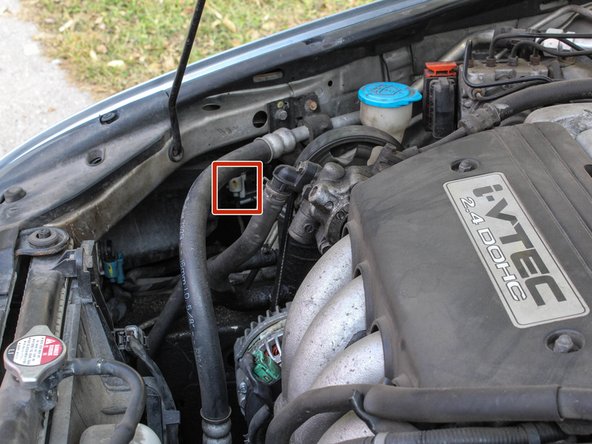
Identify the release latch beneath the hood. For the 2003 model this is located directly above the Honda logo that is on the grill.
-
Once identified, push up on the lever, which will allow you to lift up the hood.
-
-
Bu adım çevrilmemiş. Çevrilmesine yardım edin
-
Lift up the hood.
-
Identify the hood support rod. For the 2003 model, and most all cars, it will be located directly to the left of the engine compartment.
-
Place the hood support rod into the support rod hole within the hood itself. This will be located just to the left of the center of the hood.
-
-
-
Bu adım çevrilmemiş. Çevrilmesine yardım edin
-
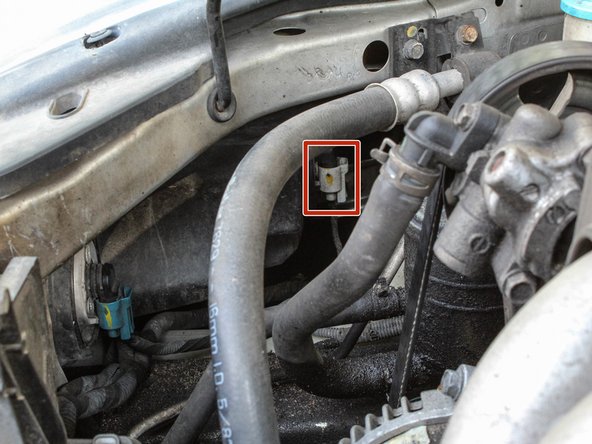
Identify your lightbulb hardware. This can be easily done by looking directly behind the light bulb for a white plastic headlight clip that houses both a wire and piece of hardware that feeds into the headlight housing.
-
-
Bu adım çevrilmemiş. Çevrilmesine yardım edin
-
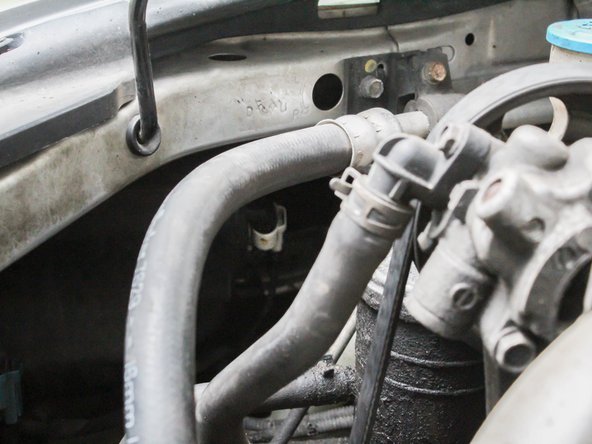
Twist these components counterclockwise to unscrew them.
-
Once unscrewed, pull the components backwards out of the headlight housing to gain access to the headlight itself.
-
-
Bu adım çevrilmemiş. Çevrilmesine yardım edin
-
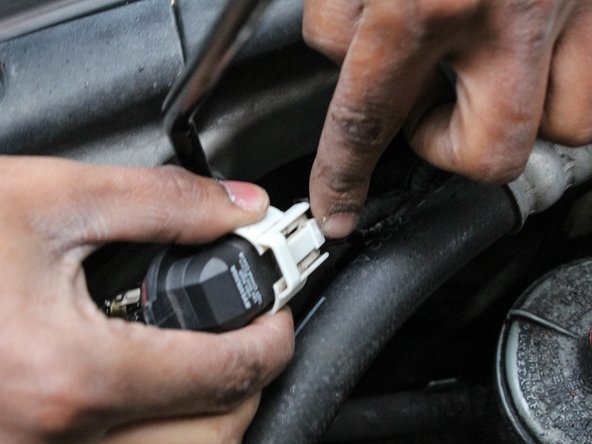
Remove the lightbulb that needs replacing from the white plastic piece by pressing down on the tab that is located on the bottom of the piece. While pressing down, slide the lightbulb outwards to remove it.
-
-
Bu adım çevrilmemiş. Çevrilmesine yardım edin
-
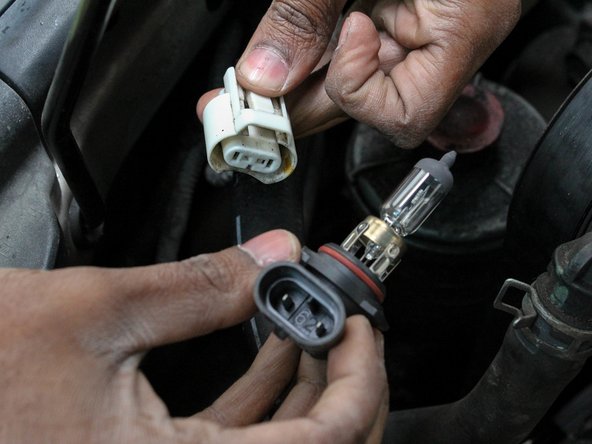
Take the new bulb and install it in the white plastic clip by pressing down on the release tab and sliding the corresponding part of the bulb inside of it. When the new bulb is correctly installed, you will feel it lock into place, and the release tab pop up.
-
-
Bu adım çevrilmemiş. Çevrilmesine yardım edin
-
The bulb is now ready for use and can be placed back into its housing. To do this, carefully slide the new bulb into the housing that the old one was removed from in step five.
-
Once the bulb is completely inserted, twist the bulb clockwise so that it tightens into place.
-


İptal et: Bu kılavuzu tamamlamadım.
Bir başkası bu kılavuzu tamamladı.
Ekip

University of Minnesota, Team S1-G3, Card Fall 2018 University of Minnesota, Team S1-G3, Card Fall 2018 üyesi
UMN-CARD-F18S1G3
3 Üyeler
1 Kılavuz yazıldı