Neye ihtiyacın var
-
-
Remove the two screws at the front of the unit using a philips head screwdriver
-
Lift up on the lid and remove it from the APC RBC43 Cartridge
-
-
-
Lift up and tilt the first battery in the cartridge to get free access to the wire connections at the top of the battery. It is easiest to begin with a battery at the very end of the cartridge - opposite of where it plugs into the APC unit.
-
Remove both the positive and negative wires from the battery
-
Remove the battery from the RBC43 cartridge
-
-
-
-
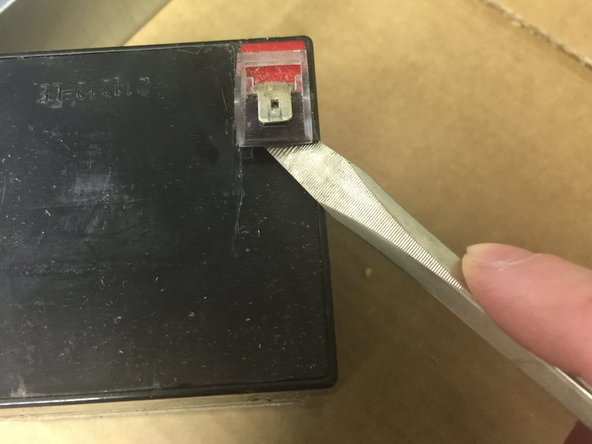
Use a flat head screwdriver to remove the plastic terminal connector from the old battery
-
Fit the plastic terminal connector onto your new battery on the positive side - typically identified by the color red on the top of the battery.
-
-
-
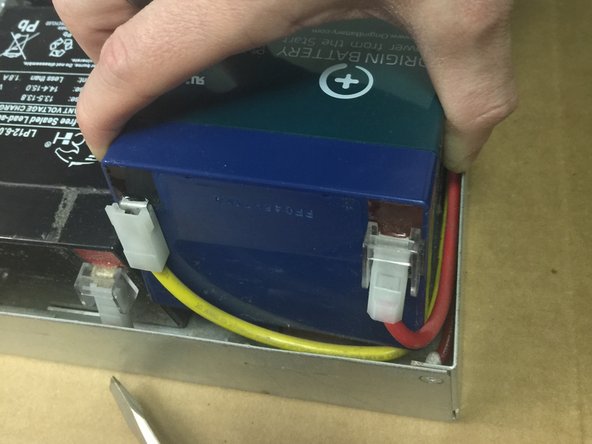
Place your new battery in the vacant battery spot and lean it forward to get access to the wires as pictured
-
Connect the wires to the battery exactly as they were removed. The wires will stay in position and should line up with the correct terminals
-
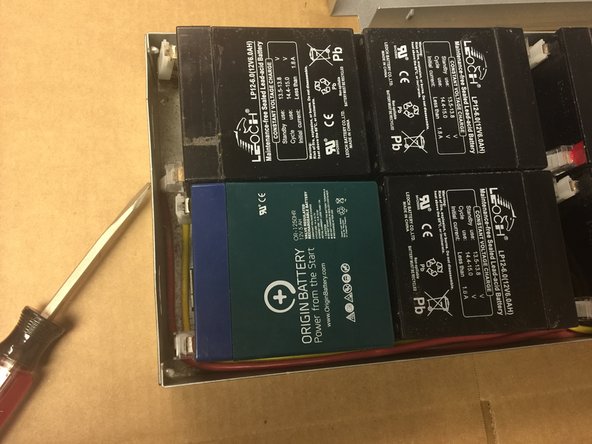
Lay the battery flat in the cartridge so it is flush with the others. If your having trouble getting the battery to sit flush in the case then a corner may be hung up on one of the wires, just shimmy the wire to the side.
-
-
-
Repeat steps 2 through 4 until you have replaced all of the batteries in the RBC43 cartridge
-
I recommend removing and replacing one battery at a time for anyone new to the APC RBC43 Cartridge. Removing and replacing one at a time will ensure that your wiring will be correct avoiding any potential confusion that could arise.
-
Step 3 is important! Always re-use the plastic terminal protectors, if the adhesive is no longer usable then apply a small piece of double sided tape.
-


To finish up your installation, follow the instructions of Step 1 in reverse order.
To finish up your installation, follow the instructions of Step 1 in reverse order.

Bir Yorum
One caveat to the above instructions. Don’t just try and pull the connectors off the batteries as APC employ security locked terminals. Use a thin flat blade screwdriver and insert it between the battery terminal and the connecter to depress the catch, now you should be able to release the wire with very little effort.
Otherwise you can damage the connector as it will pull back the internal latch and irrevocably damage the connector!