Ana içeriğe geç
Onarım Topluluğuna Katılın - Hesap Oluşturun

ASUS Chromebook C200MA DS01 Touchpad Replacement

Neye ihtiyacın var

  1. ASUS Chromebook C200MA DS01 Touchpad Replacement, Back Panel: adım 1, 1 resimden 1.
    • Before proceeding, power down your Chromebook. Close the display and lay it on a soft surface, top-side down.

    • Remove the five 8.4 mm Phillips #0 screws.

    • Remove the four 4.6 mm Phillips #0 screws.

    FixBot'a Sor
  2. ASUS Chromebook C200MA DS01 Touchpad Replacement: adım 2, 1 resimden 1.
    • Use the plastic opening tool to gently work around the edge of the Chromebook until the back panel starts to lift off.

    FixBot'a Sor
  3. ASUS Chromebook C200MA DS01 Touchpad Replacement: adım 3, 1 resimden 1.
    • Remove the back panel by lifting it away from the Chromebook.

    • Some clicking will be heard as the panel is removed from the back, this is completely normal.

    FixBot'a Sor
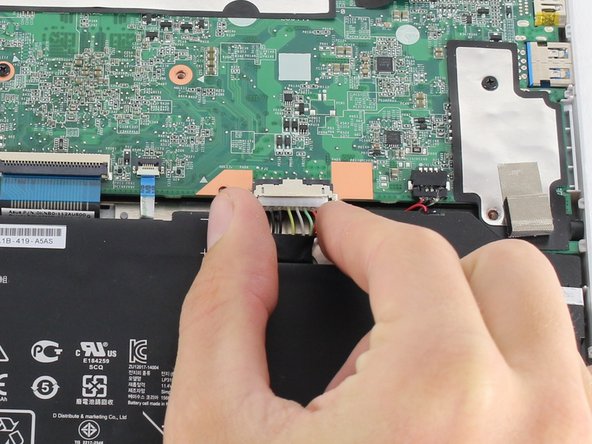
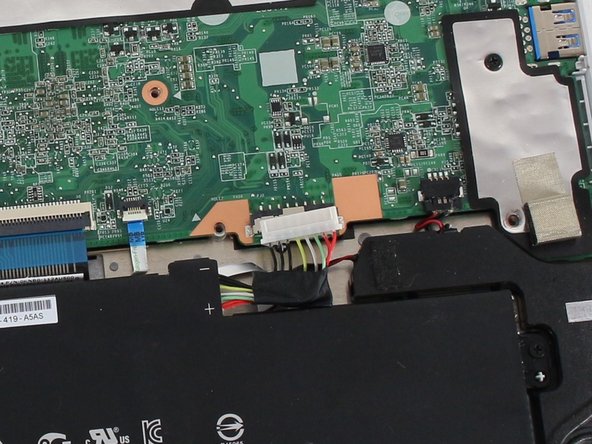
  4. ASUS Chromebook C200MA DS01 Touchpad Replacement, Battery Connection: adım 4, 3 resimden 1. ASUS Chromebook C200MA DS01 Touchpad Replacement, Battery Connection: adım 4, 3 resimden 2. ASUS Chromebook C200MA DS01 Touchpad Replacement, Battery Connection: adım 4, 3 resimden 3.
    • To disconnect the battery, pinch the multi-color bundle cable with your thumb and forefinger and pull directly back.

    FixBot'a Sor
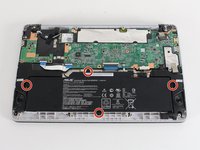
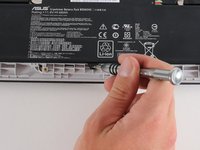
  5. ASUS Chromebook C200MA DS01 Touchpad Replacement, Battery: adım 5, 2 resimden 1. ASUS Chromebook C200MA DS01 Touchpad Replacement, Battery: adım 5, 2 resimden 2.
    • Remove the four 4.7 mm Phillips #0 screws that secure the battery to the Chromebook.

    FixBot'a Sor
  6. ASUS Chromebook C200MA DS01 Touchpad Replacement: adım 6, 1 resimden 1.
    • Pull out the battery.

    FixBot'a Sor
  7. ASUS Chromebook C200MA DS01 Touchpad Replacement, Touchpad: adım 7, 1 resimden 1.
    • Locate the touchpad.

    • Locate the touch pad cable connector.

    FixBot'a Sor
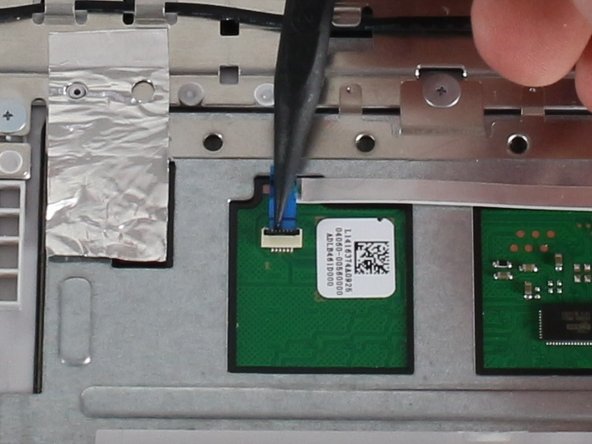
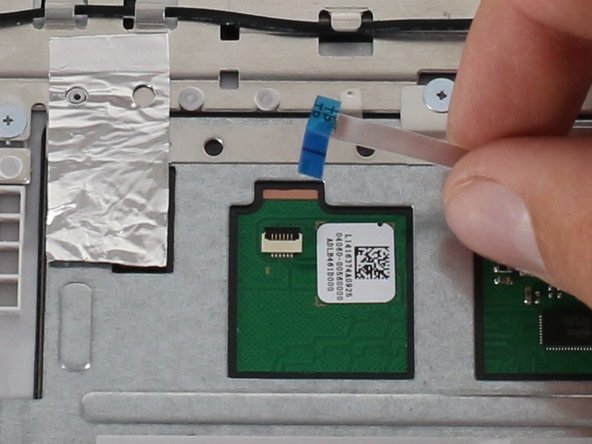
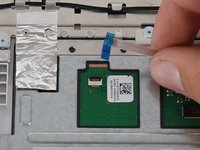
  8. ASUS Chromebook C200MA DS01 Touchpad Replacement: adım 8, 3 resimden 1. ASUS Chromebook C200MA DS01 Touchpad Replacement: adım 8, 3 resimden 2. ASUS Chromebook C200MA DS01 Touchpad Replacement: adım 8, 3 resimden 3.
    • Disconnect the touch pad ZIF(zero insertion force) connector.

    • Flip the flap up using a spudger or your fingers.

    • Pull gently on the ribbon cable to disconnect.

    FixBot'a Sor
  9. ASUS Chromebook C200MA DS01 Touchpad Replacement: adım 9, 1 resimden 1.
    • Gently remove the adhesive on the touch pad ribbon cable.

    FixBot'a Sor
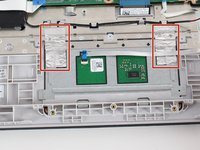
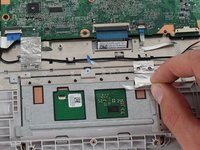
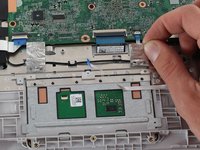
  10. ASUS Chromebook C200MA DS01 Touchpad Replacement: adım 10, 3 resimden 1. ASUS Chromebook C200MA DS01 Touchpad Replacement: adım 10, 3 resimden 2. ASUS Chromebook C200MA DS01 Touchpad Replacement: adım 10, 3 resimden 3.
    • Gently remove the metallic tape from the touch pad only.

    • Try not to tear the tape, it can be re-used during reassembly.

    FixBot'a Sor
  11. ASUS Chromebook C200MA DS01 Touchpad Replacement: adım 11, 1 resimden 1.
    • Remove the three 1.8 mm Phillips #00 screws.

    FixBot'a Sor
  12. ASUS Chromebook C200MA DS01 Touchpad Replacement: adım 12, 2 resimden 1. ASUS Chromebook C200MA DS01 Touchpad Replacement: adım 12, 2 resimden 2.
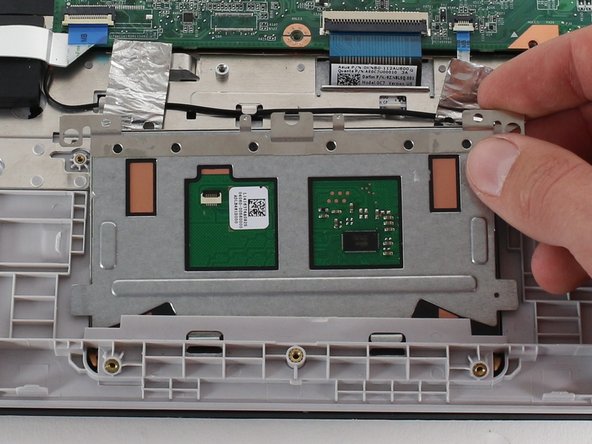
    • Lift the far edge of the touch pad to remove it.

    FixBot'a Sor
Sonuç

To reassemble your device, follow these instructions in reverse order.

Christopher Lim

Üyelik tarihi: 04/26/17

779 İtibar

7 adet Kılavuz yazıldı

Ekip

Cal Poly, Team S23-G4, Livingston Spring 2017 Cal Poly, Team S23-G4, Livingston Spring 2017 üyesi

CPSU-LIVINGSTON-S17S23G4

4 Üyeler

19 adet Kılavuz yazıldı

0Kılavuz Yorumları

Yorum Ekle

İstatistikleri Görüntüle:

Son 24 Saat: 0

Son 7 gün: 3

Son 30 gün: 29

Her zaman: 783