Ana içeriğe geç

ASUS Chromebook C200MA DS01 Touchpad Replacement

Neye ihtiyacın var

  1. ASUS Chromebook C200MA DS01 Touchpad Replacement, Back Panel: adım 1, 1 resimden 1.
    • Before proceeding, power down your Chromebook. Close the display and lay it on a soft surface, top-side down.

    • Remove the five 8.4 mm Phillips #0 screws.

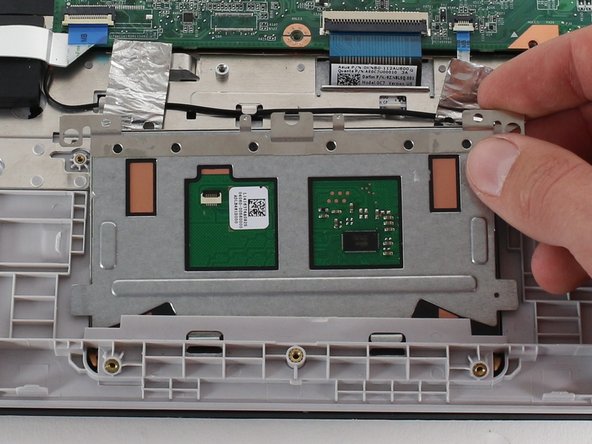
    • Remove the four 4.6 mm Phillips #0 screws.

  2. ASUS Chromebook C200MA DS01 Touchpad Replacement: adım 2, 1 resimden 1.
    • Use the plastic opening tool to gently work around the edge of the Chromebook until the back panel starts to lift off.

  3. ASUS Chromebook C200MA DS01 Touchpad Replacement: adım 3, 1 resimden 1.
    • Remove the back panel by lifting it away from the Chromebook.

    • Some clicking will be heard as the panel is removed from the back, this is completely normal.

  4. ASUS Chromebook C200MA DS01 Touchpad Replacement, Battery Connection: adım 4, 3 resimden 1. ASUS Chromebook C200MA DS01 Touchpad Replacement, Battery Connection: adım 4, 3 resimden 2. ASUS Chromebook C200MA DS01 Touchpad Replacement, Battery Connection: adım 4, 3 resimden 3.
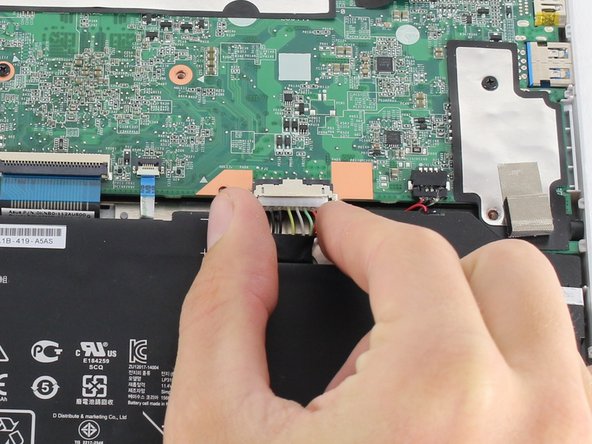
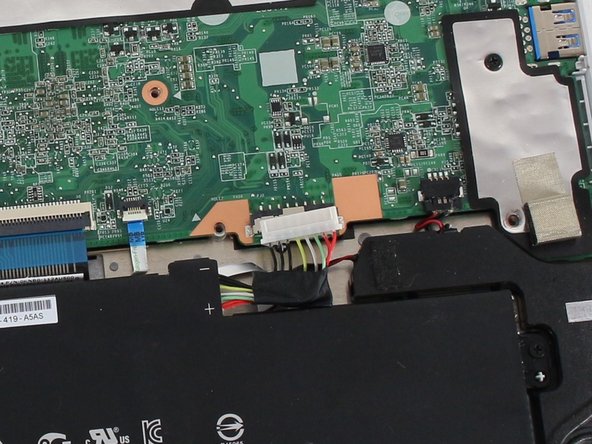
    • To disconnect the battery, pinch the multi-color bundle cable with your thumb and forefinger and pull directly back.

  5. ASUS Chromebook C200MA DS01 Touchpad Replacement, Battery: adım 5, 2 resimden 1. ASUS Chromebook C200MA DS01 Touchpad Replacement, Battery: adım 5, 2 resimden 2.
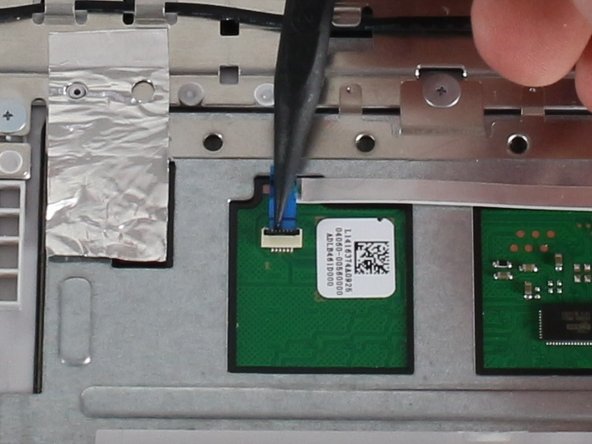
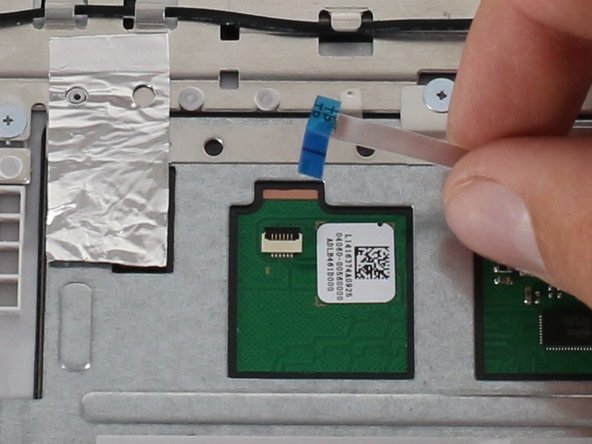
    • Remove the four 4.7 mm Phillips #0 screws that secure the battery to the Chromebook.

  6. ASUS Chromebook C200MA DS01 Touchpad Replacement: adım 6, 1 resimden 1.
    • Pull out the battery.

  7. ASUS Chromebook C200MA DS01 Touchpad Replacement, Touchpad: adım 7, 1 resimden 1.
    • Locate the touchpad.

    • Locate the touch pad cable connector.

  8. ASUS Chromebook C200MA DS01 Touchpad Replacement: adım 8, 3 resimden 1. ASUS Chromebook C200MA DS01 Touchpad Replacement: adım 8, 3 resimden 2. ASUS Chromebook C200MA DS01 Touchpad Replacement: adım 8, 3 resimden 3.
    • Disconnect the touch pad ZIF(zero insertion force) connector.

    • Flip the flap up using a spudger or your fingers.

    • Pull gently on the ribbon cable to disconnect.

  9. ASUS Chromebook C200MA DS01 Touchpad Replacement: adım 9, 1 resimden 1.
    • Gently remove the adhesive on the touch pad ribbon cable.

  10. ASUS Chromebook C200MA DS01 Touchpad Replacement: adım 10, 3 resimden 1. ASUS Chromebook C200MA DS01 Touchpad Replacement: adım 10, 3 resimden 2. ASUS Chromebook C200MA DS01 Touchpad Replacement: adım 10, 3 resimden 3.
    • Gently remove the metallic tape from the touch pad only.

    • Try not to tear the tape, it can be re-used during reassembly.

  11. ASUS Chromebook C200MA DS01 Touchpad Replacement: adım 11, 1 resimden 1.
    • Remove the three 1.8 mm Phillips #00 screws.

  12. ASUS Chromebook C200MA DS01 Touchpad Replacement: adım 12, 2 resimden 1. ASUS Chromebook C200MA DS01 Touchpad Replacement: adım 12, 2 resimden 2.
    • Lift the far edge of the touch pad to remove it.

Sonuç

To reassemble your device, follow these instructions in reverse order.

Christopher Lim

Üyelik tarihi: 04/26/17

779 İtibar

7 adet Kılavuz yazıldı

Ekip

Cal Poly, Team S23-G4, Livingston Spring 2017 Cal Poly, Team S23-G4, Livingston Spring 2017 üyesi

CPSU-LIVINGSTON-S17S23G4

4 Üyeler

19 adet Kılavuz yazıldı

0 Yorum

Yorum Ekle

İstatistikleri Görüntüle:

Son 24 Saat: 0

Son 7 gün: 0

Son 30 gün: 1

Her zaman: 582