Ana içeriğe geç

ASUS Eee PC 900HD Hard Drive Replacement

Neye ihtiyacın var

  1. ASUS Eee PC 900HD Hard Drive Replacement, Hard Drive: adım 1, 3 resimden 1. ASUS Eee PC 900HD Hard Drive Replacement, Hard Drive: adım 1, 3 resimden 2. ASUS Eee PC 900HD Hard Drive Replacement, Hard Drive: adım 1, 3 resimden 3.
    • Remove the four 4.76 mm Philips screws on the back of the laptop using the Phillips J0 Screwdriver.

  2. ASUS Eee PC 900HD Hard Drive Replacement: adım 2, 2 resimden 1. ASUS Eee PC 900HD Hard Drive Replacement: adım 2, 2 resimden 2.
    • Use a plastic opening tool to remove the back cover.

  3. ASUS Eee PC 900HD Hard Drive Replacement: adım 3, 3 resimden 1. ASUS Eee PC 900HD Hard Drive Replacement: adım 3, 3 resimden 2. ASUS Eee PC 900HD Hard Drive Replacement: adım 3, 3 resimden 3.
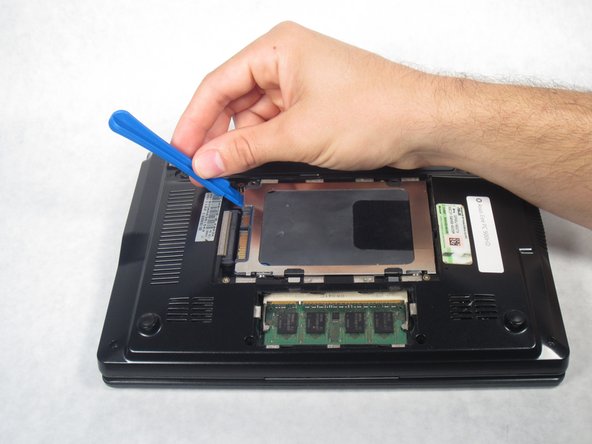
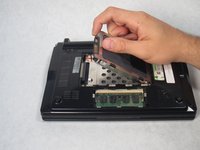
    • Starting from the left, use a plastic opening tool to slide the hard drive all the way to the right.

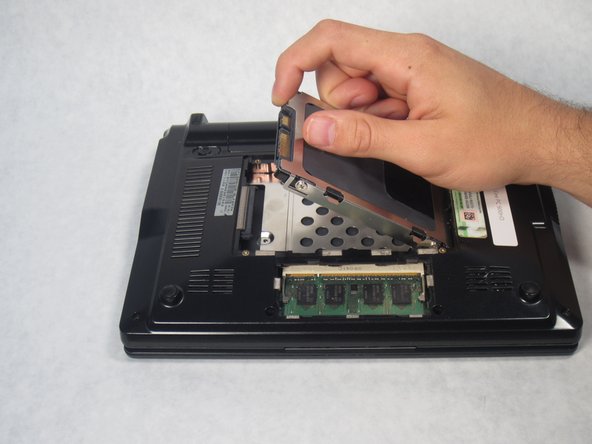
    • Once the hard drive is completely to the right, pull up on the hard drive to remove.

Sonuç

To reassemble your device, follow these instructions in reverse order.

Bir başkası bu kılavuzu tamamladı.

Kendall Marie Mehlhorn

Üyelik tarihi: 10/13/15

557 İtibar

5 adet Kılavuz yazıldı

Ekip

0 Yorum

Yorum Ekle

İstatistikleri Görüntüle:

Son 24 Saat: 3

Son 7 gün: 7

Son 30 gün: 16

Her zaman: 765