Ana içeriğe geç

ASUS K200MA-DS01T Battery Replacement

Neye ihtiyacın var

  1. ASUS K200MA-DS01T Battery Replacement, Back Panel: adım 1, 2 resimden 1. ASUS K200MA-DS01T Battery Replacement, Back Panel: adım 1, 2 resimden 2.
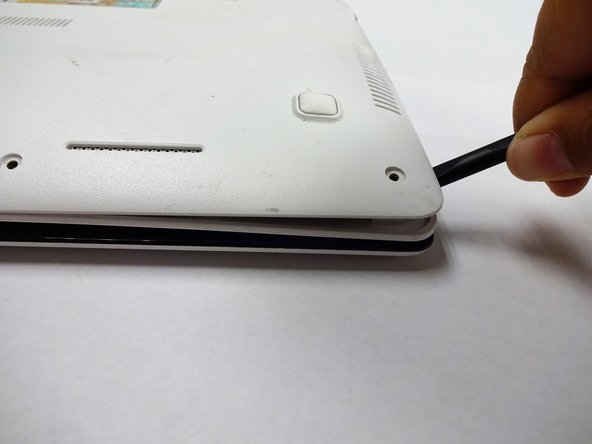
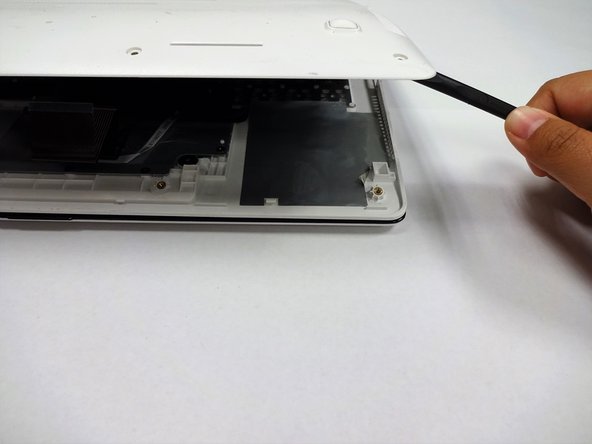
    • With the opening facing you, flip the laptop over and remove the following screws from the back panel:

    • Six 4mm Phillips screws using a Phillips #0 screwdriver.

    • One 12mm Phillips screw in the center using a Phillips #0 screwdriver.

  2. ASUS K200MA-DS01T Battery Replacement: adım 2, 2 resimden 1. ASUS K200MA-DS01T Battery Replacement: adım 2, 2 resimden 2.
    • Using a plastic spudger, remove the two rubber stoppers closest to the hinge to reveal the screws underneath.

  3. ASUS K200MA-DS01T Battery Replacement: adım 3, 1 resimden 1.
    • Remove the following screws:

    • Two 4mm Phillips screws using a Phillips #0 screwdriver.

  4. ASUS K200MA-DS01T Battery Replacement: adım 4, 3 resimden 1. ASUS K200MA-DS01T Battery Replacement: adım 4, 3 resimden 2. ASUS K200MA-DS01T Battery Replacement: adım 4, 3 resimden 3.
    • Using a plastic spudger (and a fair amount of force), pry the back panel up from the keyboard to separate.

    • You may have to use one spudger to wedge between the back panel and keyboard while using another to pry it open in a different spot.

  5. ASUS K200MA-DS01T Battery Replacement, Keyboard: adım 5, 2 resimden 1. ASUS K200MA-DS01T Battery Replacement, Keyboard: adım 5, 2 resimden 2.
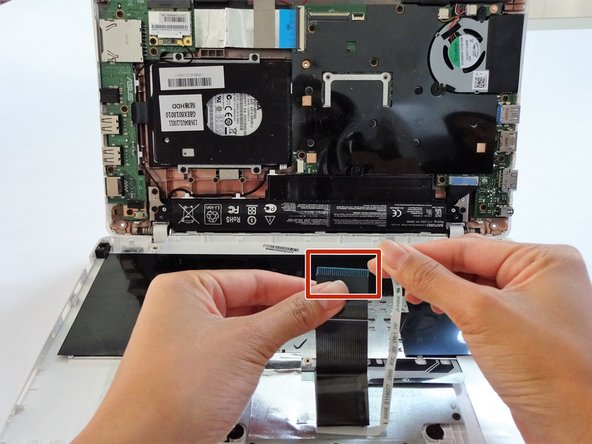
    • To disconnect the keyboard connectors from keyboard and back panel, gently pull wide keyboard connector out.

    • Gently pull the narrow connector away from the keyboard.

  6. ASUS K200MA-DS01T Battery Replacement: adım 6, 2 resimden 1. ASUS K200MA-DS01T Battery Replacement: adım 6, 2 resimden 2.
    • Now that the keyboard connectors are unplugged, pull the keyboard off and away from the back panel hinges.

  7. ASUS K200MA-DS01T Battery Replacement, Battery: adım 7, 2 resimden 1. ASUS K200MA-DS01T Battery Replacement, Battery: adım 7, 2 resimden 2.
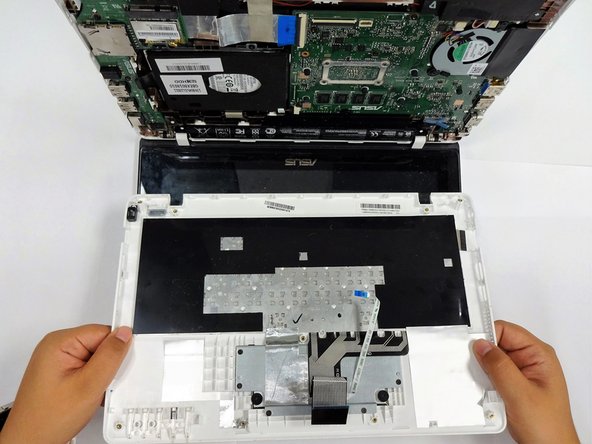
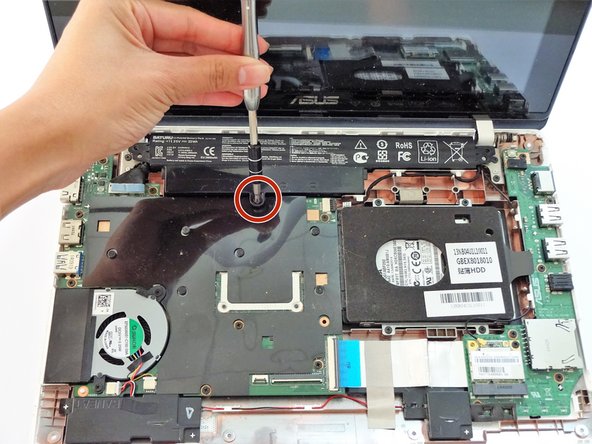
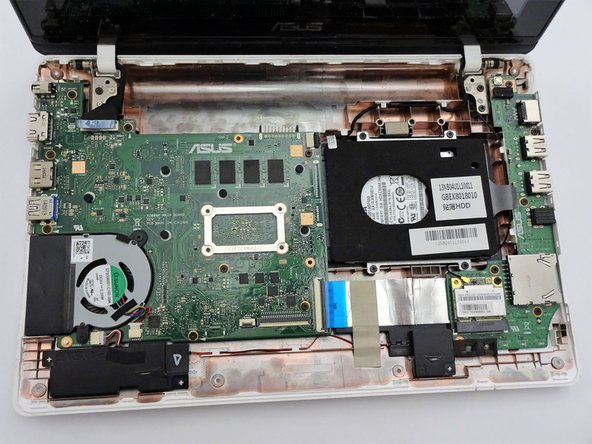
    • Flip the computer over so that the side with the motherboard (large green piece) is laying face-up.

    • Remove the following screws from the middle and far ends of the battery:

    • Three 4mm Phillips screws using a Phillips #0 screwdriver.

    • The battery will be located closest to the screen.

  8. ASUS K200MA-DS01T Battery Replacement: adım 8, 3 resimden 1. ASUS K200MA-DS01T Battery Replacement: adım 8, 3 resimden 2. ASUS K200MA-DS01T Battery Replacement: adım 8, 3 resimden 3.
    • Gripping the wider left section, lift the battery up and away from computer.

Sonuç

To reassemble your device, follow these instructions in reverse order.

Aliyah Malapit

Üyelik tarihi: 09/26/18

199 İtibar

2 adet Kılavuz yazıldı

Ekip

CSU Fullerton, Team S2-G5, Bruce Fall 2018 CSU Fullerton, Team S2-G5, Bruce Fall 2018 üyesi

CSUF-BRUCE-F18S2G5

4 Üyeler

7 adet Kılavuz yazıldı

0 Yorum

Yorum Ekle

İstatistikleri Görüntüle:

Son 24 Saat: 0

Son 7 gün: 0

Son 30 gün: 0

Her zaman: 299