Giriş
This guide will show you how to remove and replace the laptop's CD/DVD Drive. This may be necessary if your drive suffers some sort of hardware failure such as not ejecting or the inability for it to read disks.
Neye ihtiyacın var
-
-
Turn the laptop off and unplug all cables.
-
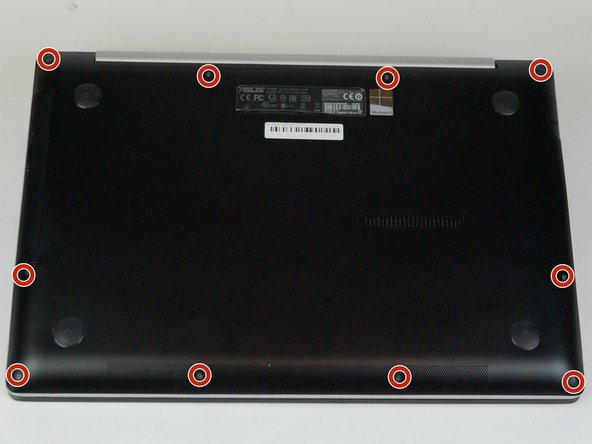
Flip over so the bottom is facing you.
-
Remove the ten 3mm Torx T5 screws from the bottom cover.
-
-
-
-
Remove the two 4mm black Phillips #1 screws from the top of the CD/DVD bracket.
-
Remove the single 4mm silver Phillips #1 screw from the bottom of the CD/DVD bracket.
-
Remove the CD/DVD bracket.
-


To reassemble your device, follow these instructions in reverse order.
To reassemble your device, follow these instructions in reverse order.
İptal et: Bu kılavuzu tamamlamadım.
2 farklı kişi bu kılavuzu tamamladı.
Ekip

USF Tampa, Team S5-G1, Passmore Spring 2018 USF Tampa, Team S5-G1, Passmore Spring 2018 üyesi
USFT-PASSMORE-S18S5G1
4 Üyeler
6 adet Kılavuz yazıldı