Ana içeriğe geç

ASUS VG248 Disassembly

Neye ihtiyacın var

  1. ASUS VG248 Disassembly, ASUS VG248 Disassembly: adım 1, 2 resimden 1. ASUS VG248 Disassembly, ASUS VG248 Disassembly: adım 1, 2 resimden 2.
    • Before you begin, lay the monitor face down on a smooth, clean surface.

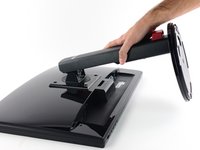
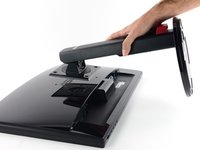
    • Four rubbery covers hide four screws in the rear of the monitor.

    • Pry out the plastic covers with a stiff pointed tool, like a metal spudger.

  2. ASUS VG248 Disassembly: adım 2, 1 resimden 1.
    • Remove the four 13.4 mm Philips #1 screws securing the monitor stand.

  3. ASUS VG248 Disassembly: adım 3, 2 resimden 1. ASUS VG248 Disassembly: adım 3, 2 resimden 2.
    • Remove the stand from the display.

  4. ASUS VG248 Disassembly: adım 4, 2 resimden 1. ASUS VG248 Disassembly: adım 4, 2 resimden 2.
    • The display bezel is held to the rear case by plastic clips that can be released by pulling straight up on the bezel.

    • Rather than use any prying tools that could damage the LCD, it's best to just pull with your fingers. A thin cloth will both protect your fingertips and prevent you from smudging the LCD.

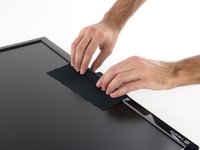
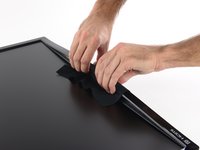
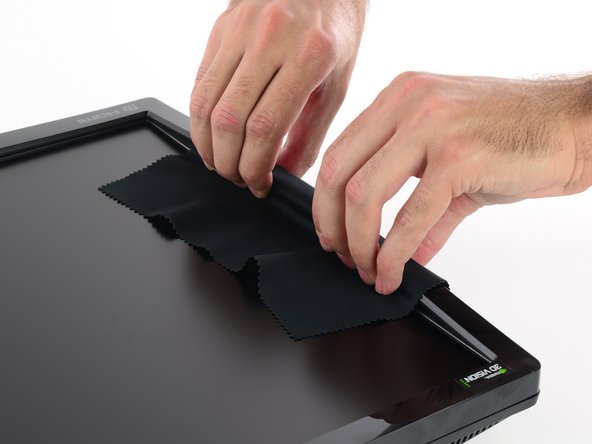
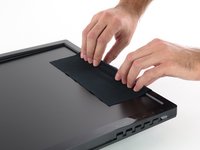
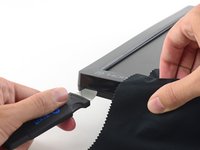
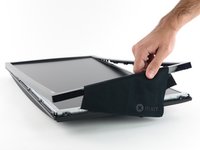
    • Lay the cloth over one of the long edges of the display.

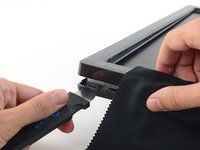
    • Grip the side of the bezel through the cloth and lift straight up. A few clips in the center will pop free.

    • Be careful to pull straight up, and not pry against the display. Pushing down on the display could damage it.

  5. ASUS VG248 Disassembly: adım 5, 2 resimden 1. ASUS VG248 Disassembly: adım 5, 2 resimden 2.
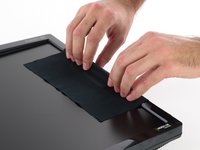
    • Repeat the procedure around the display, lifting up the center of the next side.

  6. ASUS VG248 Disassembly: adım 6, 2 resimden 1. ASUS VG248 Disassembly: adım 6, 2 resimden 2.
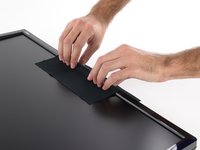
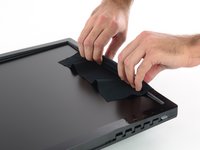
    • Move around to the other long side and lift up on the center of the bezel.

  7. ASUS VG248 Disassembly: adım 7, 2 resimden 1. ASUS VG248 Disassembly: adım 7, 2 resimden 2.
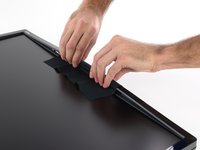
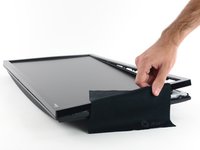
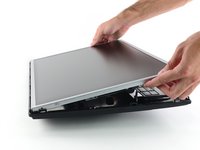
    • Grip the center of the final side and lift the bezel away from the rear case.

  8. ASUS VG248 Disassembly: adım 8, 2 resimden 1. ASUS VG248 Disassembly: adım 8, 2 resimden 2.
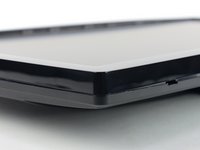
    • Now that you've freed the centers of the four sides, it's time to move on to the corners.

    • Each corner is secured by two large clips that can't be freed by just pulling straight up like you did with the sides.

    • In the next step, you'll be pushing in on the corner clip on the left of the bottom edge of the bezel.

  9. ASUS VG248 Disassembly: adım 9, 2 resimden 1. ASUS VG248 Disassembly: adım 9, 2 resimden 2.
    Bu adımda kullanılan alet:
    Jimmy
    $7.95
    Satın Al
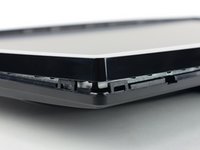
    • Using a thin stiff prying device, like a Jimmy, press in against the bottom clip in the lower left corner (beneath the HDMI logo).

    • While pressing the clip in, pull up on the lower edge of the bezel. The entire corner should pop free.

  10. ASUS VG248 Disassembly: adım 10, 3 resimden 1. ASUS VG248 Disassembly: adım 10, 3 resimden 2. ASUS VG248 Disassembly: adım 10, 3 resimden 3.
    • Once you've freed one corner, you should be able to gently twist the bezel off, freeing all of the remaining corners.

    • If any corners are particularly stubborn, repeat the previous step on the difficult corner.

  11. ASUS VG248 Disassembly: adım 11, 1 resimden 1.
    • Remove the bezel.

  12. ASUS VG248 Disassembly: adım 12, 2 resimden 1. ASUS VG248 Disassembly: adım 12, 2 resimden 2.
    • Lift the LCD out of the rear case.

    • The row of adjustment buttons will come out of the case with the display, attached by a thin ribbon cable. Take care not to damage the cable.

  13. ASUS VG248 Disassembly: adım 13, 1 resimden 1.
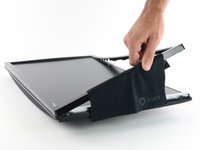
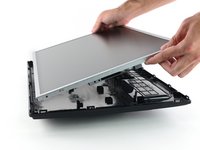
    • With the casing removed, you now have access to the button board, cables, and the housing over the motherboard components.

Sonuç

To reassemble your device, follow these instructions in reverse order.

19 farklı kişi bu kılavuzu tamamladı.

Sam Goldheart

Üyelik tarihi: 10/18/12

465.617 İtibar

538 adet Kılavuz yazıldı

Ekip

iFixit iFixit üyesi

Staff

135 Üyeler

16.732 adet Kılavuz yazıldı

8 Yorum

Do you know of any place that sell the replacement lcd screen?

treymcbrd - Yanıt

Hi there, I have a little thunderbug trapped in the LCD is it possible to take the metal casing at the front of to reomve said bug? Thanks

TJ Grainger - Yanıt

You could yes, but be very careful NOT to introduce dust into the panel!

Bertus van den Dikkenberg -

Hi. A really small bug got stuck within my screen and I accidentally squished it so now it’s dead in there and I want to clean it. How would I remove the top layer of the screen? Because from what I can see it seems like it got squished between the glass and the actual LCD screen itself.

Carl Viernes - Yanıt

Guide to disassemble vg259qm

syedaliabdullah272 - Yanıt

Yorum Ekle

İstatistikleri Görüntüle:

Son 24 Saat: 27

Son 7 gün: 195

Son 30 gün: 938

Her zaman: 114,628