Ana içeriğe geç

ASUS ZenWatch Vibration motor Replacement

Neye ihtiyacın var

  1. ASUS ZenWatch Vibration motor Replacement, Watch Strap Removal: adım 1, 2 resimden 1. ASUS ZenWatch Vibration motor Replacement, Watch Strap Removal: adım 1, 2 resimden 2.
    • On the strap there is a knob. Sliding this knob towards the opposite side of the strap releases the tension on the spring bar, allowing you to pull the strap out..

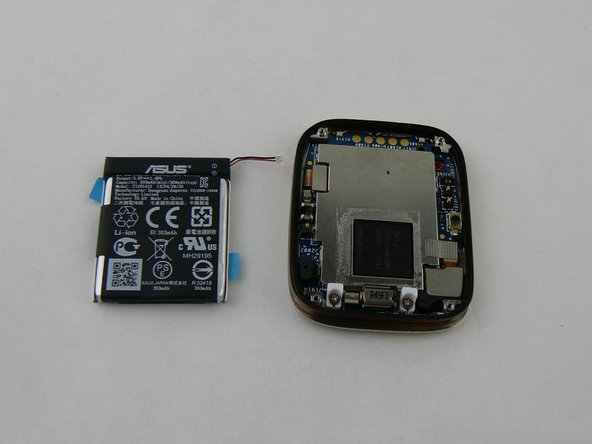
  2. ASUS ZenWatch Vibration motor Replacement, Battery: adım 2, 3 resimden 1. ASUS ZenWatch Vibration motor Replacement, Battery: adım 2, 3 resimden 2. ASUS ZenWatch Vibration motor Replacement, Battery: adım 2, 3 resimden 3.
    • Use the T5 Torx driver to remove the four screws on the case.

    • Use the magnetic pad to keep all your parts easily contained!

    • The case will pry easily off with just gentle hand pressure

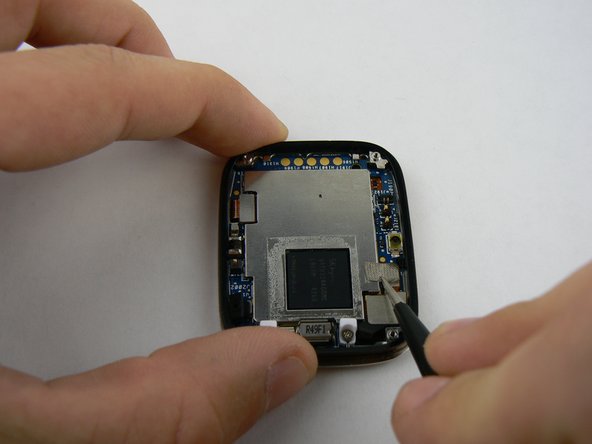
  3. ASUS ZenWatch Vibration motor Replacement: adım 3, 2 resimden 1. ASUS ZenWatch Vibration motor Replacement: adım 3, 2 resimden 2.
    • Using the tweezers, gently remove the fabric protecting the battery connection.

    • Take care when removing the fabric. Too much force may damage the contact with the metal tweezers.

    • Use the heavy duty spudger to gently push the contact towards the top of the case.

  4. ASUS ZenWatch Vibration motor Replacement: adım 4, 3 resimden 1. ASUS ZenWatch Vibration motor Replacement: adım 4, 3 resimden 2. ASUS ZenWatch Vibration motor Replacement: adım 4, 3 resimden 3.
    • Gently pry the battery up with the plastic pry tools

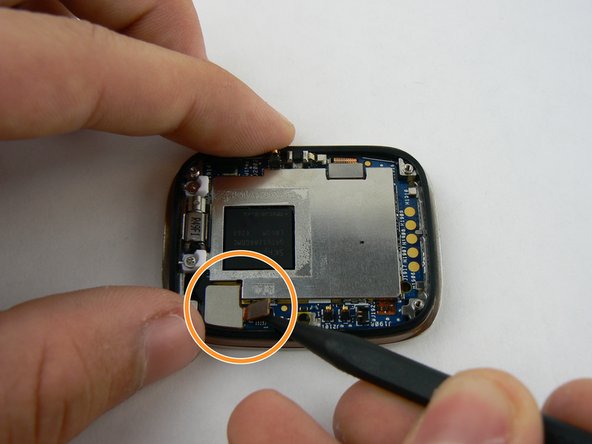
  5. ASUS ZenWatch Vibration motor Replacement, Motherboard: adım 5, 3 resimden 1. ASUS ZenWatch Vibration motor Replacement, Motherboard: adım 5, 3 resimden 2. ASUS ZenWatch Vibration motor Replacement, Motherboard: adım 5, 3 resimden 3.
    • With the metal tweezers gently remove the fabric covering the connection on bottom right

    • Using the heavy duty plastic spudger pry up on the connection ribbon.

    • There are two connection ports on the single ribbon. Do not use too much force as you may tear ribbon!

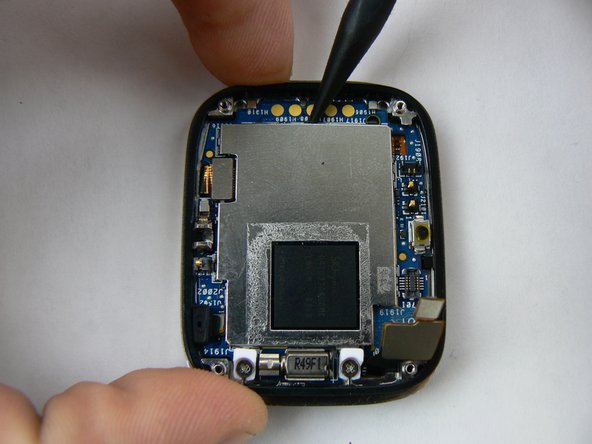
  6. ASUS ZenWatch Vibration motor Replacement: adım 6, 3 resimden 1. ASUS ZenWatch Vibration motor Replacement: adım 6, 3 resimden 2. ASUS ZenWatch Vibration motor Replacement: adım 6, 3 resimden 3.
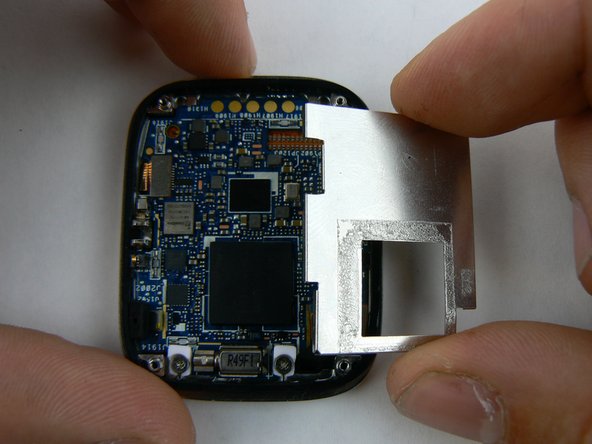
    • The protective plate is now ready to be safely removed.

    • With the heavy duty spudger pry up on the metal plate, in a counter-clockwise pattern

    • There are tiny notches on plate making it simple to pull up on each side.

    • A small strip of adhesive is on back of plate as well.

    • Remove loosened plate and set aside.

  7. ASUS ZenWatch Vibration motor Replacement: adım 7, 3 resimden 1. ASUS ZenWatch Vibration motor Replacement: adım 7, 3 resimden 2. ASUS ZenWatch Vibration motor Replacement: adım 7, 3 resimden 3.
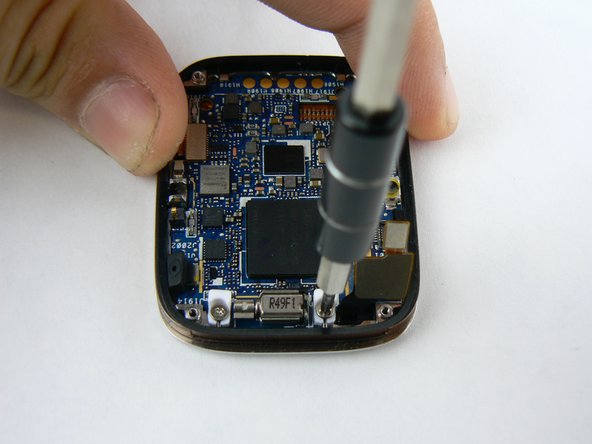
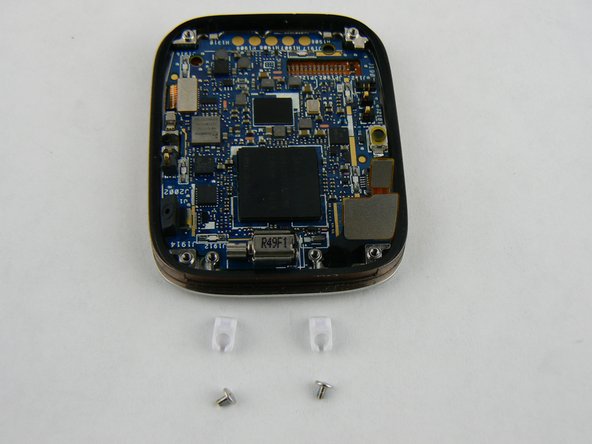
    • With the 000 Philips screwdriver remove the screw and plastic retainer clips

  8. ASUS ZenWatch Vibration motor Replacement: adım 8, 2 resimden 1. ASUS ZenWatch Vibration motor Replacement: adım 8, 2 resimden 2.
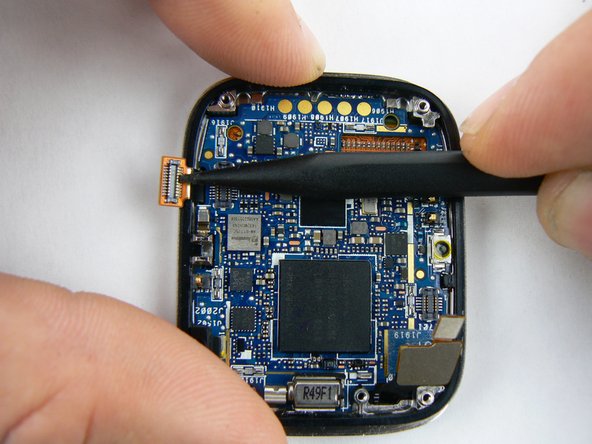
    • With heavy duty spudger lift up on final connection ribbon located on left corner.

  9. ASUS ZenWatch Vibration motor Replacement: adım 9, 2 resimden 1. ASUS ZenWatch Vibration motor Replacement: adım 9, 2 resimden 2.
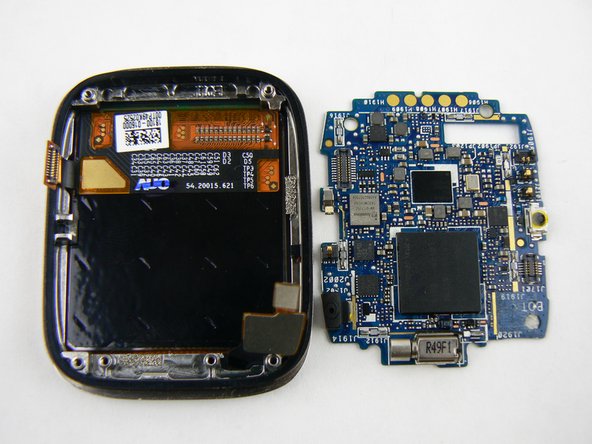
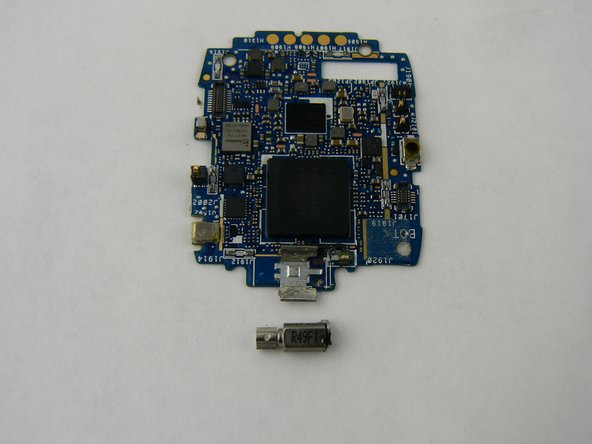
    • With all the connections disconnected the motherboard can be gently pried up and out of the watch case.

  10. ASUS ZenWatch Vibration motor Replacement, Vibration motor: adım 10, 3 resimden 1. ASUS ZenWatch Vibration motor Replacement, Vibration motor: adım 10, 3 resimden 2. ASUS ZenWatch Vibration motor Replacement, Vibration motor: adım 10, 3 resimden 3.
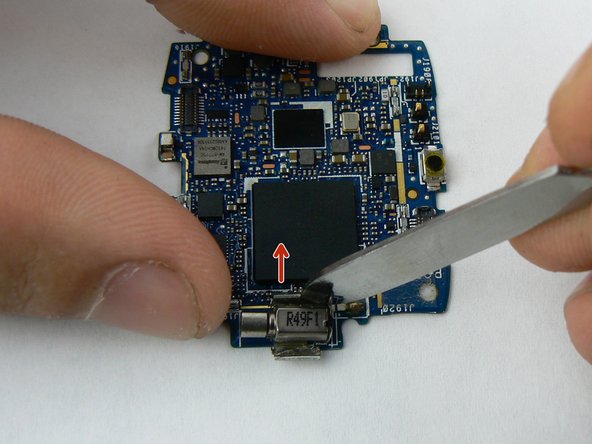
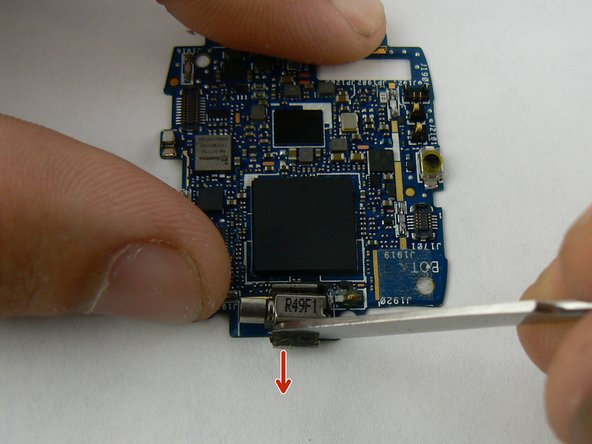
    • With a flat metal spudger pry back the little metal clamps that hold the motor secure.

    • Do not bend these too far as they can easily break off!

  11. ASUS ZenWatch Vibration motor Replacement: adım 11, 3 resimden 1. ASUS ZenWatch Vibration motor Replacement: adım 11, 3 resimden 2. ASUS ZenWatch Vibration motor Replacement: adım 11, 3 resimden 3.
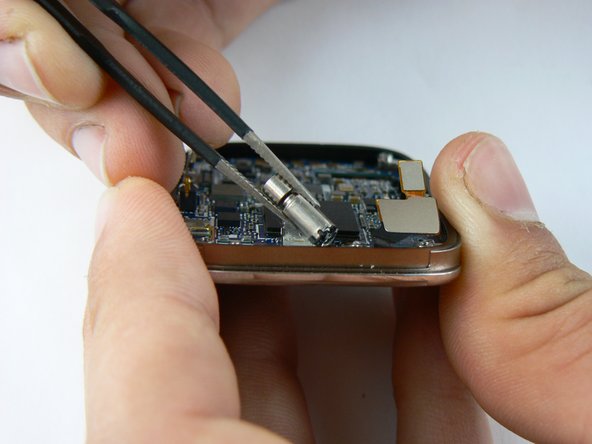
    • With the soldering iron, heat the two solder tabs on back of motor.

    • Use metal tweezers to pull up and remove motor.

    • A soldering iron gets hot! Take care not to burn yourself or place it on any other part of the board.

Sonuç

To reassemble your device, follow these instructions in reverse order.

Bir başkası bu kılavuzu tamamladı.

Wayne McClure

Üyelik tarihi: 02/10/16

961 İtibar

5 adet Kılavuz yazıldı

Ekip

USF Tampa, Team 1-3, Sullivan Spring 2016 USF Tampa, Team 1-3, Sullivan Spring 2016 üyesi

USFT-SULLIVAN-S16S1G3

4 Üyeler

7 adet Kılavuz yazıldı

0 Yorum

Yorum Ekle

İstatistikleri Görüntüle:

Son 24 Saat: 0

Son 7 gün: 3

Son 30 gün: 4

Her zaman: 815