Bu sürüm, hatalı düzenlemeler içerebilir. En son doğrulanmış bellek kopyası dönün.
Neye ihtiyacın var
-
Bu adım çevrilmemiş. Çevrilmesine yardım edin
-
Remove five 9.5 mm Phillips #1 screws from the back panel of the phone.
-
-
Bu adım çevrilmemiş. Çevrilmesine yardım edin
-
Slide the metal spudger into the crack and continue around to the front panel of the phone.
-
-
-
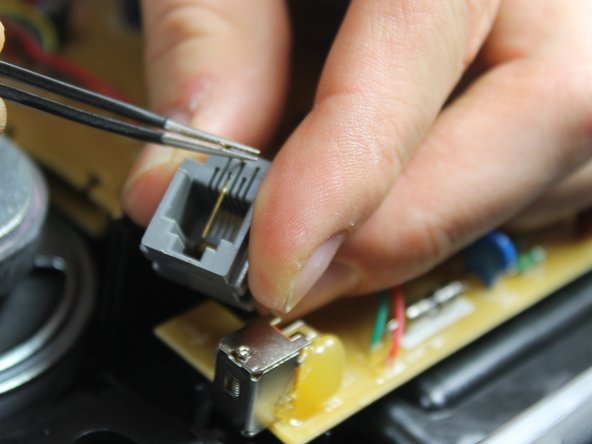
Bu adım çevrilmemiş. Çevrilmesine yardım edin
-
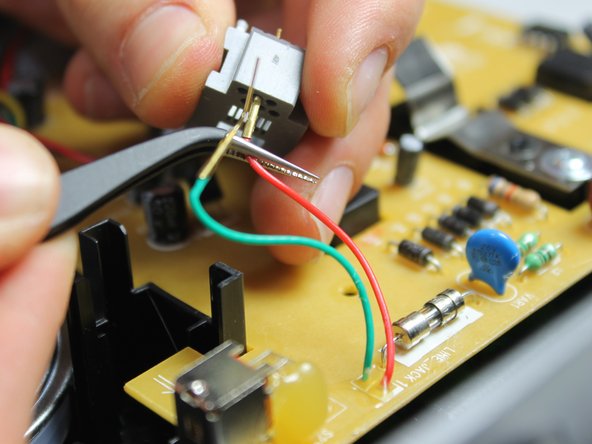
Using the precision tweezers, bend the golden tips of the green and red wires upward.
-
Bend the wires slowly and gently to avoid breaking them.
-
-
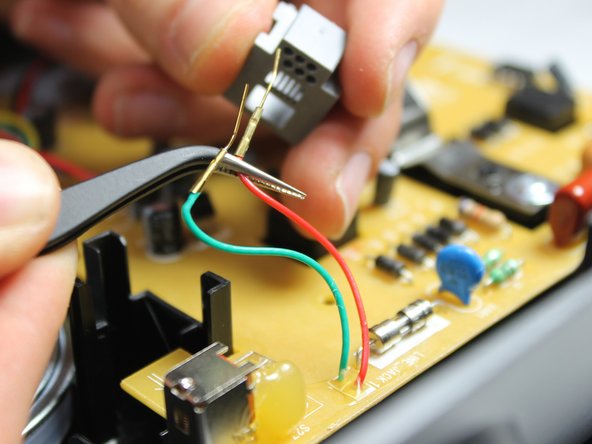
Bu adım çevrilmemiş. Çevrilmesine yardım edin
-
After bending the golden wire tips, pull the wires out from the back side of the phone jack.
-


İptal et: Bu kılavuzu tamamlamadım.
Bir başkası bu kılavuzu tamamladı.
Ekip

IUPUI, Team 1-1, Harley Spring 2016 IUPUI, Team 1-1, Harley Spring 2016 üyesi
IUPUI-HARLEY-S16S1G1
4 Üyeler
13 adet Kılavuz yazıldı