Ana içeriğe geç

Acer Aspire E 11 RAM Replacement

Neye ihtiyacın var

  1. Acer Aspire E 11 RAM Replacement, Lower Case: adım 1, 2 resimden 1. Acer Aspire E 11 RAM Replacement, Lower Case: adım 1, 2 resimden 2.
    • Unscrew the thirteen 6.2mm Phillips #1 screws located on the bottom of the device.

  2. Acer Aspire E 11 RAM Replacement: adım 2, 3 resimden 1. Acer Aspire E 11 RAM Replacement: adım 2, 3 resimden 2. Acer Aspire E 11 RAM Replacement: adım 2, 3 resimden 3.
    • Lift the back panel using a plastic opening tool. Slowly make your way around the device until the back panel comes off.

  3. Acer Aspire E 11 RAM Replacement, Battery: adım 3, 2 resimden 1. Acer Aspire E 11 RAM Replacement, Battery: adım 3, 2 resimden 2.
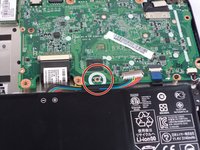
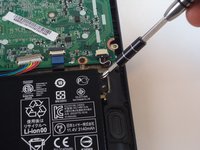
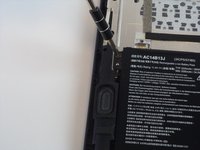
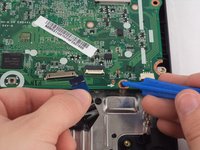
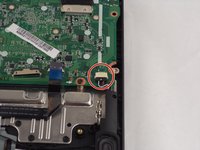
    • Press and hold the small black button located on the motherboard just above the battery for five seconds.

  4. Acer Aspire E 11 RAM Replacement: adım 4, 3 resimden 1. Acer Aspire E 11 RAM Replacement: adım 4, 3 resimden 2. Acer Aspire E 11 RAM Replacement: adım 4, 3 resimden 3.
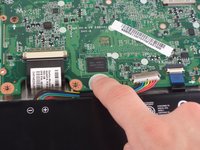
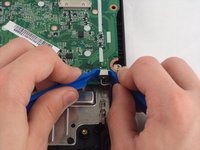
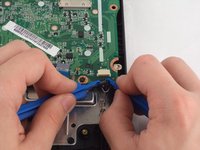
    • Using two plastic opening tools tightly grab the connector going from the battery to the motherboard and pull to unplug.

  5. Acer Aspire E 11 RAM Replacement: adım 5, 3 resimden 1. Acer Aspire E 11 RAM Replacement: adım 5, 3 resimden 2. Acer Aspire E 11 RAM Replacement: adım 5, 3 resimden 3.
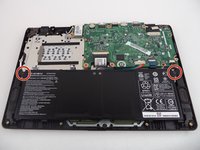
    • Unscrew two 6.2 mm Phillips #1 screws on the right and left sides of the battery.

  6. Acer Aspire E 11 RAM Replacement: adım 6, 1 resimden 1.
    • Carefully remove the battery by lifting it out of the casing.

  7. Acer Aspire E 11 RAM Replacement, Motherboard: adım 7, 3 resimden 1. Acer Aspire E 11 RAM Replacement, Motherboard: adım 7, 3 resimden 2. Acer Aspire E 11 RAM Replacement, Motherboard: adım 7, 3 resimden 3.
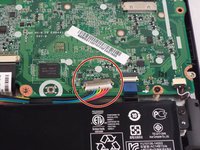
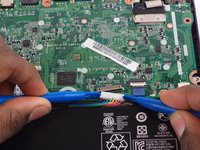
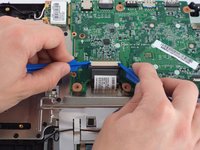
    • Locate the keyboard cable on the motherboard. Using, two plastic opening tools on each side of the connector, pull the two gray tabs outward and then remove the cable from the motherboard.

  8. Acer Aspire E 11 RAM Replacement: adım 8, 3 resimden 1. Acer Aspire E 11 RAM Replacement: adım 8, 3 resimden 2. Acer Aspire E 11 RAM Replacement: adım 8, 3 resimden 3.
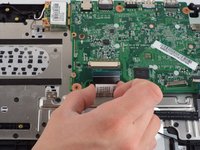
    • Use a plastic opening tool to carefully lift the white hinge up on the touchpad cable connector, and gently remove the cable from the motherboard.

  9. Acer Aspire E 11 RAM Replacement: adım 9, 3 resimden 1. Acer Aspire E 11 RAM Replacement: adım 9, 3 resimden 2. Acer Aspire E 11 RAM Replacement: adım 9, 3 resimden 3.
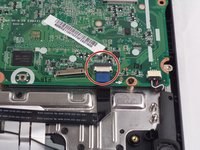
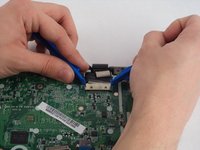
    • Use two plastic opening tools to grip each side of the connector for the speaker cable and gently pull the cable from the motherboard.

  10. Acer Aspire E 11 RAM Replacement: adım 10, 3 resimden 1. Acer Aspire E 11 RAM Replacement: adım 10, 3 resimden 2. Acer Aspire E 11 RAM Replacement: adım 10, 3 resimden 3.
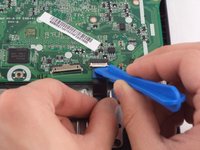
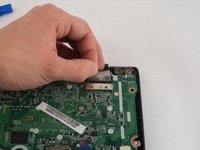
    • Remove the tape on the connector for the display cable.

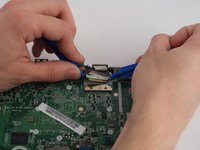
    • Use two plastic opening tools to grip each side of the connector and gently pull the display cable from the motherboard.

  11. Acer Aspire E 11 RAM Replacement: adım 11, 2 resimden 1. Acer Aspire E 11 RAM Replacement: adım 11, 2 resimden 2.
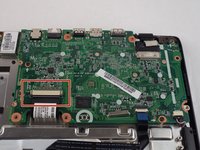
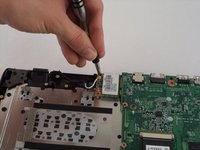
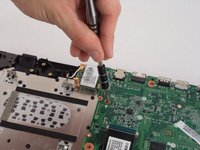
    • Remove one 6.2 mm Phillips #1 screw from the wireless chip on the left side of the motherboard.

  12. Acer Aspire E 11 RAM Replacement: adım 12, 3 resimden 1. Acer Aspire E 11 RAM Replacement: adım 12, 3 resimden 2. Acer Aspire E 11 RAM Replacement: adım 12, 3 resimden 3.
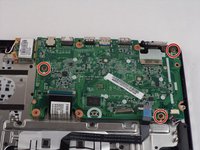
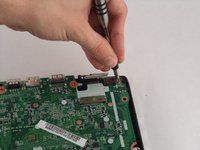
    • Remove three 6.2 mm Phillips #1 screws that attach the motherboard to the laptop casing.

  13. Acer Aspire E 11 RAM Replacement: adım 13, 1 resimden 1.
    • Return to the wireless chip and gently pull it from the connector on the side of the motherboard.

  14. Acer Aspire E 11 RAM Replacement: adım 14, 1 resimden 1.
    • The motherboard can now be lifted out from the laptop casing.

  15. Acer Aspire E 11 RAM Replacement, RAM: adım 15, 3 resimden 1. Acer Aspire E 11 RAM Replacement, RAM: adım 15, 3 resimden 2. Acer Aspire E 11 RAM Replacement, RAM: adım 15, 3 resimden 3.
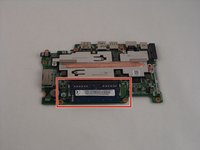
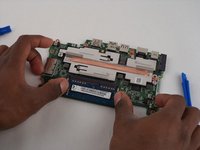
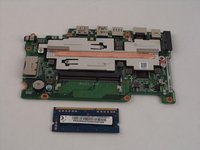
    • Once the motherboard has been removed from the device, flip the motherboard over to reveal the RAM chip.

    • Using your thumbs slide RAM card down and out of its slot.

Sonuç

To reassemble your device, follow these instructions in reverse order.

2 farklı kişi bu kılavuzu tamamladı.

Robert Cobaich

Üyelik tarihi: 09/03/15

2.073 İtibar

3 adet Kılavuz yazıldı

Ekip

USF Tampa, Team 16-1, Blackwell Winter 2016 USF Tampa, Team 16-1, Blackwell Winter 2016 üyesi

USFT-BLACKWELL-W16S16G1

4 Üyeler

11 adet Kılavuz yazıldı

0 Yorum

Yorum Ekle

İstatistikleri Görüntüle:

Son 24 Saat: 0

Son 7 gün: 9

Son 30 gün: 17

Her zaman: 3,043