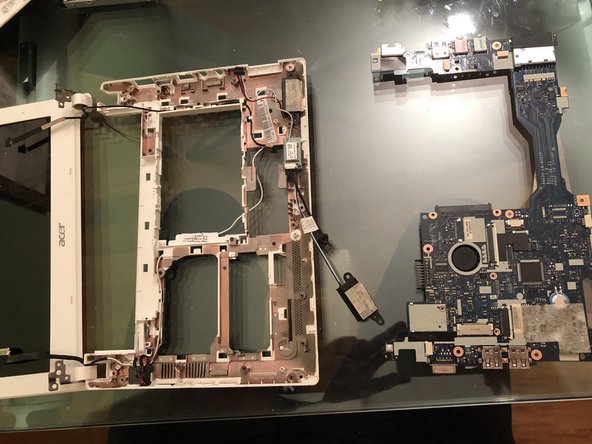
Ana içeriğe geç

Acer Aspire One Happy Dissasembly

  1. Acer Aspire One Happy Dissasembly, Acer Aspire One Happy Dissasembly: adım 1, 3 resimden 1. Acer Aspire One Happy Dissasembly, Acer Aspire One Happy Dissasembly: adım 1, 3 resimden 2. Acer Aspire One Happy Dissasembly, Acer Aspire One Happy Dissasembly: adım 1, 3 resimden 3.
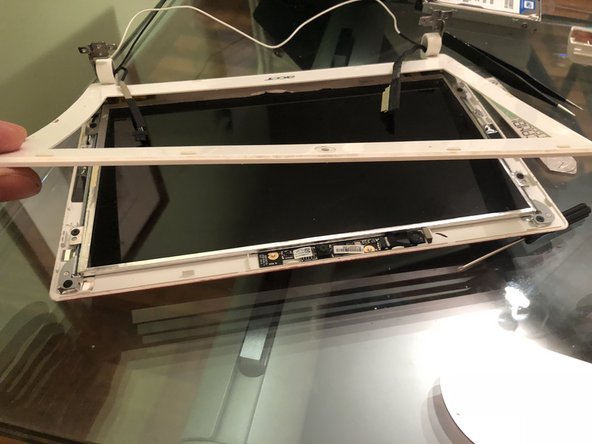
    • Remove the keyboard by using a lever-like motion with thin tools on the joints along the keyboard.

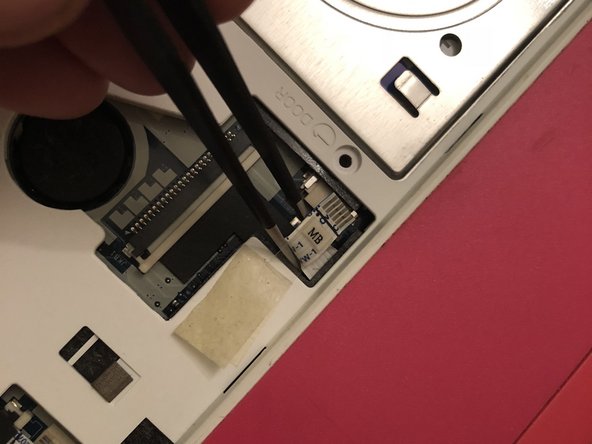
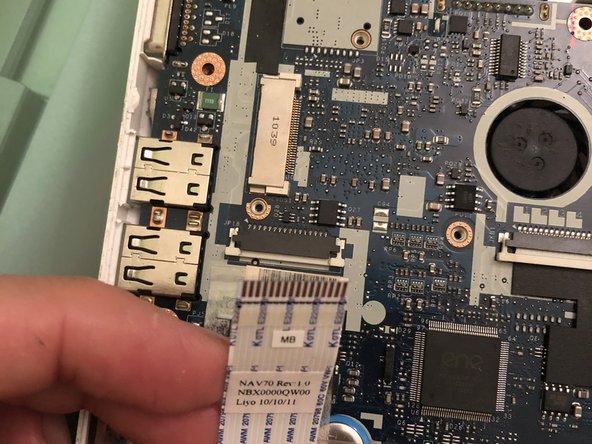
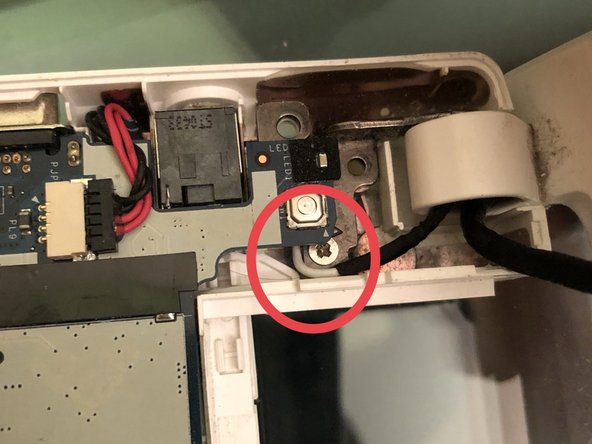
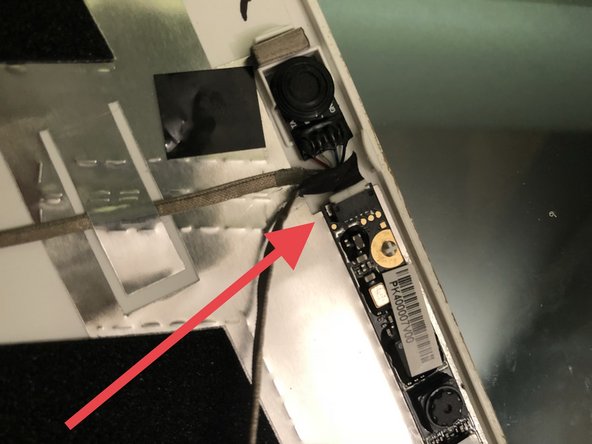
    • Carefully lift and disconnect the flat cable from the motherboard

  2. Acer Aspire One Happy Dissasembly: adım 2, 1 resimden 1.
    • Disconnect the battery

  3. Acer Aspire One Happy Dissasembly: adım 3, 2 resimden 1. Acer Aspire One Happy Dissasembly: adım 3, 2 resimden 2.
    • Unclip and disconnect the connector to remove the keyboard

  4. Acer Aspire One Happy Dissasembly: adım 4, 3 resimden 1. Acer Aspire One Happy Dissasembly: adım 4, 3 resimden 2. Acer Aspire One Happy Dissasembly: adım 4, 3 resimden 3.
    • Remove the eight screws that secure the lower shell.

    • We recommend the use of a flat tool to help you out.

    • Now it's possible to remove the lower shell

  5. Acer Aspire One Happy Dissasembly: adım 5, 3 resimden 1. Acer Aspire One Happy Dissasembly: adım 5, 3 resimden 2. Acer Aspire One Happy Dissasembly: adım 5, 3 resimden 3.
    • Remove the screw that hold the hard drive in place

    • Disconnect the flat cable

    • Using a thin tool, unclip the hooks that hold the upper shell to the middle shell by separating them.

  6. Acer Aspire One Happy Dissasembly: adım 6, 2 resimden 1. Acer Aspire One Happy Dissasembly: adım 6, 2 resimden 2.
    • Seperate the top case shell

    • Remove the hard drive

  7. Acer Aspire One Happy Dissasembly: adım 7, 3 resimden 1. Acer Aspire One Happy Dissasembly: adım 7, 3 resimden 2. Acer Aspire One Happy Dissasembly: adım 7, 3 resimden 3.
    • Disconnect the WiFi card

    • Disconnect the display cable

  8. Acer Aspire One Happy Dissasembly: adım 8, 3 resimden 1. Acer Aspire One Happy Dissasembly: adım 8, 3 resimden 2. Acer Aspire One Happy Dissasembly: adım 8, 3 resimden 3.
    • Unclip the connectors

    • Remove the 3 screws securing the card in place. Remove the card after it is free

  9. Acer Aspire One Happy Dissasembly: adım 9, 3 resimden 1. Acer Aspire One Happy Dissasembly: adım 9, 3 resimden 2. Acer Aspire One Happy Dissasembly: adım 9, 3 resimden 3.
    • Remove the speaker

    • Release the connectors

    • Remove the 2 screws that secure the motherboard to the laptop

  10. Acer Aspire One Happy Dissasembly: adım 10, 2 resimden 1. Acer Aspire One Happy Dissasembly: adım 10, 2 resimden 2.
    • Release the connectors

    • Carefully remove the motherboard from the laptop

  11. Acer Aspire One Happy Dissasembly: adım 11, 3 resimden 1. Acer Aspire One Happy Dissasembly: adım 11, 3 resimden 2. Acer Aspire One Happy Dissasembly: adım 11, 3 resimden 3.
    • Remove both of the left and right screws holding the display assembly to the laptop

  12. Acer Aspire One Happy Dissasembly: adım 12, 3 resimden 1. Acer Aspire One Happy Dissasembly: adım 12, 3 resimden 2. Acer Aspire One Happy Dissasembly: adım 12, 3 resimden 3.
    • Remove the adhesive that covers the 2 screws.

    • With an opening pick or Jimmy, seperate the bezel from the LCD assembly.

    • Remove the bezel

  13. Acer Aspire One Happy Dissasembly: adım 13, 3 resimden 1. Acer Aspire One Happy Dissasembly: adım 13, 3 resimden 2. Acer Aspire One Happy Dissasembly: adım 13, 3 resimden 3.
    • Remove the 4 screws on the display

    • Disconnect the display cable

    • Remove the LCD

Sonuç

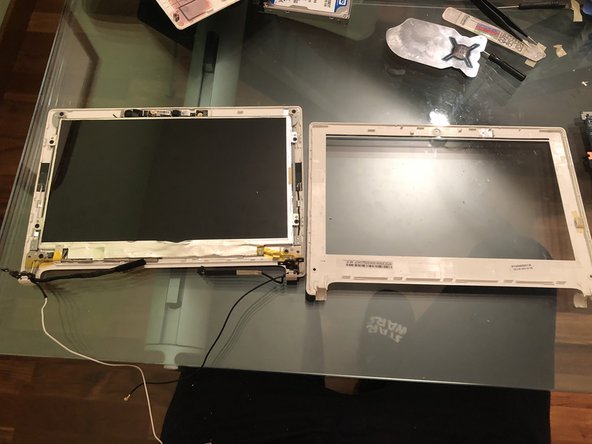
To reassemble your device, follow these steps in reverse order.

2 farklı kişi bu kılavuzu tamamladı.

Bu çevirmenlere özel teşekkürler:

it en

100%

Bu çevirmenler dünyayı onarmamıza yardım ediyor! Katkıda bulunmak ister misiniz?
Çeviriye Başlayın ›

Smilzo

Üyelik tarihi: 11/09/13

11.267 İtibar

39 adet Kılavuz yazıldı

0 Yorum

Yorum Ekle

İstatistikleri Görüntüle:

Son 24 Saat: 3

Son 7 gün: 32

Son 30 gün: 131

Her zaman: 6,117