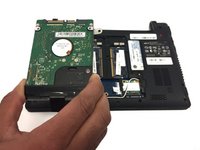
Ana içeriğe geç

Acer Aspire TimelineX 1830T-68U118 Hard Drive Replacement

Neye ihtiyacın var

  1. Acer Aspire TimelineX 1830T-68U118 Hard Drive Replacement, Hard Drive: adım 1, 3 resimden 1. Acer Aspire TimelineX 1830T-68U118 Hard Drive Replacement, Hard Drive: adım 1, 3 resimden 2. Acer Aspire TimelineX 1830T-68U118 Hard Drive Replacement, Hard Drive: adım 1, 3 resimden 3.
    • Remove the device's battery before beginning.

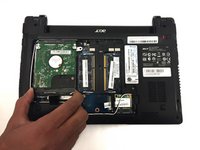
    • Turn laptop so under side is facing up.

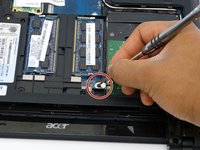
    • Locate the hard drive door and unscrew the 5 screws using PH0 mm Phillips Head.

  2. Acer Aspire TimelineX 1830T-68U118 Hard Drive Replacement: adım 2, 1 resimden 1.
    • Pry open hard drive cover using the Spudger tool.

  3. Acer Aspire TimelineX 1830T-68U118 Hard Drive Replacement: adım 3, 3 resimden 1. Acer Aspire TimelineX 1830T-68U118 Hard Drive Replacement: adım 3, 3 resimden 2. Acer Aspire TimelineX 1830T-68U118 Hard Drive Replacement: adım 3, 3 resimden 3.
    • Remove screw attached to the hard drive using the PH0 mm Phillips Head.

    • The hard drive can now be removed from the device.

Sonuç

To reassemble your device, follow these instructions in reverse order.

Brenna Waterbury

Üyelik tarihi: 09/19/17

523 İtibar

5 adet Kılavuz yazıldı

0 Yorum

Yorum Ekle

İstatistikleri Görüntüle:

Son 24 Saat: 0

Son 7 gün: 1

Son 30 gün: 3

Her zaman: 813