Bu sürüm, hatalı düzenlemeler içerebilir. En son doğrulanmış bellek kopyası dönün.
Neye ihtiyacın var
-
Bu adım çevrilmemiş. Çevrilmesine yardım edin
-
Use a Phillips head screw driver to remove the 13 screws in these locations.
-
-
Bu adım çevrilmemiş. Çevrilmesine yardım edin
-
Use a plastic spudger to pry up the bottom cover and remove it.
-
-
Bu adım çevrilmemiş. Çevrilmesine yardım edin
-
Use two fingers to unplug the battery-to-motherboard connection.
-
-
-
Bu adım çevrilmemiş. Çevrilmesine yardım edin
-
Take out battery by lifting it up in the manner pictured.
-
-
Bu adım çevrilmemiş. Çevrilmesine yardım edin
-
Unscrew screw holding SSD card in place.
-
Slide out the SSD card towards you to remove it.
-
-
Bu adım çevrilmemiş. Çevrilmesine yardım edin
-
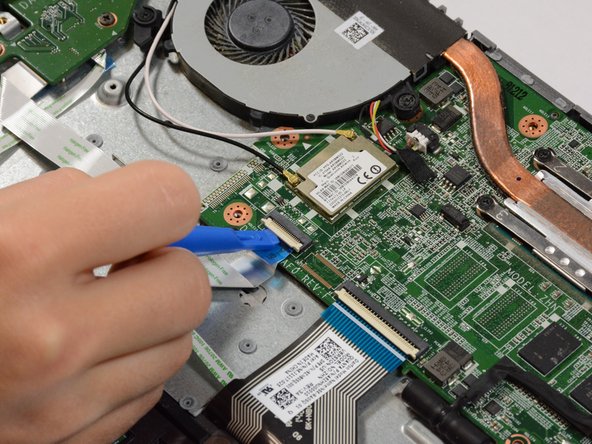
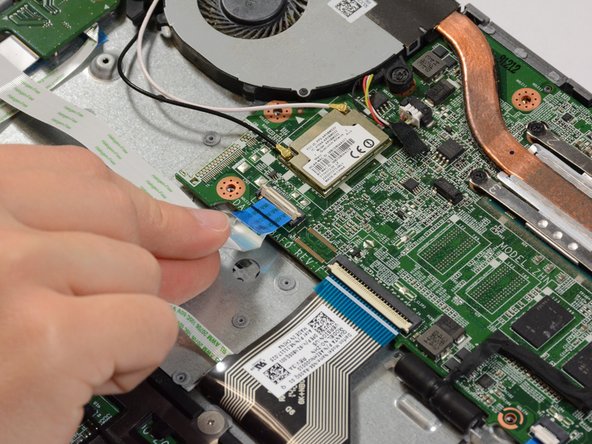
Remove the three ribbon cables connected to the bottom of the motherboard.
-
Use the plastic spudger to lift the white hinges from on top of the ribbon cables.
-
Then gently pull the cables out.
-
-
Bu adım çevrilmemiş. Çevrilmesine yardım edin
-
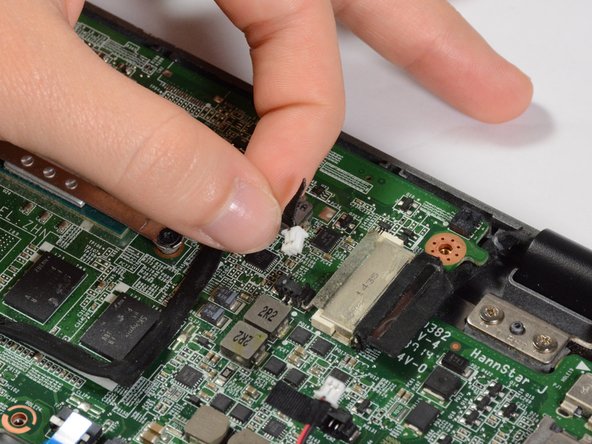
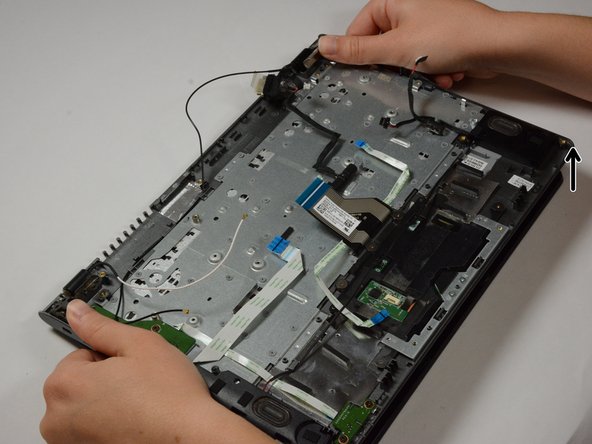
Remove 4 connectors from the right side of the motherboard.
-
All of these connectors release by simply pulling back.
-
-
Bu adım çevrilmemiş. Çevrilmesine yardım edin
-
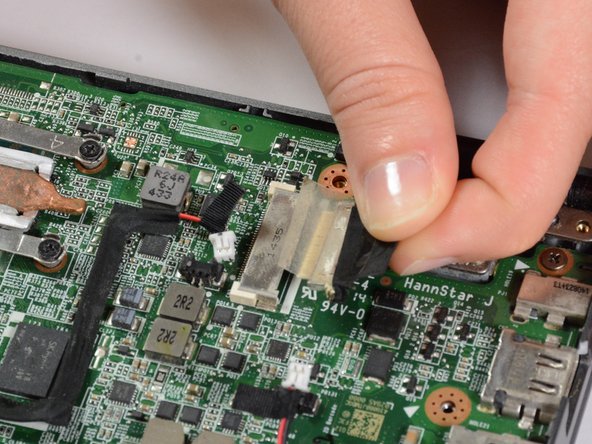
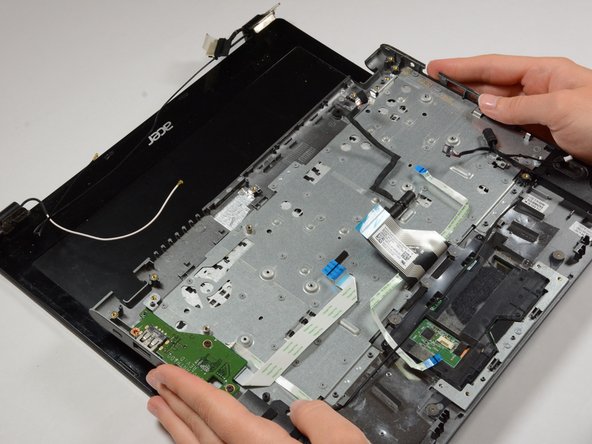
On the left side of the motherboard, remove one more connector and two cables.
-
To remove the cables, lift them up with a plastic spudger.
-
-
Bu adım çevrilmemiş. Çevrilmesine yardım edin
-
Remove the 2 fan screws and the 4 heat sink screws.
-
The screws don't necessarily need to be removed from the component, but rather just loosened enough to remove the component from the motherboard.
-
Now remove the fan/heat sink component.
-
-
Bu adım çevrilmemiş. Çevrilmesine yardım edin
-
Remove the 2 motherboard screws.
-
Now you can remove the motherboard.
-
-
Bu adım çevrilmemiş. Çevrilmesine yardım edin
-
Remove the 4 keyboard screws.
-
Lastly, remove the keyboard. To do this, slightly hinge open the laptop and pull back.
-


İptal et: Bu kılavuzu tamamlamadım.
3 farklı kişi bu kılavuzu tamamladı.

Ekip

Baylor, Team S3-G1, Williams Spring 2018 Baylor, Team S3-G1, Williams Spring 2018 üyesi
BU-WILLIAMS-S18S3G1
4 Üyeler
4 adet Kılavuz yazıldı
2 Yorum
! ATTENTION ! Comme l’a dit avarno il y a quelques mois, le tutoriel ne propose QUE DE REMPLACER LE BLOC CLAVIER + PAVÉ TACTILE. Sur Ifixit on peut aussi acheter le clavier seul (ce que j’ai fait). On se retrouve bloqué à l’étape 12. J’ai posté une solution en commentaire de l’étape 12 (peut être pas très conventionnelle, à vos risques et périls !)