Bu sürüm, hatalı düzenlemeler içerebilir. En son doğrulanmış bellek kopyası dönün.
Neye ihtiyacın var
-
Bu adım çevrilmemiş. Çevrilmesine yardım edin
-
Power down the Chromebook and disconnect the power adapter.
-
-
Bu adım çevrilmemiş. Çevrilmesine yardım edin
-
Place the chromebook bottom side up on a flat surface.
-
Remove the thirteen 7 mm screws with a Phillips #0 screwdriver.
-
-
Bu adım çevrilmemiş. Çevrilmesine yardım edin
-
Insert the plastic opening tool into the slit near the hinges and pry upwards to lift the back panel.
-
-
Bu adım çevrilmemiş. Çevrilmesine yardım edin
-
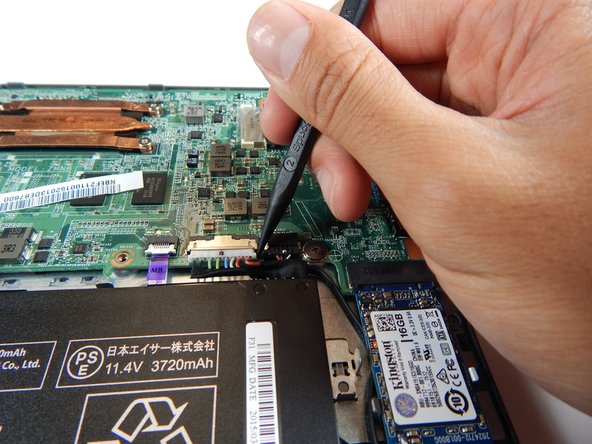
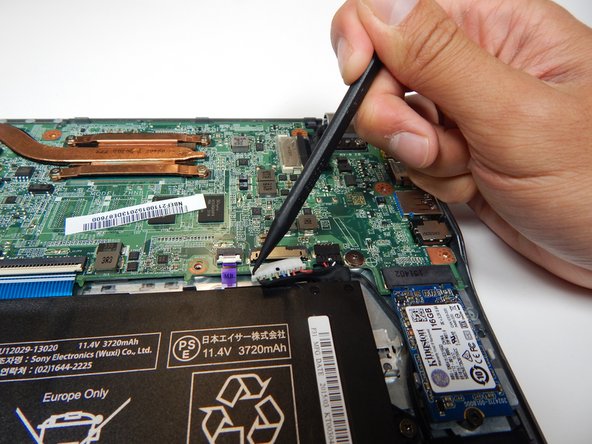
Unplug the white 8-wire battery connector from the motherboard by using a spudger to push the two L-shaped indentations towards the battery.
-
-
Bu adım çevrilmemiş. Çevrilmesine yardım edin
-
Remove the the two 3.7 mm screws with a Phillips #0 screwdriver.
-
-
-
Bu adım çevrilmemiş. Çevrilmesine yardım edin
-
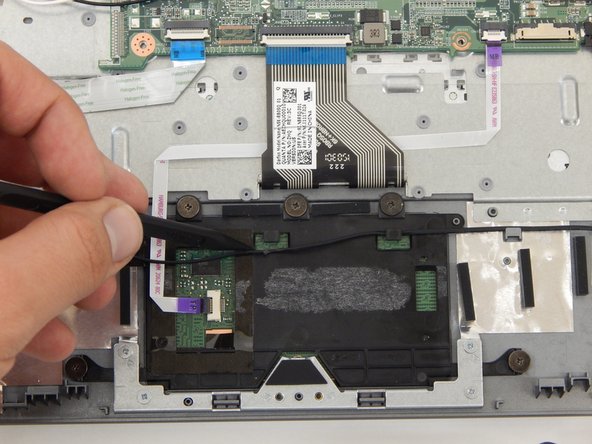
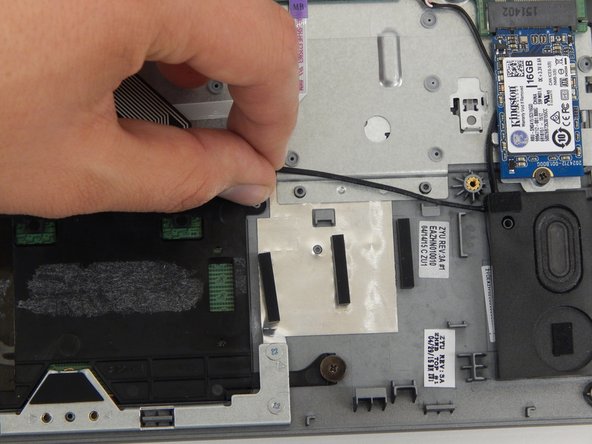
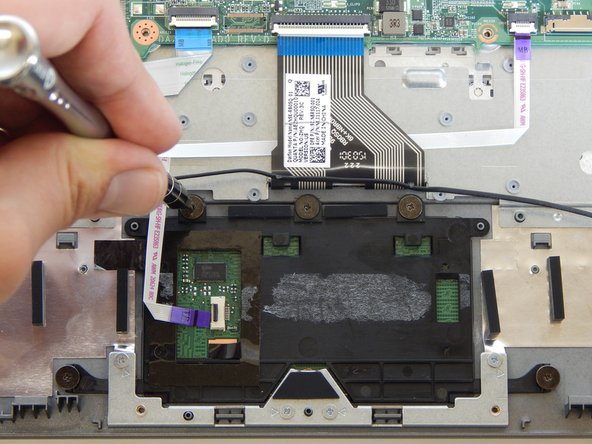
Pull the black wire out from under the the black center clips and up from the gray outer clips with a spudger.
-
-
Bu adım çevrilmemiş. Çevrilmesine yardım edin
-
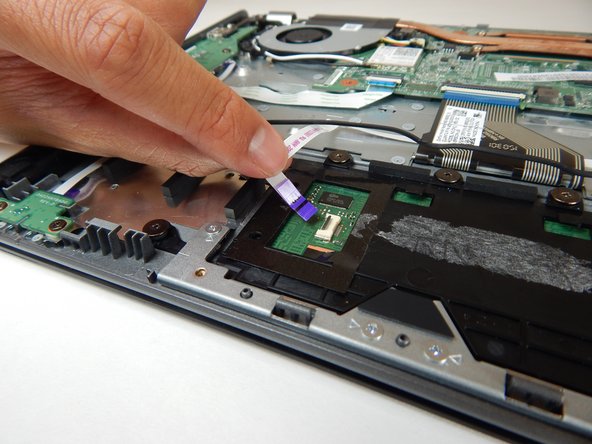
Use a spudger to lift the black clip on the small purple ribbon cable connector to the left of the touchpad.
-
Pull the ribbon cable out from the connector.
-
-
Bu adım çevrilmemiş. Çevrilmesine yardım edin
-
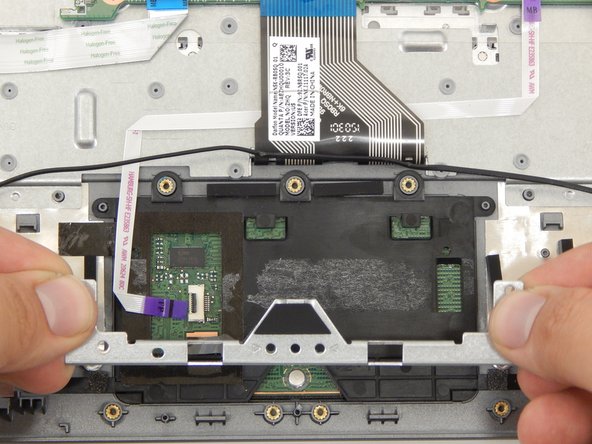
Remove the five 2.5 mm screws with a Phillips #0 screwdriver.
-
-
Bu adım çevrilmemiş. Çevrilmesine yardım edin
-
Remove the four 2.8 mm screws with a Phillips #00 screwdriver.
-
-
Bu adım çevrilmemiş. Çevrilmesine yardım edin
-
Remove the black tape on the left side of the touchpad.
-
-
Bu adım çevrilmemiş. Çevrilmesine yardım edin
-
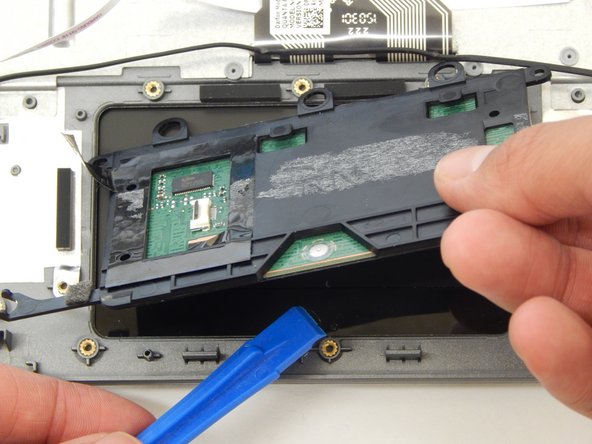
Lift off the black plastic cover with the plastic opening tool.
-
İptal et: Bu kılavuzu tamamlamadım.
6 farklı kişi bu kılavuzu tamamladı.


