Ana içeriğe geç

Acer Iconia A110 Front Facing Camera Replacement

Neye ihtiyacın var

  1. Acer Iconia A110 Front Facing Camera Replacement, Battery: adım 1, 2 resimden 1. Acer Iconia A110 Front Facing Camera Replacement, Battery: adım 1, 2 resimden 2.
    • Before taking apart your tablet, make sure the device is powered off.

    • Pry open the right side of case with the plastic opening tool. If necessary, keep a tool lodged into the side to keep the case from closing.

    • During this process, the volume button and/or power button may fall out.

  2. Acer Iconia A110 Front Facing Camera Replacement: adım 2, 3 resimden 1. Acer Iconia A110 Front Facing Camera Replacement: adım 2, 3 resimden 2. Acer Iconia A110 Front Facing Camera Replacement: adım 2, 3 resimden 3.
    • Pry open the left side of the case with a plastic opening tool. The backside of the tablet should now separate completely from the front.

  3. Acer Iconia A110 Front Facing Camera Replacement: adım 3, 3 resimden 1. Acer Iconia A110 Front Facing Camera Replacement: adım 3, 3 resimden 2. Acer Iconia A110 Front Facing Camera Replacement: adım 3, 3 resimden 3.
    • Using the plastic opening tool and spudger, carefully pry up the battery from the case.

    • You should hear the adhesive ripping as you do this.

    • Once the battery is no longer adhered to the case, detach the dongle that connects the battery to the motherboard.

  4. Acer Iconia A110 Front Facing Camera Replacement, Speaker: adım 4, 2 resimden 1. Acer Iconia A110 Front Facing Camera Replacement, Speaker: adım 4, 2 resimden 2.
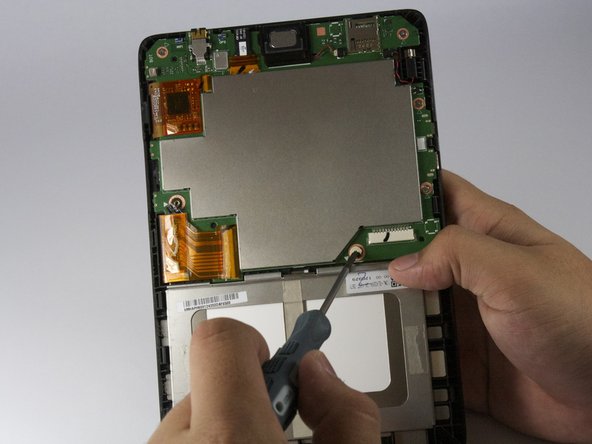
    • With the Phillips #00 screwdriver, remove the following screws securing the motherboard to the back panel:

    • Two 2.0 mm screws (with the bigger head)

    • Four 2.5 mm screws (with the smaller head)

  5. Acer Iconia A110 Front Facing Camera Replacement: adım 5, 2 resimden 1. Acer Iconia A110 Front Facing Camera Replacement: adım 5, 2 resimden 2.
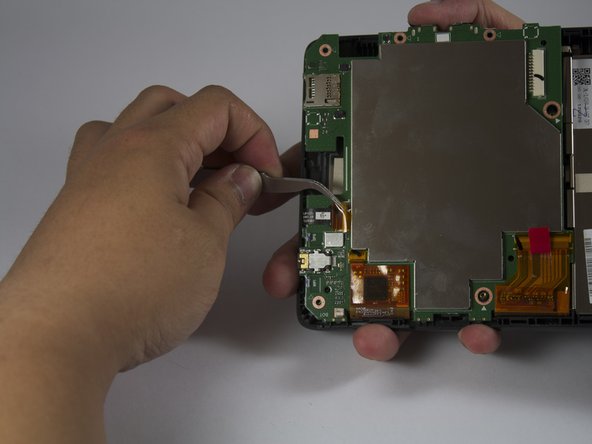
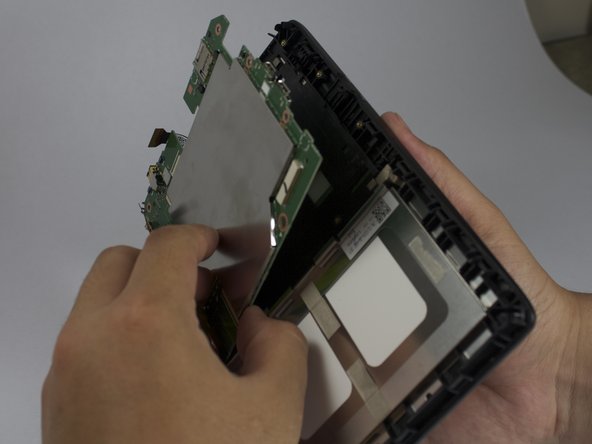
    • On the top right side of the motherboard, is the vibration motor. With tweezers, carefully pull the vibration motor out from underneath the motherboard.

    • The vibration motor is still connected to the motherboard by a small wire connection, so be careful not to rip the wire out.

    • With your fingers, carefully disconnect the cable securing the vibration motor to the motherboard. Set aside.

  6. Acer Iconia A110 Front Facing Camera Replacement: adım 6, 2 resimden 1. Acer Iconia A110 Front Facing Camera Replacement: adım 6, 2 resimden 2.
    • The speaker located on the top of the motherboard should easily slide out. Take note that there is still a wire connected, so do so carefully.

    • With your fingers, slowly pull out the wire connecting the speaker to the motherboard.

  7. Acer Iconia A110 Front Facing Camera Replacement, Motherboard: adım 7, 3 resimden 1. Acer Iconia A110 Front Facing Camera Replacement, Motherboard: adım 7, 3 resimden 2. Acer Iconia A110 Front Facing Camera Replacement, Motherboard: adım 7, 3 resimden 3.
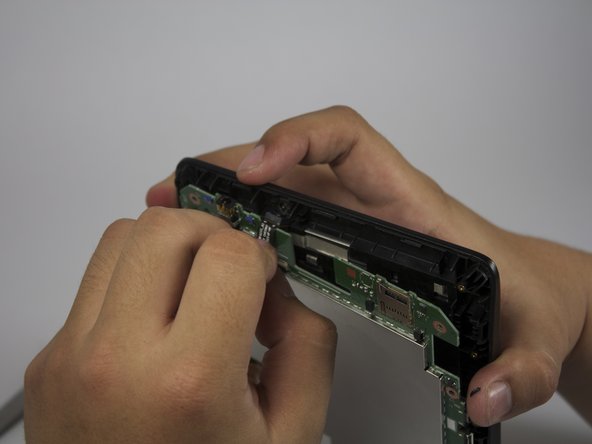
    • The next step is to pull out the ribbon cables connected to the motherboard.

    • Each ribbon cable has a sticker covering it; peel it off with tweezers.

    • Use tweezers to pull out the ribbon cable.

    • Make sure to pull the ribbon cable horizontally, not vertically to avoid tearing the ribbon

  8. Acer Iconia A110 Front Facing Camera Replacement: adım 8, 3 resimden 1. Acer Iconia A110 Front Facing Camera Replacement: adım 8, 3 resimden 2. Acer Iconia A110 Front Facing Camera Replacement: adım 8, 3 resimden 3.
    • After all ribbon cables are disconnected,move them out of the way, and the motherboard should fall out easily.

  9. Acer Iconia A110 Front Facing Camera Replacement, Front Facing Camera: adım 9, 3 resimden 1. Acer Iconia A110 Front Facing Camera Replacement, Front Facing Camera: adım 9, 3 resimden 2. Acer Iconia A110 Front Facing Camera Replacement, Front Facing Camera: adım 9, 3 resimden 3.
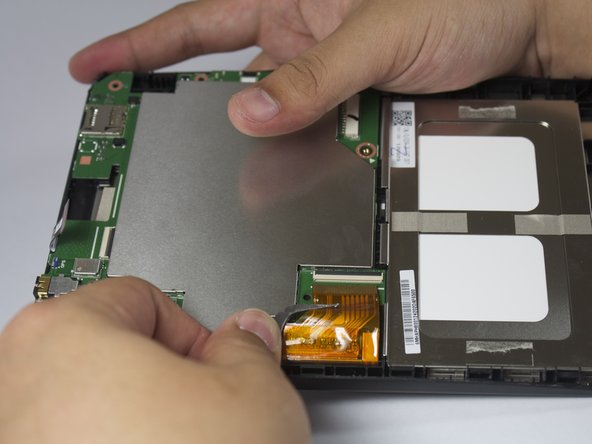
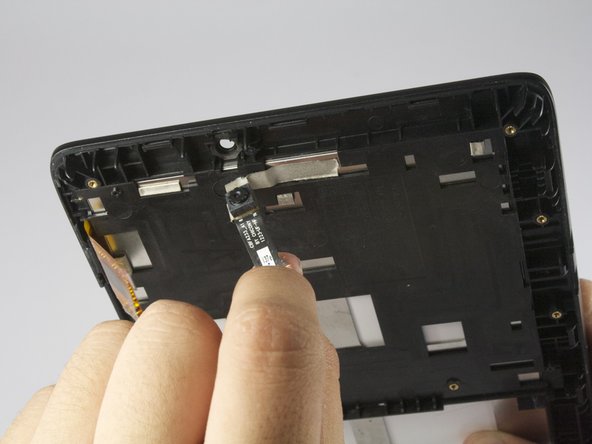
    • Carefully gripping the top of the camera connection cord, slowly pull down to remove the sticky tape from the tablet.

Sonuç

To reassemble your device, follow these instructions in reverse order.

3 farklı kişi bu kılavuzu tamamladı.

Andrea

Üyelik tarihi: 04/14/14

757 İtibar

5 adet Kılavuz yazıldı

Ekip

Cal Poly, Team 3-42, Maness Spring 2014 Cal Poly, Team 3-42, Maness Spring 2014 üyesi

CPSU-MANESS-S14S3G42

4 Üyeler

5 adet Kılavuz yazıldı

0 Yorum

Yorum Ekle

İstatistikleri Görüntüle:

Son 24 Saat: 0

Son 7 gün: 0

Son 30 gün: 1

Her zaman: 943