Ana içeriğe geç
Onarım Topluluğuna Katılın - Hesap Oluşturun

Acer Iconia W3-810 Screen Replacement

Neye ihtiyacın var

    1. Acer Iconia W3-810  Screen Replacement, Back Panel: adım 1, 1 resimden 1.
      • Place the tablet face down on a flat surface with the charger facing toward you.

      FixBot'a Sor

      Yorum Ekle

    2. Acer Iconia W3-810  Screen Replacement: adım 2, 1 resimden 1.
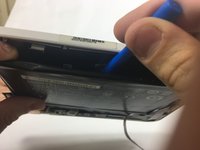
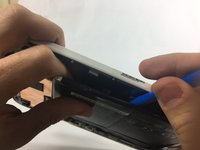
      • Use a plastic opening tool to pry the back panel off of the device.

      • Be careful to not use the plastic opening tool near the charging dock or any media ports.

      FixBot'a Sor

      Yorum Ekle

    1. Acer Iconia W3-810  Screen Replacement, Battery: adım 3, 1 resimden 1.
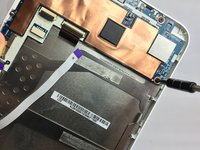
      • Pull the ribbon cord by pushing the clamp on the port toward you with the plastic opening tool.

      FixBot'a Sor

      Yorum Ekle

    2. Acer Iconia W3-810  Screen Replacement: adım 4, 1 resimden 1.
      • Move the ribbon cord in order to disconnect the rainbow cord from the battery.

      • Take extra care to not rip the ribbon cord.

      FixBot'a Sor

      Yorum Ekle

    3. Acer Iconia W3-810  Screen Replacement: adım 5, 1 resimden 1.
      • Use the plastic opening tool to carefully slide the power cord from its slot by pushing it out from both sides, then remove the cord from its port with your hand.

      FixBot'a Sor

      Yorum Ekle

    4. Acer Iconia W3-810  Screen Replacement: adım 6, 1 resimden 1.
      • Pull on the ribbon cord carefully in order to break the seal between the ribbon cord and the battery. Do this until the cord is completely free of the battery.

      • Do not pull the ribbon cord too hard or near the opposite end.

      FixBot'a Sor

      Yorum Ekle

    5. Acer Iconia W3-810  Screen Replacement: adım 7, 1 resimden 1.
      • Use the plastic opening tool to gently wedge out and lift the battery pack from the device.

      FixBot'a Sor

      Yorum Ekle

    6. Acer Iconia W3-810  Screen Replacement: adım 8, 2 resimden 1. Acer Iconia W3-810  Screen Replacement: adım 8, 2 resimden 2.
      • Carefully break the bond between the inner tape and the battery using the plastic opening tool. The tape can be found in the middle and either side of the battery.

      FixBot'a Sor

      Yorum Ekle

    7. Acer Iconia W3-810  Screen Replacement: adım 9, 1 resimden 1.
      • Remove battery pack

      FixBot'a Sor

      Yorum Ekle

    1. Acer Iconia W3-810  Screen Replacement, Screen: adım 10, 1 resimden 1.
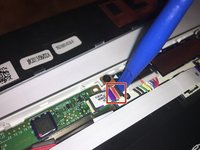
      • Disconnect the speaker cord from the motherboard by carefully prying it out with a plastic opening tool.

      FixBot'a Sor

      Yorum Ekle

    2. Acer Iconia W3-810  Screen Replacement: adım 11, 1 resimden 1.
      • Loosen the retaining flap using a plastic opening tool, and then pull the ribbon cord from its slot.

      FixBot'a Sor

      Yorum Ekle

    3. Acer Iconia W3-810  Screen Replacement: adım 12, 2 resimden 1. Acer Iconia W3-810  Screen Replacement: adım 12, 2 resimden 2.
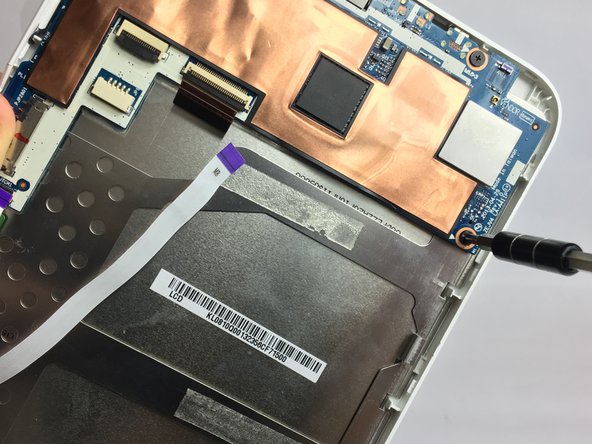
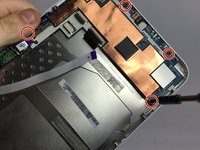
      • Unscrew the 3mm phillips head screws along the motherboard using a HH0 screwdriver.

      FixBot'a Sor

      Yorum Ekle

    4. Acer Iconia W3-810  Screen Replacement: adım 13, 2 resimden 1. Acer Iconia W3-810  Screen Replacement: adım 13, 2 resimden 2.
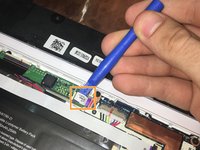
      • Lift the retaining flap of the ribbon cord connecting the screen circuit board to the motherboard using a plastic opening tool.

      • Then, remove the ribbon cord from its slot using a plastic opening tool.

      FixBot'a Sor

      Yorum Ekle

    5. Acer Iconia W3-810  Screen Replacement: adım 14, 1 resimden 1.
      • Unscrew the 3mm phillips head screws from beneath the screen circuit board using the same HHO screwdriver.

      FixBot'a Sor

      Yorum Ekle

    6. Acer Iconia W3-810  Screen Replacement: adım 15, 1 resimden 1.
      • Unscrew the 3mm phillips head screws connecting speaker and home button circuit board from main frame using the HHO screwdriver.

      FixBot'a Sor

      Yorum Ekle

    7. Acer Iconia W3-810  Screen Replacement: adım 16, 1 resimden 1.
      • Pull ribbon cord from designated slots on screen circuit board.

      FixBot'a Sor

      Yorum Ekle

    8. Acer Iconia W3-810  Screen Replacement: adım 17, 1 resimden 1.
      • Unscrew left speaker from frame by moving the ribbon cord out of the way to access the 3mm phillips head screws.

      FixBot'a Sor

      Yorum Ekle

    9. Acer Iconia W3-810  Screen Replacement: adım 18, 1 resimden 1.
      • Loosen speaker cord from main back frame by breaking the tape seal using a spudger.

      FixBot'a Sor

      Yorum Ekle

    10. Acer Iconia W3-810  Screen Replacement: adım 19, 1 resimden 1.
      • Loosen the main back metal frame from the front casing using a plastic opening tool.

      FixBot'a Sor

      Yorum Ekle

    11. Acer Iconia W3-810  Screen Replacement: adım 20, 1 resimden 1.
      • Loosen metal tape from the front panel using a spudger.

      FixBot'a Sor

      Yorum Ekle

    12. Acer Iconia W3-810  Screen Replacement: adım 21, 1 resimden 1.
      • detach metal tape from the back of the screen using a spudger.

      FixBot'a Sor

      Yorum Ekle

    13. Acer Iconia W3-810  Screen Replacement: adım 22, 1 resimden 1.
      • Remove the screen from the front casing.

      FixBot'a Sor

      Yorum Ekle

Sonuç

To reassemble your device, follow these instructions in reverse order.

İptal et: Bu kılavuzu tamamlamadım.

3 farklı kişi bu kılavuzu tamamladı.

Adam Fierce

Üyelik tarihi: 09/15/16

418 İtibar

3 adet Kılavuz yazıldı

Ekip

USF Tampa, Team 18-4, Blackwell Fall 2016 USF Tampa, Team 18-4, Blackwell Fall 2016 üyesi

USFT-BLACKWELL-F16S18G4

4 Üyeler

24 adet Kılavuz yazıldı

0Kılavuz Yorumları

Yorum Ekle

İstatistikleri Görüntüle:

Son 24 Saat: 2

Son 7 gün: 8

Son 30 gün: 27

Her zaman: 2,869