Ana içeriğe geç

Acer Iconia W510 Battery Replacement

Neye ihtiyacın var

  1. Acer Iconia W510 Battery Replacement, Rear Cover: adım 1, 3 resimden 1. Acer Iconia W510 Battery Replacement, Rear Cover: adım 1, 3 resimden 2. Acer Iconia W510 Battery Replacement, Rear Cover: adım 1, 3 resimden 3.
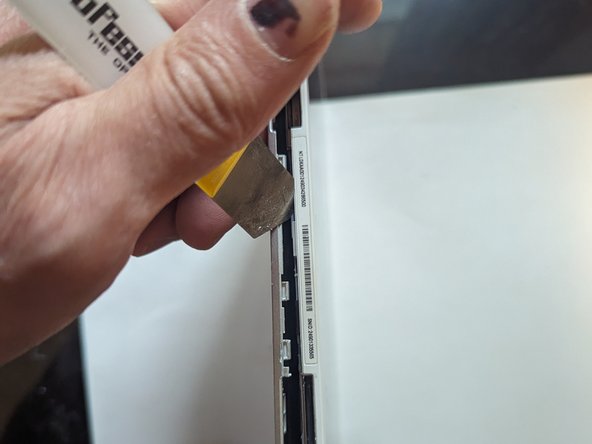
    • Carefully insert your metal pry tool between the back cover and the frame at an angle as shown.

    • Give the tool a twist to the left to start separating the clips.

    • Work your way to the corner, prying and twisting to pop the clips as you go.

  2. Acer Iconia W510 Battery Replacement, Right Side: adım 2, 3 resimden 1. Acer Iconia W510 Battery Replacement, Right Side: adım 2, 3 resimden 2. Acer Iconia W510 Battery Replacement, Right Side: adım 2, 3 resimden 3.
    • Insert an opening pick to make sure the clips don't close down again as you round the corner and start working on the right side of the tablet.

    • Continue as before, prying and twisting to release the catches.

  3. Acer Iconia W510 Battery Replacement, Top Edge: adım 3, 2 resimden 1. Acer Iconia W510 Battery Replacement, Top Edge: adım 3, 2 resimden 2.
    • Continue along the top edge as before

    • When you get to the corner, be careful not to insert the tool in the space below the power on symbol. There is a delicate clip there that is easy to break if you're prying with the tool. (Yes, I'm speaking from experience. Don't be me.)

  4. Acer Iconia W510 Battery Replacement, Left Side: adım 4, 2 resimden 1. Acer Iconia W510 Battery Replacement, Left Side: adım 4, 2 resimden 2.
    • Unclip the left side of the tablet.

  5. Acer Iconia W510 Battery Replacement, Bottom Edge: adım 5, 2 resimden 1. Acer Iconia W510 Battery Replacement, Bottom Edge: adım 5, 2 resimden 2.
    • Back to the bottom side again, this little part by itself is a little finicky to get unclipped, just follow the same procedure as with the first one.

    • And finally the home stretch between the keyboard/power connector and the right hand guide pin, back to where you started.

  6. Acer Iconia W510 Battery Replacement: adım 6, 1 resimden 1.
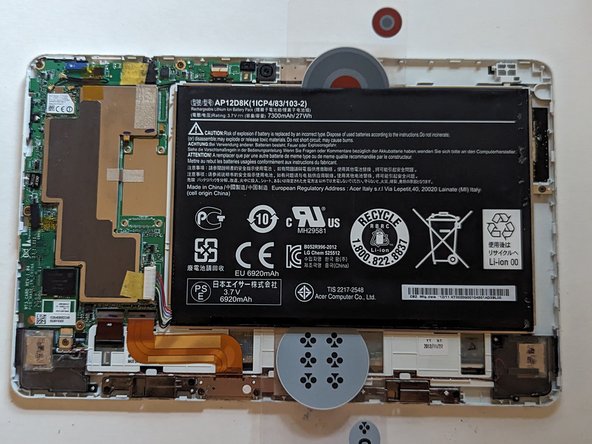
    • The rear cover is removed.

  7. Acer Iconia W510 Battery Replacement, Unplug the Tablet Battery: adım 7, 2 resimden 1. Acer Iconia W510 Battery Replacement, Unplug the Tablet Battery: adım 7, 2 resimden 2.
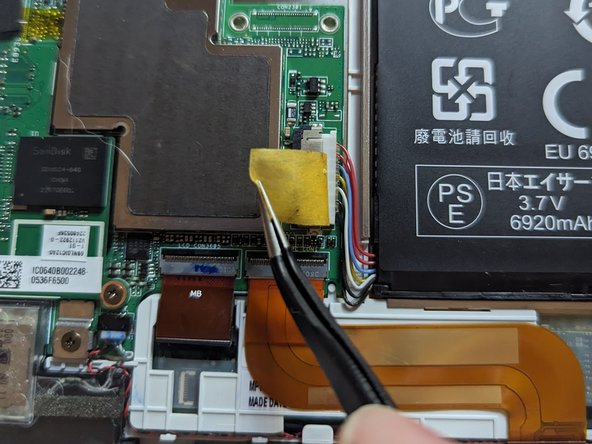
    • Peel back the tape securing the battery connector.

  8. Acer Iconia W510 Battery Replacement: adım 8, 2 resimden 1. Acer Iconia W510 Battery Replacement: adım 8, 2 resimden 2.
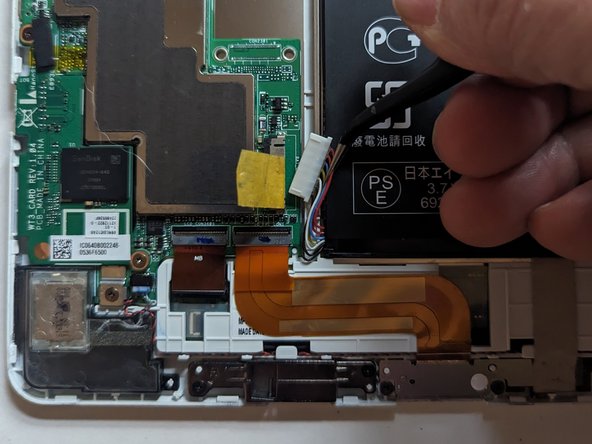
    • Grasp the plug by the tabs on either side and pull it straight out from the connector.

  9. Acer Iconia W510 Battery Replacement, Battery: adım 9, 3 resimden 1. Acer Iconia W510 Battery Replacement, Battery: adım 9, 3 resimden 2. Acer Iconia W510 Battery Replacement, Battery: adım 9, 3 resimden 3.
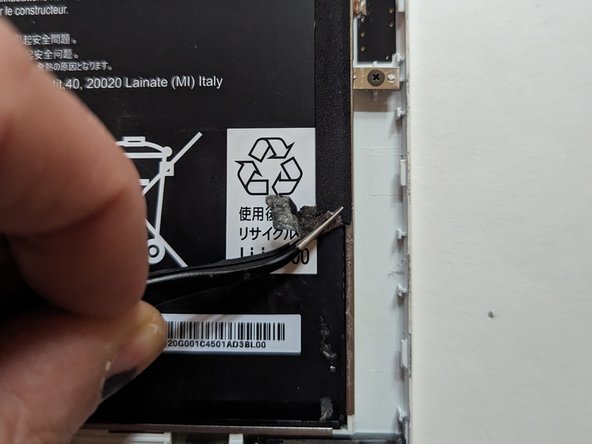
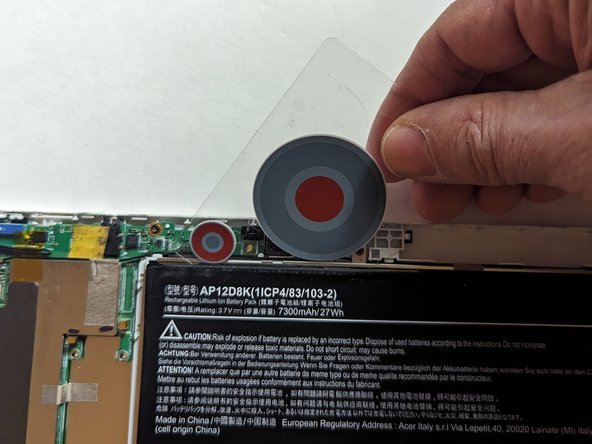
    • Remove the tape on the right side of the battery securing it to the tray.

  10. Acer Iconia W510 Battery Replacement: adım 10, 1 resimden 1.
    • Note the position of three strips of adhesive holding the battery in place.

  11. Acer Iconia W510 Battery Replacement: adım 11, 3 resimden 1. Acer Iconia W510 Battery Replacement: adım 11, 3 resimden 2. Acer Iconia W510 Battery Replacement: adım 11, 3 resimden 3.
    • Using a flexible piece of plastic, slip it under the battery and use it to slice the first adhesive strip.

    • Leave it in place while slicing the remaining strips.

  12. Acer Iconia W510 Battery Replacement: adım 12, 2 resimden 1. Acer Iconia W510 Battery Replacement: adım 12, 2 resimden 2.
    • Do the same with the second piece of adhesive.

    • Leave the card in place again.

  13. Acer Iconia W510 Battery Replacement: adım 13, 2 resimden 1. Acer Iconia W510 Battery Replacement: adım 13, 2 resimden 2.
    • And finally, slice the third adhesive strip.

  14. Acer Iconia W510 Battery Replacement: adım 14, 2 resimden 1. Acer Iconia W510 Battery Replacement: adım 14, 2 resimden 2.
    • The battery can now be lifted out of the tablet.

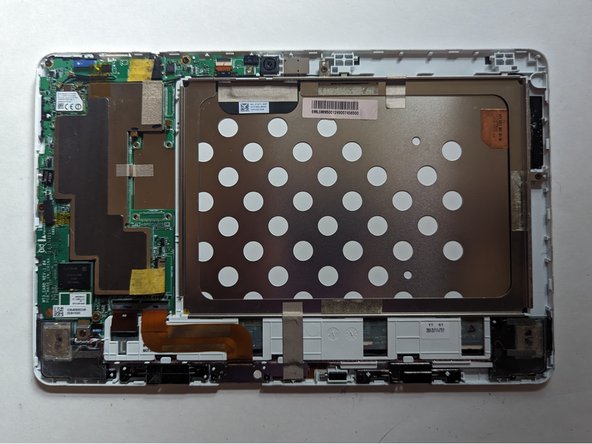
  15. Acer Iconia W510 Battery Replacement: adım 15, 1 resimden 1.
    • The battery is now free.

Sonuç

To reassemble your device, follow these instructions in reverse order.

Jerry Wheeler

Üyelik tarihi: 03/21/22

58.269 İtibar

69 adet Kılavuz yazıldı

Ekip

Oregonians Oregonians üyesi

Community

8 Üyeler

176 adet Kılavuz yazıldı

0 Yorum

Yorum Ekle

İstatistikleri Görüntüle:

Son 24 Saat: 1

Son 7 gün: 6

Son 30 gün: 26

Her zaman: 150