Ana içeriğe geç

Acer Predator 17 G9-791 Trackpad Replacement

Neye ihtiyacın var

  1. Acer Predator 17 G9-791 Trackpad Replacement, Service Panel: adım 1, 1 resimden 1.
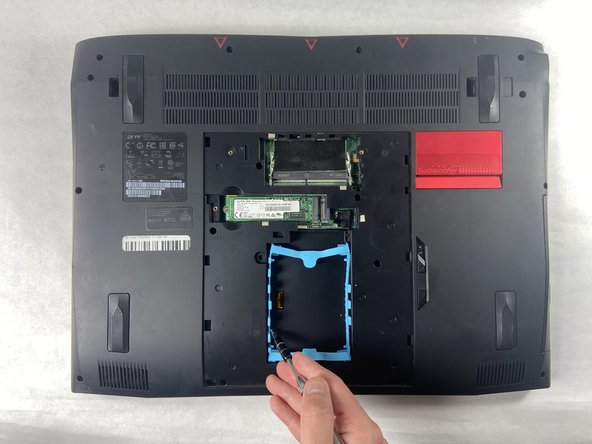
    • The service panel can be located on the bottom of the device. It is shown here as the panel located in the middle of the device, going from the upper vents to the bottom of the device.

  2. Acer Predator 17 G9-791 Trackpad Replacement: adım 2, 2 resimden 1. Acer Predator 17 G9-791 Trackpad Replacement: adım 2, 2 resimden 2.
    • Loosen the two Phillips #0 screws.

    • Pull up slightly on the top of the panel to help fully separate the screws from the rest of the device.

  3. Acer Predator 17 G9-791 Trackpad Replacement: adım 3, 1 resimden 1.
    • Continue pulling up on the panel to separate it from the laptop and remove it.

  4. Acer Predator 17 G9-791 Trackpad Replacement, Bottom Case: adım 4, 3 resimden 1. Acer Predator 17 G9-791 Trackpad Replacement, Bottom Case: adım 4, 3 resimden 2. Acer Predator 17 G9-791 Trackpad Replacement, Bottom Case: adım 4, 3 resimden 3.
    • Remove the nine 4.5 mm Phillips #0 screws from the panel.

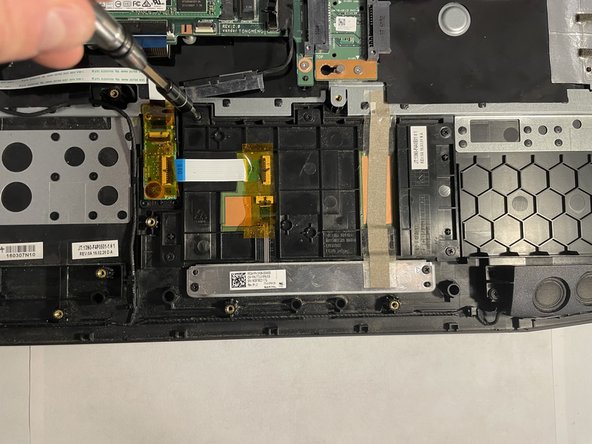
    • Remove four 14 mm Phillips #0 screws.

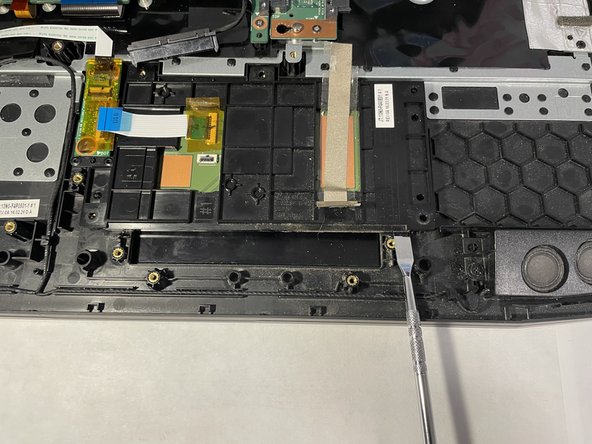
    • Remove six 7 mm Phillips #0 screws.

  5. Acer Predator 17 G9-791 Trackpad Replacement: adım 5, 1 resimden 1.
    • Slide the "unlock" slider up located to the right of the service panel and pull the disc tray out.

  6. Acer Predator 17 G9-791 Trackpad Replacement: adım 6, 1 resimden 1.
    • Remove the two 4.5 mm Phillips #0 screws located underneath the removed optical drive.

  7. Acer Predator 17 G9-791 Trackpad Replacement: adım 7, 2 resimden 1. Acer Predator 17 G9-791 Trackpad Replacement: adım 7, 2 resimden 2.
    • Pry up on the edges of the bottom cover and lift the bottom case off of the device.

  8. Acer Predator 17 G9-791 Trackpad Replacement, Battery: adım 8, 1 resimden 1.
    • Remove the six 4 mm Phillips #0 screws from the battery.

  9. Acer Predator 17 G9-791 Trackpad Replacement: adım 9, 2 resimden 1. Acer Predator 17 G9-791 Trackpad Replacement: adım 9, 2 resimden 2.
    • Disconnect the battery connector from the motherboard.

  10. Acer Predator 17 G9-791 Trackpad Replacement: adım 10, 1 resimden 1.
    • Gently lift the battery and remove it from the device.

  11. Acer Predator 17 G9-791 Trackpad Replacement, Trackpad: adım 11, 2 resimden 1. Acer Predator 17 G9-791 Trackpad Replacement, Trackpad: adım 11, 2 resimden 2.
    • Remove the seven 4 mm Phillips #0 screws.

  12. Acer Predator 17 G9-791 Trackpad Replacement: adım 12, 2 resimden 1. Acer Predator 17 G9-791 Trackpad Replacement: adım 12, 2 resimden 2.
    • Remove the connector by flipping the black lock bar up and removing the pulling it out.

    • Peel back the tape from the metal button assembly on the bottom and the tape connecting the trackpad to the device at the top.

  13. Acer Predator 17 G9-791 Trackpad Replacement: adım 13, 1 resimden 1.
    • Remove the metal button assembly.

  14. Acer Predator 17 G9-791 Trackpad Replacement: adım 14, 1 resimden 1.
    • Flip the black lock bar up and remove the connector on the left.

  15. Acer Predator 17 G9-791 Trackpad Replacement: adım 15, 3 resimden 1. Acer Predator 17 G9-791 Trackpad Replacement: adım 15, 3 resimden 2. Acer Predator 17 G9-791 Trackpad Replacement: adım 15, 3 resimden 3.
    • Using a spudger, pry the trackpad up and remove it from the device.

    • There is an adhesive holding the trackpad down that must be pulled against.

Sonuç

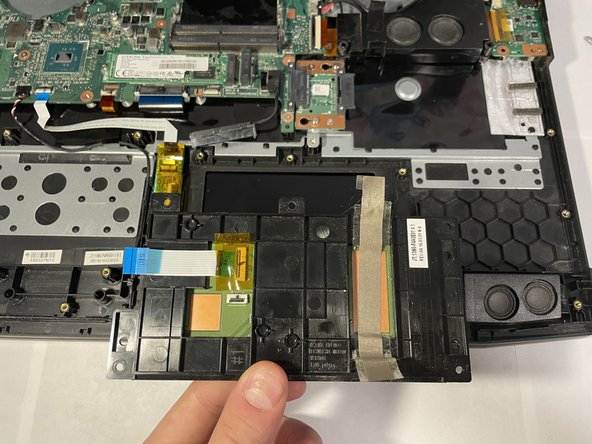
To reassemble your device, follow these instructions in reverse order.

Bir başkası bu kılavuzu tamamladı.

Adeline Slocum

Üyelik tarihi: 10/25/22

304 İtibar

2 adet Kılavuz yazıldı

Ekip

UMass Dartmouth, Team 5-1, Sinclaire Fall 2022 UMass Dartmouth, Team 5-1, Sinclaire Fall 2022 üyesi

UMASSD-SINCLAIRE-F22S5G1

5 Üyeler

7 adet Kılavuz yazıldı

0 Yorum

Yorum Ekle

İstatistikleri Görüntüle:

Son 24 Saat: 2

Son 7 gün: 9

Son 30 gün: 20

Her zaman: 339