Giriş
If the battery of your Alienware 15 R2 dies quickly, or fails to charge, you may consider replacing it. This will show you how to do so. When working with computers, always make sure to unplug your computer and ground yourself before reaching inner components so you don’t accidentally release an electrical charge into the sensitive technology. The discharge could potentially damage your computer’s internals.
Neye ihtiyacın var
-
-
Place laptop upside down with the hinge facing you, then remove the two 9mm Phillips #0 screws located in the bottom left and right of the of the rear panel.
-
Remove the rear panel by using the iFixit opening tool to separate it from the back of the laptop.
-
-
-
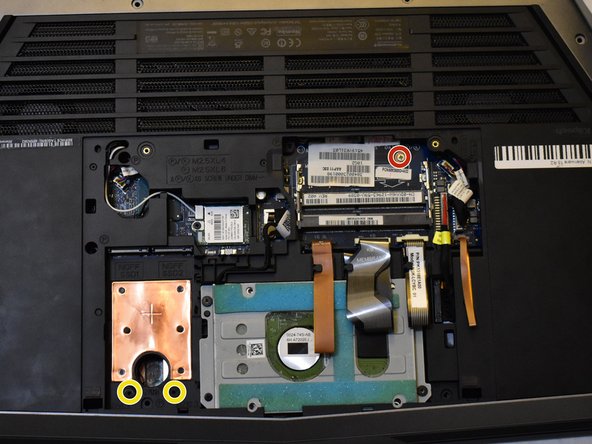
Use the iFixit opening tool to disconnect the battery cable. Put the iFixit tool underneath the cable and then pull it to remove.
Also be sure to disconnect the black and white cable next to the small m.2.
Hard Drive also needs to be removed at the 4 screws.
-
-
-
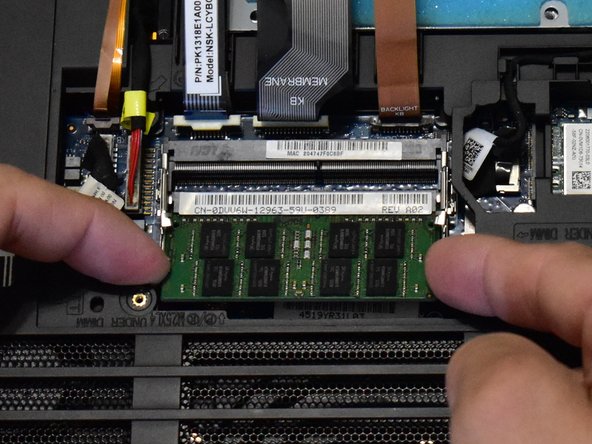
Using a Phillips #0 remove the small 1X 3mm screw behind where the RAM used to be.
-
If you installed additional SSD's, you will need to remove those as well.
The four cables in the middle; two brown and two grey. They need to be disconnected in order for them not to tear when separating the bottom shell of the computer at the later stage.
-
-
-
-
Remove all screws from the back casing. (4X 18mm, 4X 10mm, 6X 6mm)
-
Press your finger in the hole next to the hard drive to lift the key board. You may need an iFixit opening tool and work your way around the edges of the keyboard to get it fully lifted.
There’s a cable still connected between the display and the top case in between these two steps. Be sure to disconnect it before pulling the two apart completely.
There is another screw with P label next to it should be removed
-
-
-
Lift the battery from the front edge and remove.
-
There are two tabs at the front of the battery on each side that you need to slightly pry open in order to get the battery out. You can pull the speakers out in order to see the tabs better.
-


To reassemble your device, follow these instructions in reverse order.
To reassemble your device, follow these instructions in reverse order.
İptal et: Bu kılavuzu tamamlamadım.
4 farklı kişi bu kılavuzu tamamladı.
Ekip

Western Carolina University, Team S1-G2, Virtue Fall 2019 Western Carolina University, Team S1-G2, Virtue Fall 2019 üyesi
WCU-VIRTUE-F19S1G2
4 Üyeler
7 adet Kılavuz yazıldı
3Kılavuz Yorumları
Honestly made an account to comment on this repair guide, this is extremely incomplete. I’d go as far as saying you’re likely to damage the product by relying solely on this guide, I would turn to a breakdown on YouTube instead. I’m not sure if this is listed under the correct product.
The guide is good for someone who has already done repair work on laptops, but it may be difficult to understand for someone who does not have a lot of experience.
Made a few modifications like removing the keyboard (and the steps required, this made it so much easier), there were a couple of screws not mentioned for removal, as well as paying attention to the tabs in front of the battery in order to remove it smoothly. Overall, I glad it was available, it at least got me off to a great start. Thanks