Ana içeriğe geç
Onarım Topluluğuna Katılın - Hesap Oluşturun

Alienware P18G M14X R1 Optical Drive Replacement

Neye ihtiyacın var

    1. Alienware P18G M14X R1 Optical Drive Replacement, Back Cover: adım 1, 1 resimden 1.
      • Loosen the top left and top right 6.5mm PH1 screws that hold down the back cover.

      • The screws will not be able to be removed from the back cover. They can only be loosened or tightened.

      FixBot'a Sor

      Yorum Ekle

    2. Alienware P18G M14X R1 Optical Drive Replacement: adım 2, 1 resimden 1.
      • Slide back cover forward using your thumbs.

      FixBot'a Sor

      Yorum Ekle

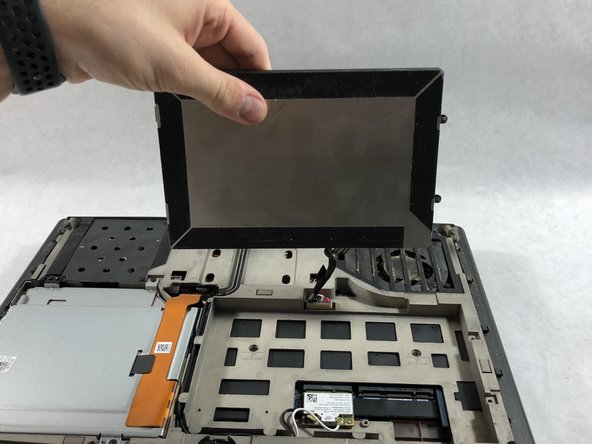
    3. Alienware P18G M14X R1 Optical Drive Replacement: adım 3, 1 resimden 1.
      • Lift up the cover and set aside exposing the internals of the computer.

      FixBot'a Sor

      Yorum Ekle

    1. Alienware P18G M14X R1 Optical Drive Replacement, Battery: adım 4, 1 resimden 1.
      • Make sure the laptop is turned off before starting.

      • Using PH1 screwdriver loosen the two screws on the right of the battery.

      • The screws will not be able to be removed from the battery. They can only be loosened or tightened.

      FixBot'a Sor

      Yorum Ekle

    2. Alienware P18G M14X R1 Optical Drive Replacement: adım 5, 2 resimden 1. Alienware P18G M14X R1 Optical Drive Replacement: adım 5, 2 resimden 2.
      • Pull battery up using the tab provided.

      FixBot'a Sor

      Yorum Ekle

    3. Alienware P18G M14X R1 Optical Drive Replacement: adım 6, 1 resimden 1.
      • Disconnect the clip connecting the battery to the computer.

      • Set battery aside.

      FixBot'a Sor

      Yorum Ekle

    1. Alienware P18G M14X R1 Optical Drive Replacement, Optical Drive: adım 7, 1 resimden 1.
      • Unscrew the four 6.35mm screws using the PH1, that hold down the optical drive.

      FixBot'a Sor

      Yorum Ekle

    2. Alienware P18G M14X R1 Optical Drive Replacement: adım 8, 1 resimden 1.
      • Using the plastic opening tool unclip the white connector holding down the orange cable.

      FixBot'a Sor

      Yorum Ekle

    3. Alienware P18G M14X R1 Optical Drive Replacement: adım 9, 1 resimden 1.
      • Using the tab on the optical drive, lift the optical drive out of the computer and set it aside.

      FixBot'a Sor

      Yorum Ekle

Sonuç

To reassemble your device, follow these instructions in reverse order.

İptal et: Bu kılavuzu tamamlamadım.

Andonaq Grozdani

Üyelik tarihi: 03/01/18

892 İtibar

5 adet Kılavuz yazıldı

Ekip

UMass Dartmouth, Team S2-G2, Simcock Spring 2018 UMass Dartmouth, Team S2-G2, Simcock Spring 2018 üyesi

UMASSD-SIMCOCK-S18S2G2

3 Üyeler

35 adet Kılavuz yazıldı

0Kılavuz Yorumları

Yorum Ekle

İstatistikleri Görüntüle:

Son 24 Saat: 0

Son 7 gün: 5

Son 30 gün: 36

Her zaman: 762