Ana içeriğe geç

Amazon Fire HD 8 Rear-facing Camera Replacement

Neye ihtiyacın var

  1. Amazon Fire HD 8 Rear-facing Camera Replacement, Screen: adım 1, 2 resimden 1. Amazon Fire HD 8 Rear-facing Camera Replacement, Screen: adım 1, 2 resimden 2.
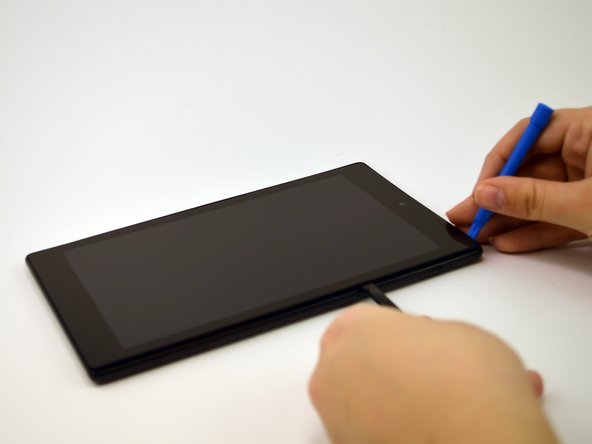
    • Heat the edges of the screen with a heat gun on the lowest setting by using sweeping motions from about 8-10 inches away.

    • Make sure you use sweeping motions with the heat gun, instead of hovering over one area.

  2. Amazon Fire HD 8 Rear-facing Camera Replacement: adım 2, 1 resimden 1.
    • After 1-2 minutes, use a plastic opening tool to pry the screen loose. Start at the top right corner and gently pry the screen from the device.

    • Be careful not to bend the screen by pushing it too far from the rest of the device.

  3. Amazon Fire HD 8 Rear-facing Camera Replacement: adım 3, 3 resimden 1. Amazon Fire HD 8 Rear-facing Camera Replacement: adım 3, 3 resimden 2. Amazon Fire HD 8 Rear-facing Camera Replacement: adım 3, 3 resimden 3.
    • Slide a plastic opening tool and spudger along the underside of the screen using enough force to peel the screen and the adhesive strip from the other half of the device.

    • Be mindful of the orange cable connecting the screen to the mid-bottom of the device.

  4. Amazon Fire HD 8 Rear-facing Camera Replacement: adım 4, 3 resimden 1. Amazon Fire HD 8 Rear-facing Camera Replacement: adım 4, 3 resimden 2. Amazon Fire HD 8 Rear-facing Camera Replacement: adım 4, 3 resimden 3.
    • To remove the screen from the device, use tweezers to gently pull the orange cable from its connection to the screen.

  5. Amazon Fire HD 8 Rear-facing Camera Replacement, Rear-facing Camera: adım 5, 2 resimden 1. Amazon Fire HD 8 Rear-facing Camera Replacement, Rear-facing Camera: adım 5, 2 resimden 2.
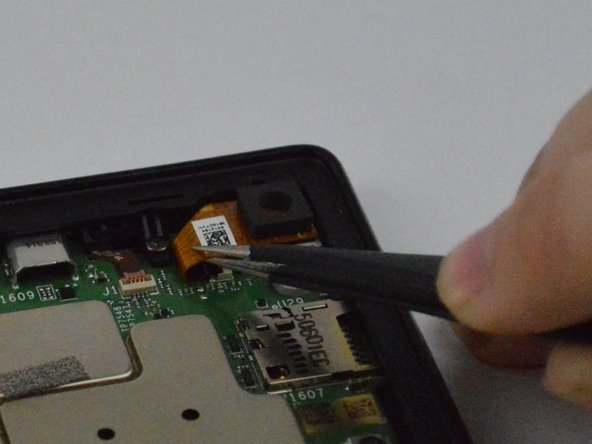
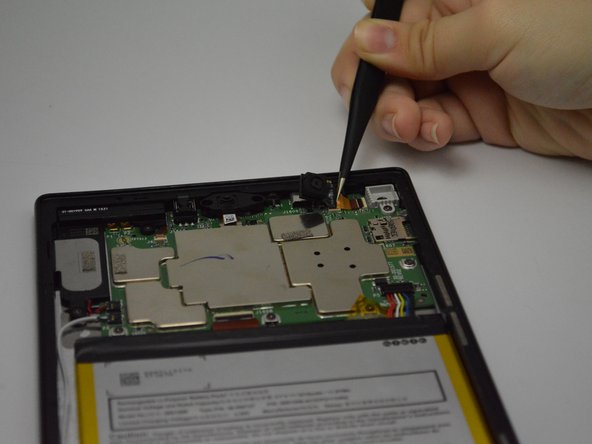
    • Pop the camera out of the rear-facing camera casing by carefully pulling the orange cable with the tweezers.

  6. Amazon Fire HD 8 Rear-facing Camera Replacement: adım 6, 2 resimden 1. Amazon Fire HD 8 Rear-facing Camera Replacement: adım 6, 2 resimden 2.
    • Flip up the tab on the ZIF connector at the end of the ribbon cable.

    • Grasp the underside of the orange cable with the tweezers and gently slide the camera out of the connector.

Sonuç

To reassemble your device, follow these instructions in reverse order.

2 farklı kişi bu kılavuzu tamamladı.

Alyssa Barrack

Üyelik tarihi: 02/24/16

849 İtibar

1 Kılavuz yazıldı

Ekip

USF Tampa, Team 1-3, Leahy Spring 2016 USF Tampa, Team 1-3, Leahy Spring 2016 üyesi

USFT-LEAHY-S16S1G3

4 Üyeler

17 adet Kılavuz yazıldı

0 Yorum

Yorum Ekle

İstatistikleri Görüntüle:

Son 24 Saat: 0

Son 7 gün: 1

Son 30 gün: 6

Her zaman: 1,977