Ana içeriğe geç

Apple AirPort Extreme Model A1034 Motherboard Replacement

Neye ihtiyacın var

  1. Apple AirPort Extreme Model A1034 Motherboard Replacement, Outer Case: adım 1, 1 resimden 1.
    • Remove the three 14.3mm T7 Torx screws from the bottom of AirPort.

  2. Apple AirPort Extreme Model A1034 Motherboard Replacement: adım 2, 1 resimden 1.
    • Remove the 5.1mm Phillips screw from the bottom of the AirPort. This screw is located under the identification sticker. You will have to remove the sticker or make a hole to remove it.

  3. Apple AirPort Extreme Model A1034 Motherboard Replacement: adım 3, 2 resimden 1. Apple AirPort Extreme Model A1034 Motherboard Replacement: adım 3, 2 resimden 2.
    • Lift the bottom and top casing straight apart and then lift metal casing straight up from the bottom plastic casing.

  4. Apple AirPort Extreme Model A1034 Motherboard Replacement: adım 4, 1 resimden 1.
    • Unplug the black connector on the top of the metal casing by gently pulling horizontally.

  5. Apple AirPort Extreme Model A1034 Motherboard Replacement, Motherboard: adım 5, 1 resimden 1.
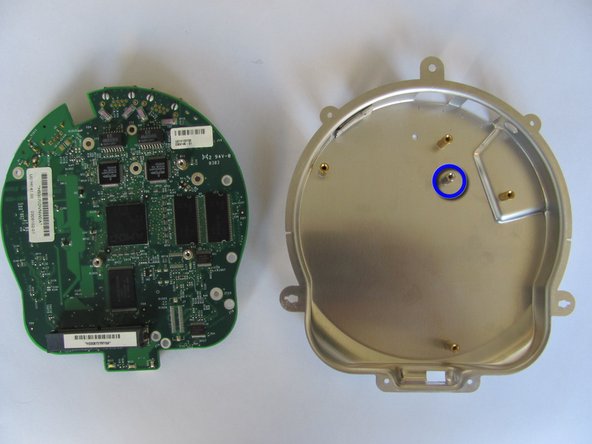
    • Remove the four 4.3mm phillips screws from the bottom of the metal casing.

  6. Apple AirPort Extreme Model A1034 Motherboard Replacement: adım 6, 1 resimden 1.
    • Lift and separate the top and bottom of the metal casing. You will now expose the motherboard and the AirPort card.

    • To remove the AirPort card, gently pull the plastic tab horizontally.

  7. Apple AirPort Extreme Model A1034 Motherboard Replacement: adım 7, 1 resimden 1.
    • Locate and remove the three 5.0mm phillips screws from the heat sink.

    • Lift to remove the heat sink from the motherboard.

  8. Apple AirPort Extreme Model A1034 Motherboard Replacement: adım 8, 2 resimden 1. Apple AirPort Extreme Model A1034 Motherboard Replacement: adım 8, 2 resimden 2.
    • Locate and remove the five 7.5mm phillips screws from the motherboard.

    • Lift and separate the motherboard from the bottom metal casing.

    • There will be a loose hexagonal female screw extender under the motherboard.

Sonuç

To reassemble your device, follow these instructions in reverse order.

2 farklı kişi bu kılavuzu tamamladı.

Michael Garcia

Üyelik tarihi: 10/12/11

411 İtibar

5 adet Kılavuz yazıldı

Ekip

Cal Poly, Team 17-15, Regan Fall 2011 Cal Poly, Team 17-15, Regan Fall 2011 üyesi

CPSU-REGAN-F11S17G15

3 Üyeler

13 adet Kılavuz yazıldı

0 Yorum

Yorum Ekle

İstatistikleri Görüntüle:

Son 24 Saat: 0

Son 7 gün: 1

Son 30 gün: 7

Her zaman: 5,971