Ana içeriğe geç

Aquaris M5 Rear Camera Replacement

Neye ihtiyacın var

  1. Aquaris M5 Rear Camera Replacement, Back Cover: adım 1, 2 resimden 1. Aquaris M5 Rear Camera Replacement, Back Cover: adım 1, 2 resimden 2.
    • Insert the tip of an iFixit opening tool between the back cover and the mid frame of the phone.

    • Between the 2 SIM card slots is a good place to start.

    • Slide the opening tool to the bottom of the phone, to snap out the plastic clips, connecting the back cover and mid frame.

  2. Aquaris M5 Rear Camera Replacement: adım 2, 2 resimden 1. Aquaris M5 Rear Camera Replacement: adım 2, 2 resimden 2.
    • Slide the opening tool back to the top of the phone, to disconnect all the clips on the edge.

    • Slide around the corner and along the top edge, to also disconnect these clips.

  3. Aquaris M5 Rear Camera Replacement: adım 3, 3 resimden 1. Aquaris M5 Rear Camera Replacement: adım 3, 3 resimden 2. Aquaris M5 Rear Camera Replacement: adım 3, 3 resimden 3.
    • Be careful not to bend the back cover too hard to prevent some of the clips breaking.

    • Grab the back cover by the loosened edge.

    • Gently bend and twist the flexible back cover a bit to disconnect the remaining clips.

    • Take off the back cover.

  4. Aquaris M5 Rear Camera Replacement, Battery: adım 4, 1 resimden 1.
    • Damaging the liquid indicator sticker, on the middle most screw, will void the warranty of the phone.

    • Unscrew the ten black 4mm Phillips #00 Screws from the mainboard shield.

    • Unscrew the golden 3.4mm Phillips #00 screw on the middle-right side of the mainboard shield.

  5. Aquaris M5 Rear Camera Replacement: adım 5, 3 resimden 1. Aquaris M5 Rear Camera Replacement: adım 5, 3 resimden 2. Aquaris M5 Rear Camera Replacement: adım 5, 3 resimden 3.
    • Insert the flat side of a spudger between the mainboard shield and the frame of the phone.

    • Twist the spudger to lift up the mainboard shield.

    • Remove the mainboard shield from the phone.

  6. Aquaris M5 Rear Camera Replacement: adım 6, 2 resimden 1. Aquaris M5 Rear Camera Replacement: adım 6, 2 resimden 2.
    • Use a spudger to disconnect the battery's flex cable from the mainboard.

    • Pull of the sticker on the bottom side of the battery.

    • Grab the sticker and lift it up to take the battery out of the phone.

  7. Aquaris M5 Rear Camera Replacement, Rear Camera: adım 7, 2 resimden 1. Aquaris M5 Rear Camera Replacement, Rear Camera: adım 7, 2 resimden 2.
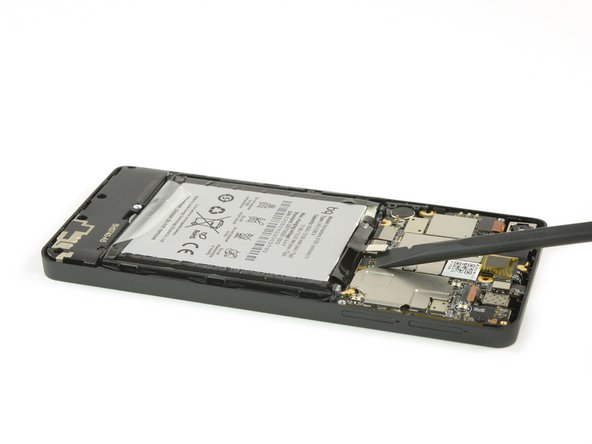
    • Use the flat side of a spudger to disconnect the camera's flex cable.

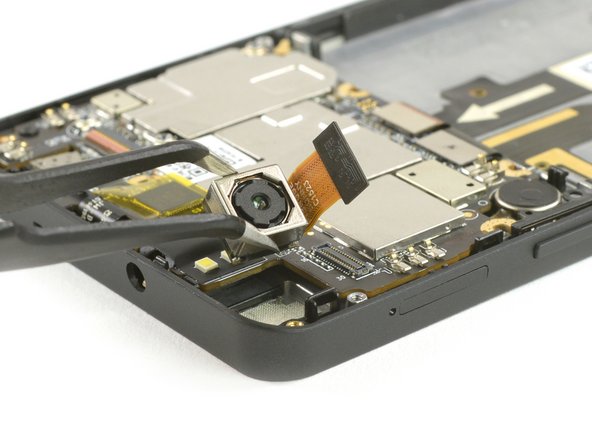
    • Use Tweezers to grab the camera and lift it out of the phone.

Sonuç

To reassemble your device, follow these instructions in reverse order.

Theo Mat

Üyelik tarihi: 11/12/17

12.782 İtibar

14 adet Kılavuz yazıldı

0 Yorum

Yorum Ekle

İstatistikleri Görüntüle:

Son 24 Saat: 0

Son 7 gün: 1

Son 30 gün: 1

Her zaman: 290