Ana içeriğe geç
Onarım Topluluğuna Katılın - Hesap Oluşturun

Astro A40 Gen2 Mixamp Button Replacement

Neye ihtiyacın var

    1. Astro A40 Gen2 Mixamp Button Replacement, Remove Dials: adım 1, 3 resimden 1. Astro A40 Gen2 Mixamp Button Replacement, Remove Dials: adım 1, 3 resimden 2. Astro A40 Gen2 Mixamp Button Replacement, Remove Dials: adım 1, 3 resimden 3.
      • Remove the dials using either a metal spudger or your hands. Be careful as the dials may be difficult to remove.

      FixBot'a Sor

      Yorum Ekle

    1. Astro A40 Gen2 Mixamp Button Replacement, Remove nuts and washers.: adım 2, 1 resimden 1.
      Bu adımda kullanılan alet:
      Tweezers
      $4.99
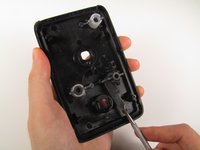
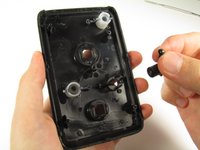
      • Locate the two 11/32 inch nuts underneath the dials.

      • Use an 11/32 inch socket wrench or tweezers to unscrew and remove the nuts and washers.

      FixBot'a Sor

      Yorum Ekle

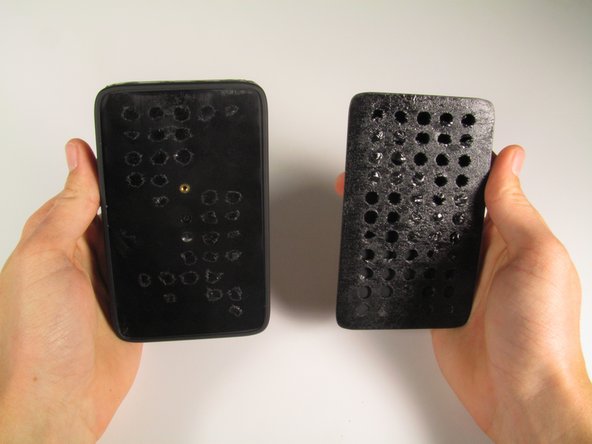
    2. Astro A40 Gen2 Mixamp Button Replacement, Remove back pad.: adım 3, 2 resimden 1. Astro A40 Gen2 Mixamp Button Replacement, Remove back pad.: adım 3, 2 resimden 2.
      • Using a larger metal spudger, remove the rubber back of the mixamp.

      • The back will have glue residue after removal. Depending on the stickiness of the residue, more glue may be needed to stick the backing back on.

      FixBot'a Sor

      Yorum Ekle

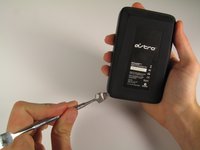
    3. Astro A40 Gen2 Mixamp Button Replacement, Take out main case screw.: adım 4, 1 resimden 1.
      • Remove the one 4.5 mm Phillips #0 screw on the back panel of the mixamp.

      FixBot'a Sor

      Yorum Ekle

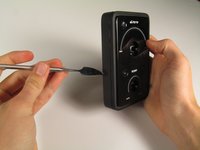
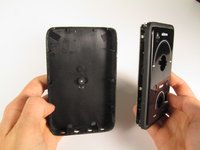
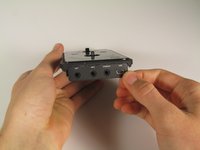
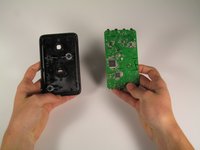
    4. Astro A40 Gen2 Mixamp Button Replacement, Pry open the case.: adım 5, 3 resimden 1. Astro A40 Gen2 Mixamp Button Replacement, Pry open the case.: adım 5, 3 resimden 2. Astro A40 Gen2 Mixamp Button Replacement, Pry open the case.: adım 5, 3 resimden 3.
      • Using a large metal spudger, detach all plastic clips holding the bottom and top casings together.

      • Remove the input casing using your fingers.

      • Be careful when releasing the clips between the two casings, as it is very easy to scratch the mixamp or break the clips.

      • Use caution when pulling the two casings apart as it is very easy to pinch your fingers between them.

      FixBot'a Sor

      Yorum Ekle

    5. Astro A40 Gen2 Mixamp Button Replacement, Remove the motherboard from the case.: adım 6, 1 resimden 1.
      • Remove the four 5.8 mm Phillips #0 screws on the motherboard.

      FixBot'a Sor

      Yorum Ekle

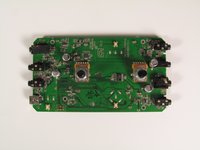
    6. Astro A40 Gen2 Mixamp Button Replacement: adım 7, 2 resimden 1. Astro A40 Gen2 Mixamp Button Replacement: adım 7, 2 resimden 2.
      • Remove the motherboard from the casing.

      FixBot'a Sor

      Yorum Ekle

    1. Astro A40 Gen2 Mixamp Button Replacement, Mixamp Button: adım 8, 2 resimden 1. Astro A40 Gen2 Mixamp Button Replacement, Mixamp Button: adım 8, 2 resimden 2.
      • Use a metal spudger to pry off the buttons and remove them.

      • You may need to apply pressure to break off the small black caps which hold the buttons down. The buttons will still function without the black caps.

      FixBot'a Sor

      Yorum Ekle

Sonuç

To reassemble your device, follow these instructions in reverse order.

İptal et: Bu kılavuzu tamamlamadım.

3 farklı kişi bu kılavuzu tamamladı.

Mark

Üyelik tarihi: 01/22/15

412 İtibar

3 adet Kılavuz yazıldı

Ekip

Cal Poly, Team 20-18, Maness Winter 2015 Cal Poly, Team 20-18, Maness Winter 2015 üyesi

CPSU-MANESS-W15S20G18

4 Üyeler

15 adet Kılavuz yazıldı

0Kılavuz Yorumları

Yorum Ekle

İstatistikleri Görüntüle:

Son 24 Saat: 2

Son 7 gün: 10

Son 30 gün: 24

Her zaman: 2,661