Giriş
After the battery has been removed, this guide will show the user how to remove the keyboard. A spudger and a screwdriver will be needed for this guide.
Neye ihtiyacın var
-
-
Hold the laptop using both hands with the battery facing upwards.
 FixBot'a Sor
-
-
-
Push the two tabs located below the battery in towards each other using your thumbs.
-
-
-
-
Continue to push the battery upwards until it is completely separated from the laptop as shown.
-
-
-
Once the battery is removed, unscrew the highlighted 3mm screws (4) using a #0 Phillps head screwdriver.
-
-
-
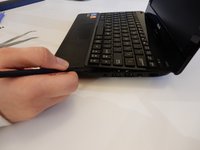
After all four screws are removed, flip the laptop over with the keyboard facing up.
-
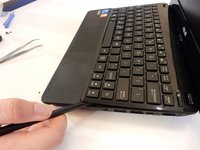
Use a spudger to pry up where the keyboard is attached to the laptop on all sides until it is detached from the laptop.
-
-
-
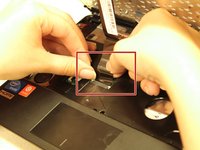
After the keyboard is detached, the ribbon cable which connects the keyboard to the laptop's motherboard is exposed.
-
-
-
Using the spudger push the white clips upwards that are holding the cable.
-


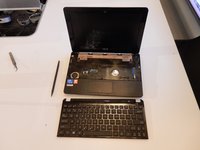
To reassemble your device, follow these instructions in reverse order.
İptal et: Bu kılavuzu tamamlamadım.
2 farklı kişi bu kılavuzu tamamladı.
Ekip

Clemson, Team 7-4, Benson Spring 2016 Clemson, Team 7-4, Benson Spring 2016 üyesi
CLEM-BENSON-S16S7G4
5 Üyeler
7 adet Kılavuz yazıldı