Giriş
The steps located within this guide are meant to assist the hopeful home-repairer in replacing the GPU fan on the ASUS GTX 750 Graphics Card. Within the guide can be found several caveats depending upon the individual repair or situation. With this in mind, be aware that the suggestions within this guide apply to several issues that may occur within the GPU fan, including broken fan blades, and a non-functioning fan unit attached to the graphics card. You do not need any special skills or tools, other than the Phillips #00 screwdriver listed on this page, to complete this repair.
Neye ihtiyacın var
-
-
Before beginning the repair process, make sure that your designated workspace is decluttered and clean.
-
Orient the case so that the power button is aligned with the rightmost corner of the device.
-
Next, push the ridge-line of the top panel away.
-
Then, slide the case away and expose the inside of the product.
-
Continue this process to lift off the side panel that was previously facing you.
-
-
-
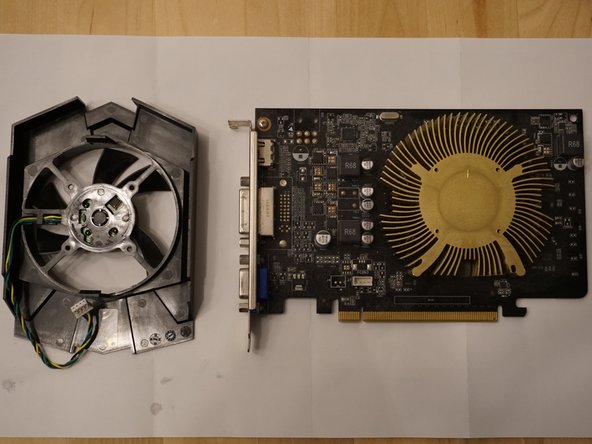
Next, disconnect the GPU cable with your thumb and forefinger. This will partially unhook the fan from the motherboard.
-
On the PCIe slot of the graphics card, there is a release mechanism. Push on this mechanism carefully and gently.
-
After pushing it down, the device will click and signify correct and complete separation from the motherboard.
-
-
-
-
Remove the four smallest screws that are holding the fan shroud in place.
-
Do so by using a (Phillips #00) screwdriver between the fan blades and corresponding supporting bracket.
-


In order to reassemble this device, follow the provided instructions in the reverse order.
In order to reassemble this device, follow the provided instructions in the reverse order.
İptal et: Bu kılavuzu tamamlamadım.
2 farklı kişi bu kılavuzu tamamladı.

Ekip

York University, Team A-4, Morris Fall 2022 York University, Team A-4, Morris Fall 2022 üyesi
YORK-MORRIS-F22SAG4
4 Üyeler
2 adet Kılavuz yazıldı