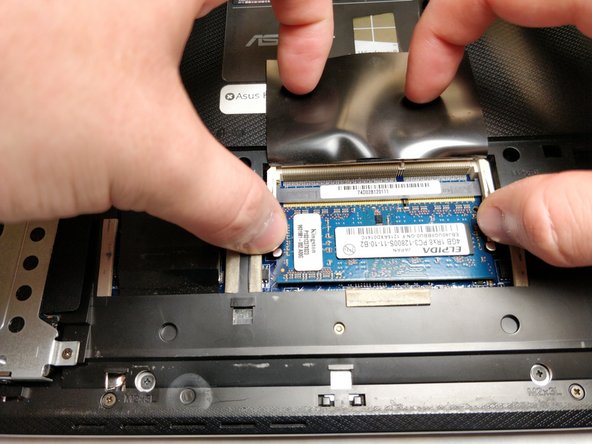
Ana içeriğe geç

Asus K55N-DS81 RAM Replacement

Neye ihtiyacın var

  1. Asus K55N-DS81 RAM Replacement, Battery: adım 1, 1 resimden 1.
    • Flip the laptop over, such that the bottom of the laptop is facing upwards.

    • Ensure that the laptop is powered off prior to following this guide.

  2. Asus K55N-DS81 RAM Replacement: adım 2, 2 resimden 1. Asus K55N-DS81 RAM Replacement: adım 2, 2 resimden 2.
    • Pull the latch to the right of the battery to the right.

  3. Asus K55N-DS81 RAM Replacement: adım 3, 2 resimden 1. Asus K55N-DS81 RAM Replacement: adım 3, 2 resimden 2.
    • Pull the latch to the left of the battery to the left. Hold the latch open with a finger to prevent it from closing.

  4. Asus K55N-DS81 RAM Replacement: adım 4, 2 resimden 1. Asus K55N-DS81 RAM Replacement: adım 4, 2 resimden 2.
    • While holding the second latch from the previous step, use another hand to reach underneath the battery.

    • Pull the battery upwards and away from the laptop to remove it.

  5. Asus K55N-DS81 RAM Replacement, Rear Panel: adım 5, 2 resimden 1. Asus K55N-DS81 RAM Replacement, Rear Panel: adım 5, 2 resimden 2.
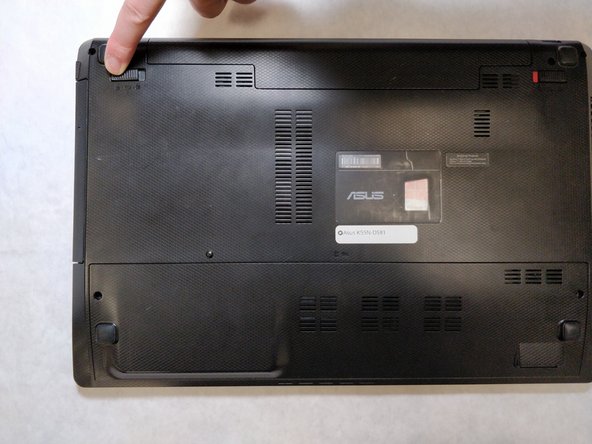
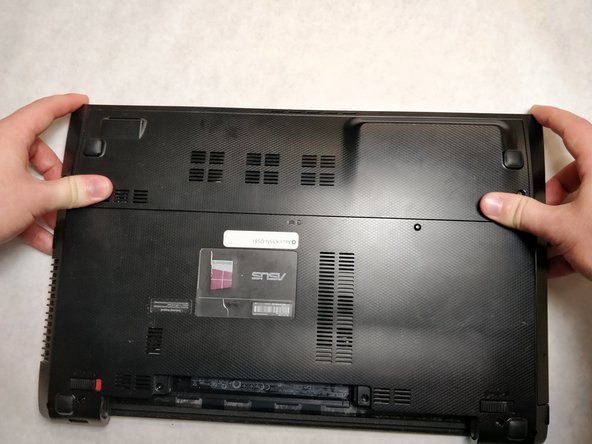
    • Using a JIS #00 screwdriver, unscrew the two 5 mm screws on either side of the laptop panel.

  6. Asus K55N-DS81 RAM Replacement: adım 6, 3 resimden 1. Asus K55N-DS81 RAM Replacement: adım 6, 3 resimden 2. Asus K55N-DS81 RAM Replacement: adım 6, 3 resimden 3.
    • Remove the panel by pushing away from the laptop until the panel is free of the laptop.

    • Lift to remove the panel.

  7. Asus K55N-DS81 RAM Replacement, RAM: adım 7, 2 resimden 1. Asus K55N-DS81 RAM Replacement, RAM: adım 7, 2 resimden 2.
    • Lift up the plastic static shield atop the RAM slots.

  8. Asus K55N-DS81 RAM Replacement: adım 8, 2 resimden 1. Asus K55N-DS81 RAM Replacement: adım 8, 2 resimden 2.
    • Depress the tongs on either side of the RAM stick to loosen the RAM from the slot.

  9. Asus K55N-DS81 RAM Replacement: adım 9, 2 resimden 1. Asus K55N-DS81 RAM Replacement: adım 9, 2 resimden 2.
    • Grab the RAM and pull away from the slot to release it.

Sonuç

To reassemble your device, follow these instructions in reverse order.

Bir başkası bu kılavuzu tamamladı.

Elliott Beckner

Üyelik tarihi: 11/05/18

543 İtibar

4 adet Kılavuz yazıldı

Ekip

IUPUI, Team S2-G1, Baechle Fall 2018 IUPUI, Team S2-G1, Baechle Fall 2018 üyesi

IUPUI-BAECHLE-F18S2G1

4 Üyeler

5 adet Kılavuz yazıldı

0 Yorum

Yorum Ekle

İstatistikleri Görüntüle:

Son 24 Saat: 0

Son 7 gün: 1

Son 30 gün: 1

Her zaman: 378