Giriş
This guide will demonstrate how to replace the hard drive on the Asus Q500A.
Neye ihtiyacın var
-
-
Use a J0 screwdriver bit to remove both screws on the back-plate, found at the bottom of device.
-
Remove back-plate.
-
Note: Use prying tool if your having issues lifting back-plate.
-
-
-
-
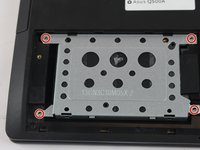
Remove 4 screws from the metal hard-drive case. There will be one in each corner.
-
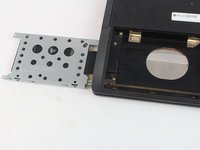
Remove the hard-drive case from the device.
-
-
-
Remove the hard-drive. It will be connected to the integrated sata-port in the device.
-
-
-
Place hard-drive into slot and connect to the integrated sata port.
-
Place hard drive case back on top of the new hard-drive.
-
Screw in the four screws on the hard-drive case.
-
-
-
Place back-plate back on device.
-
Screw in the 2 screws on the back of the plate.
-


To reassemble your device, follow these instructions in reverse order.
İptal et: Bu kılavuzu tamamlamadım.
2 farklı kişi bu kılavuzu tamamladı.
Ekip

USF Tampa, Team 12-5, Eyestone Spring 2017 USF Tampa, Team 12-5, Eyestone Spring 2017 üyesi
USFT-EYESTONE-S17S12G5
3 Üyeler
3 adet Kılavuz yazıldı