Ana içeriğe geç

Asus Q505UA-BI5T7 Screen Replacement

Neye ihtiyacın var

  1. Asus Q505UA-BI5T7 Screen Replacement, Back Cover: adım 1, 2 resimden 1. Asus Q505UA-BI5T7 Screen Replacement, Back Cover: adım 1, 2 resimden 2.
    • Flip the device over so that the back cover is facing you.

    • Ensure that the device is turned off.

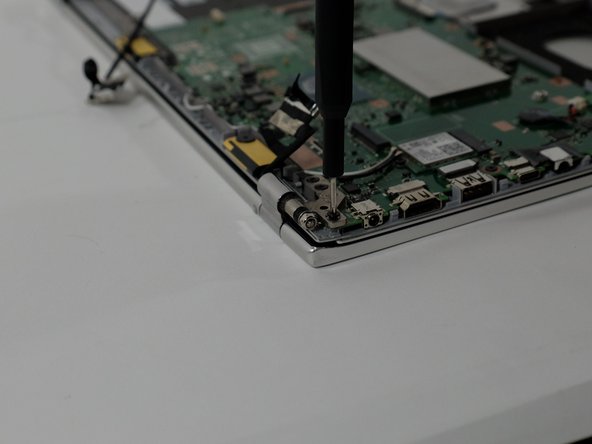
    • Remove the two 10 mm Philips #1 screws from the top two corners of the back cover of the laptop.

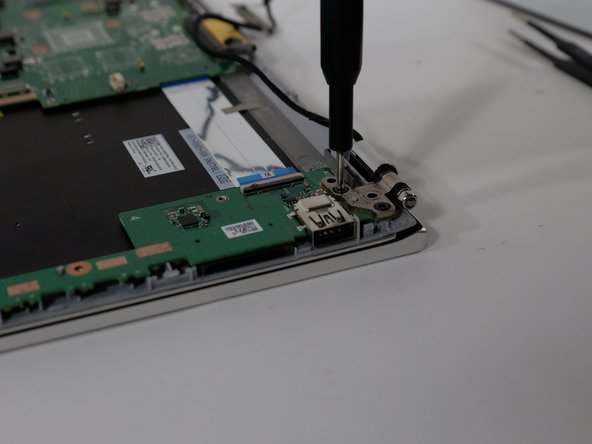
    • Remove the remaining eight 8 mm Philips #1 screws remaining in the back cover of the laptop.

  2. Asus Q505UA-BI5T7 Screen Replacement: adım 2, 3 resimden 1. Asus Q505UA-BI5T7 Screen Replacement: adım 2, 3 resimden 2. Asus Q505UA-BI5T7 Screen Replacement: adım 2, 3 resimden 3.
    • Use the plastic opening tool to gently pry the back cover of the laptop up. Slide the tool slowly along the edges of the back cover to pop it out of the clips holding the cover in place.

  3. Asus Q505UA-BI5T7 Screen Replacement: adım 3, 1 resimden 1.
    • Gently remove the cover and lift it off of the back of the device.

  4. Asus Q505UA-BI5T7 Screen Replacement, Battery: adım 4, 2 resimden 1. Asus Q505UA-BI5T7 Screen Replacement, Battery: adım 4, 2 resimden 2.
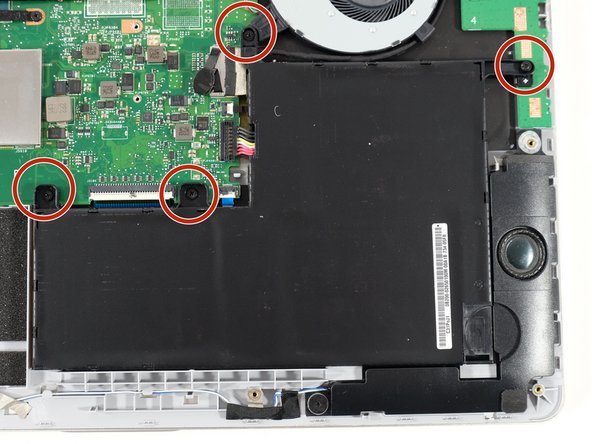
    • Make sure your device is turned off. Remove the 5 mm screws on each respective side of the battery by twisting counter-clockwise with a #0 Phillips screwdriver.

  5. Asus Q505UA-BI5T7 Screen Replacement: adım 5, 3 resimden 1. Asus Q505UA-BI5T7 Screen Replacement: adım 5, 3 resimden 2. Asus Q505UA-BI5T7 Screen Replacement: adım 5, 3 resimden 3.
    • Use a plastic opening tool to gently pry off the connected panel.

  6. Asus Q505UA-BI5T7 Screen Replacement: adım 6, 1 resimden 1.
    • Gently lift the battery.

  7. Asus Q505UA-BI5T7 Screen Replacement, Screen: adım 7, 3 resimden 1. Asus Q505UA-BI5T7 Screen Replacement, Screen: adım 7, 3 resimden 2. Asus Q505UA-BI5T7 Screen Replacement, Screen: adım 7, 3 resimden 3.
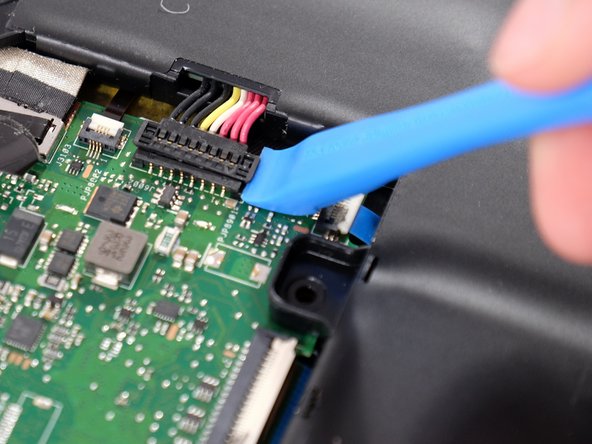
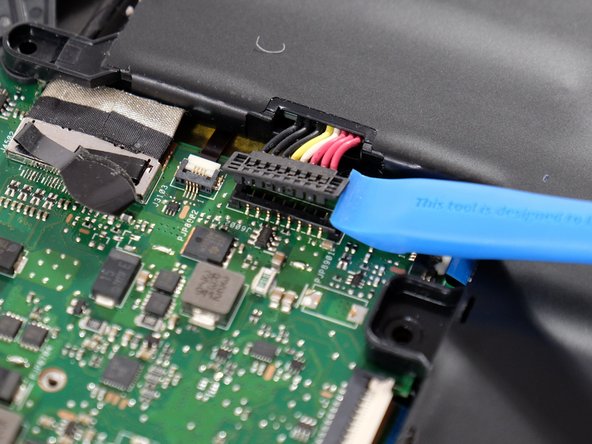
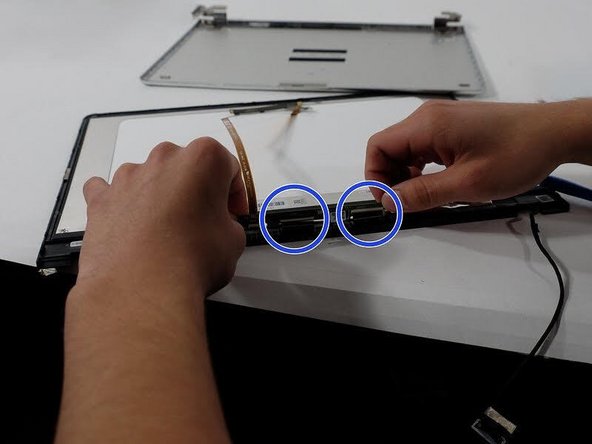
    • After following the battery removal guide, use your Ifixit opening tool to pry the two screen connectors off of the laptop motherboard.

    • The screen connector next to the fan must be unwrapped from around the fan so it is free

  8. Asus Q505UA-BI5T7 Screen Replacement: adım 8, 3 resimden 1. Asus Q505UA-BI5T7 Screen Replacement: adım 8, 3 resimden 2. Asus Q505UA-BI5T7 Screen Replacement: adım 8, 3 resimden 3.
    • Use a Phillips #0 screwdriver to remove the three 5 mm screws securing each hinge on the laptop.

  9. Asus Q505UA-BI5T7 Screen Replacement: adım 9, 1 resimden 1.
    • Then, gently open the screen a bit and remove the screen from the hinges, being careful with the screen connectors.

  10. Asus Q505UA-BI5T7 Screen Replacement: adım 10, 3 resimden 1. Asus Q505UA-BI5T7 Screen Replacement: adım 10, 3 resimden 2. Asus Q505UA-BI5T7 Screen Replacement: adım 10, 3 resimden 3.
    • After removing the screen from the laptop, use a metal pry tool to get within the gap of the screen and the casing.

    • Go all around the screen with the pry tool and detach and lift the screen from the casing.

  11. Asus Q505UA-BI5T7 Screen Replacement: adım 11, 3 resimden 1. Asus Q505UA-BI5T7 Screen Replacement: adım 11, 3 resimden 2. Asus Q505UA-BI5T7 Screen Replacement: adım 11, 3 resimden 3.
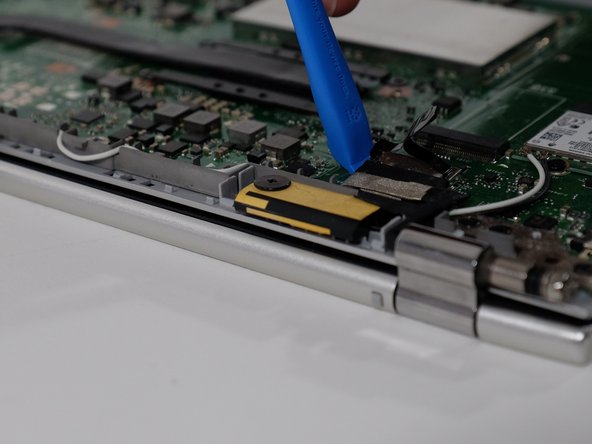
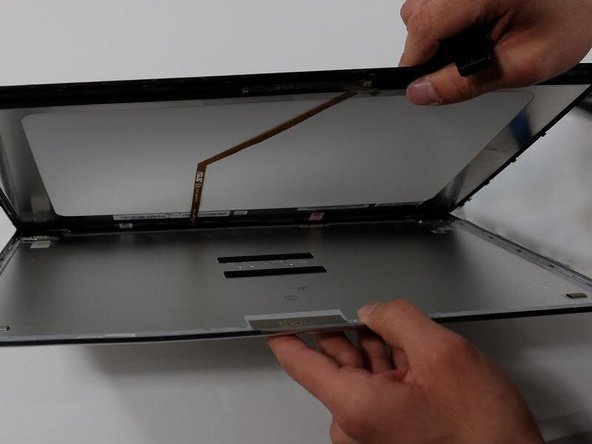
    • Using your Ifixit opening tool, remove the camera stuck on with an adhesive strip off of the top of the screen.

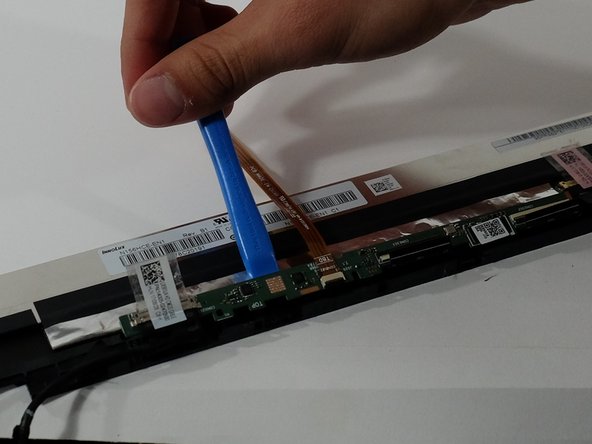
    • Using the same tool, pry and unclip the bottom touchscreen module from the screen.

    • Before removing the module from the screen, unclip the two ribbon cables still keeping it tethered.

    • Be sure to be careful with the ribbon cables so as to not tear them.

    • You can now remove the touchscreen module connected to the camera from the old screen and transfer it to your new one.

Sonuç

To reassemble your device, follow these instructions in reverse order.

Ivan Melgar

Üyelik tarihi: 09/27/23

121 İtibar

1 Kılavuz yazıldı

0 Yorum

Yorum Ekle

İstatistikleri Görüntüle:

Son 24 Saat: 1

Son 7 gün: 2

Son 30 gün: 5

Her zaman: 47