Ana içeriğe geç

Asus ROG G74SX-DH73-3D Track Pad Buttons Replacement

Neye ihtiyacın var

  1. Asus ROG G74SX-DH73-3D Track Pad Buttons Replacement, Battery: adım 1, 3 resimden 1. Asus ROG G74SX-DH73-3D Track Pad Buttons Replacement, Battery: adım 1, 3 resimden 2. Asus ROG G74SX-DH73-3D Track Pad Buttons Replacement, Battery: adım 1, 3 resimden 3.
    • With your right hand, push the latch completely up to where you can see the battery pop slightly up. Pick and pull at the tab with your left hand.

    • You can now fully remove the battery from the device.

  2. Asus ROG G74SX-DH73-3D Track Pad Buttons Replacement, Track Pad Buttons: adım 2, 2 resimden 1. Asus ROG G74SX-DH73-3D Track Pad Buttons Replacement, Track Pad Buttons: adım 2, 2 resimden 2.
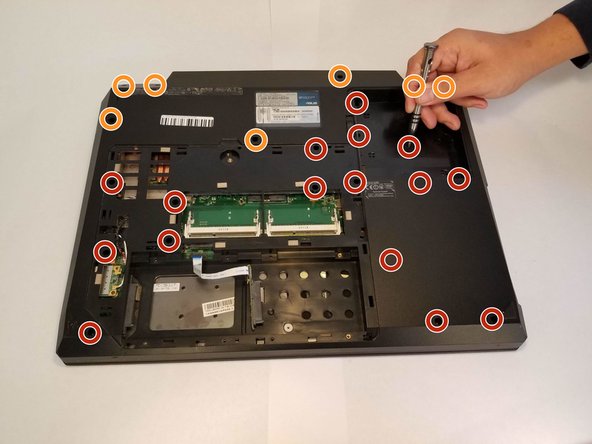
    • Remove the large flathead screw holding the back cover in place.

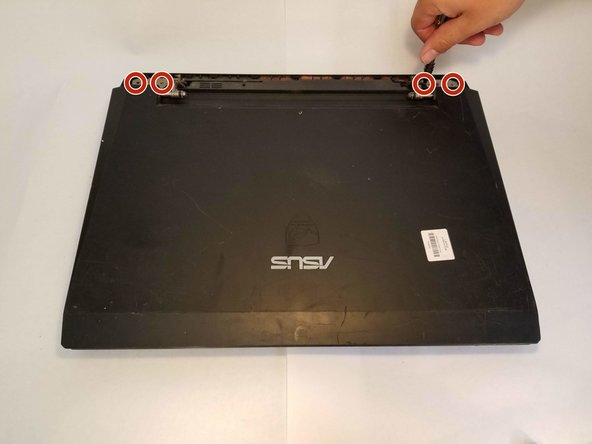
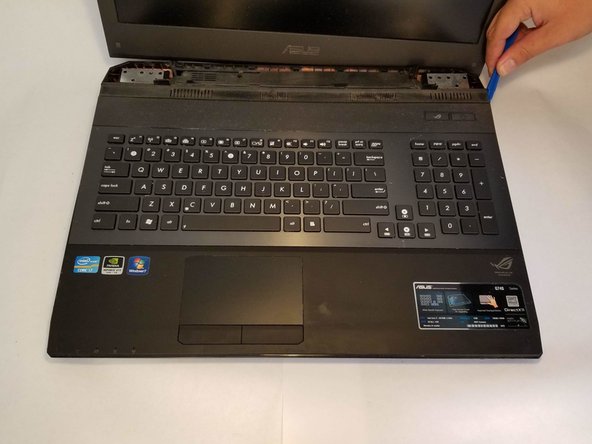
    • Pull the cover off by prying it open starting from the top center and moving outwards.

  3. Asus ROG G74SX-DH73-3D Track Pad Buttons Replacement: adım 3, 2 resimden 1. Asus ROG G74SX-DH73-3D Track Pad Buttons Replacement: adım 3, 2 resimden 2.
    • Remove the eight short screws holding in the two metal covers near the bottom.

    • Remove the two metal covers.

  4. Asus ROG G74SX-DH73-3D Track Pad Buttons Replacement: adım 4, 2 resimden 1. Asus ROG G74SX-DH73-3D Track Pad Buttons Replacement: adım 4, 2 resimden 2.
    • Remove the battery to access the screws under it.

    • Remove these 16 screws with a regular Phillips head screw-driver.

    • These Phillips head screws will require a longer bit or an extension.

  5. Asus ROG G74SX-DH73-3D Track Pad Buttons Replacement: adım 5, 2 resimden 1. Asus ROG G74SX-DH73-3D Track Pad Buttons Replacement: adım 5, 2 resimden 2.
    • Flip the device back over.

    • Pull off the plastic cover behind the screen.

    • Remove the four Phillips head screws holding the screen in place.

  6. Asus ROG G74SX-DH73-3D Track Pad Buttons Replacement: adım 6, 2 resimden 1. Asus ROG G74SX-DH73-3D Track Pad Buttons Replacement: adım 6, 2 resimden 2.
    • With the screen removed, pry the piece that has the keyboard and the track pad on it.

  7. Asus ROG G74SX-DH73-3D Track Pad Buttons Replacement: adım 7, 2 resimden 1. Asus ROG G74SX-DH73-3D Track Pad Buttons Replacement: adım 7, 2 resimden 2.
    • Remove the two Phillips head screws holding the buttons in place.

Sonuç

To reassemble your device, follow these instructions in reverse order.

0 Yorum

Yorum Ekle

İstatistikleri Görüntüle:

Son 24 Saat: 0

Son 7 gün: 1

Son 30 gün: 5

Her zaman: 369