Ana içeriğe geç

Asus ROG GL551J Optical Drive Replacement

Neye ihtiyacın var

  1. Asus ROG GL551J Optical Drive Replacement, Battery: adım 1, 1 resimden 1.
    • Lay the device on a flat surface with the battery facing up.

    • Be sure to wear ESD or Rubber gloves to protect the computer components.

  2. Asus ROG GL551J Optical Drive Replacement: adım 2, 1 resimden 1.
    • Push the latch found below the battery to the unlock position.

  3. Asus ROG GL551J Optical Drive Replacement: adım 3, 1 resimden 1.
    • Pull the battery out.

  4. Asus ROG GL551J Optical Drive Replacement, Optical Drive: adım 4, 2 resimden 1. Asus ROG GL551J Optical Drive Replacement, Optical Drive: adım 4, 2 resimden 2.
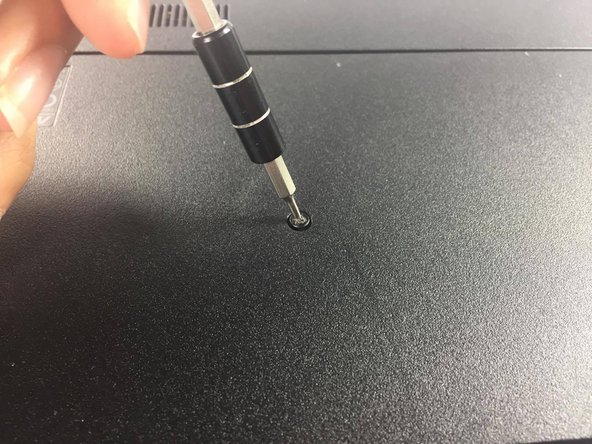
    • Locate and unscrew the screw which connects the optical drive to the chassis

  5. Asus ROG GL551J Optical Drive Replacement: adım 5, 1 resimden 1.
    • Grasp the edge of the optical drive

  6. Asus ROG GL551J Optical Drive Replacement: adım 6, 1 resimden 1.
    • Pull on the optical drive gently. With little resistance, the optical drive should just slide out

Sonuç

To reassemble your device, follow these instructions in reverse order.

4 farklı kişi bu kılavuzu tamamladı.

Philip Muino

Üyelik tarihi: 02/15/17

179 İtibar

1 Kılavuz yazıldı

Ekip

USF Tampa, Team 5-4, Lacy Spring 2017 USF Tampa, Team 5-4, Lacy Spring 2017 üyesi

USFT-LACY-S17S5G4

4 Üyeler

5 adet Kılavuz yazıldı

Bir Yorum

ok.so , if someone had replaced the dvd rom with a hard disk drive i nust do the same for replace the drive?

anix - Yanıt

Yorum Ekle

İstatistikleri Görüntüle:

Son 24 Saat: 0

Son 7 gün: 2

Son 30 gün: 10

Her zaman: 1,985