Ana içeriğe geç

Asus TUF Gaming FX505DY Heat Sink & Fan Replacement

Neye ihtiyacın var

  1. Asus TUF Gaming FX505DY Heat Sink & Fan Replacement, Back Case: adım 1, 1 resimden 1.
    • Turn off the laptop.

    • Disconnect the charging cable.

    • Failure to disconnect the charging cable and power down the computer could result in personal or property damage.

    • Flip the laptop so the back is facing up.

  2. Asus TUF Gaming FX505DY Heat Sink & Fan Replacement: adım 2, 2 resimden 1. Asus TUF Gaming FX505DY Heat Sink & Fan Replacement: adım 2, 2 resimden 2.
    • Use a Phillips #1 screwdriver to remove the five 6 mm screws that secure the back panel.

    • Use the same screwdriver to remove the six 13 mm screws securing the back panel.

  3. Asus TUF Gaming FX505DY Heat Sink & Fan Replacement: adım 3, 2 resimden 1. Asus TUF Gaming FX505DY Heat Sink & Fan Replacement: adım 3, 2 resimden 2.
    • Insert the plastic opening tool at a corner and pry up along the edges, leaving the back side with the hinges for last.

    • Do not insert the opening tool too far into the laptop to avoid damaging internal components.

  4. Asus TUF Gaming FX505DY Heat Sink & Fan Replacement: adım 4, 2 resimden 1. Asus TUF Gaming FX505DY Heat Sink & Fan Replacement: adım 4, 2 resimden 2.
    • Gently lift up the back panel to release any remaining clips on the side with the hinges and remove the panel.

  5. Asus TUF Gaming FX505DY Heat Sink & Fan Replacement, Heat Sink & Fan: adım 5, 3 resimden 1. Asus TUF Gaming FX505DY Heat Sink & Fan Replacement, Heat Sink & Fan: adım 5, 3 resimden 2. Asus TUF Gaming FX505DY Heat Sink & Fan Replacement, Heat Sink & Fan: adım 5, 3 resimden 3.
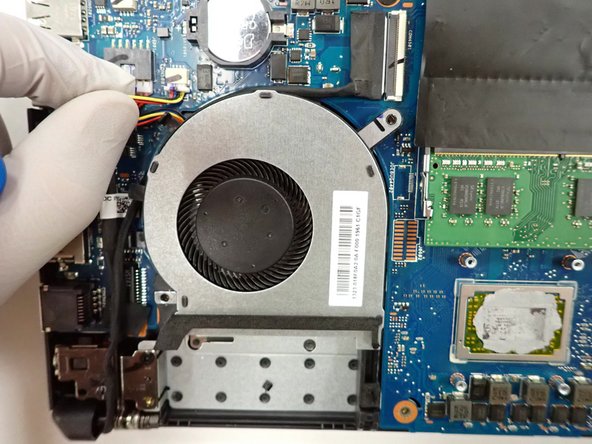
    • With a Phillips 0-bit screwdriver, remove eight 5.0 mm screws on the silver brackets

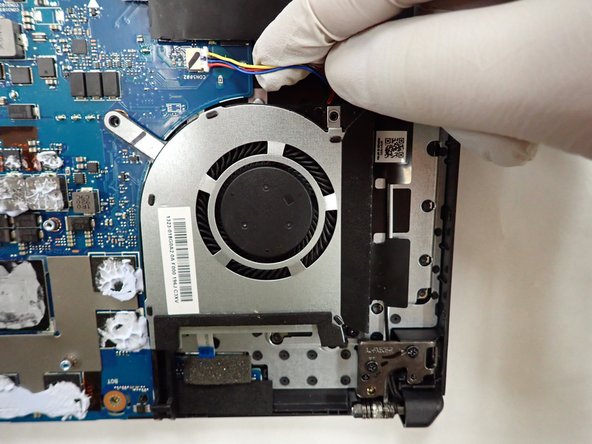
    • With a Phillips 0-bit screwdriver, remove two 5.0 mm screws holding the edge of the fans in place

  6. Asus TUF Gaming FX505DY Heat Sink & Fan Replacement: adım 6, 3 resimden 1. Asus TUF Gaming FX505DY Heat Sink & Fan Replacement: adım 6, 3 resimden 2. Asus TUF Gaming FX505DY Heat Sink & Fan Replacement: adım 6, 3 resimden 3.
    • Disconnect two power cables connecting fans to the motherboard.

    • Once all cables and screws are removed, carefully lift up and remove the fans and heat sink

Sonuç

To reassemble your device, follow these instructions in reverse order.

2 farklı kişi bu kılavuzu tamamladı.

0 Yorum

Yorum Ekle

İstatistikleri Görüntüle:

Son 24 Saat: 3

Son 7 gün: 7

Son 30 gün: 58

Her zaman: 1,225