Ana içeriğe geç

Asus V500CA-DB51T Speaker Replacement

Neye ihtiyacın var

  1. Asus V500CA-DB51T Speaker Replacement, Battery: adım 1, 2 resimden 1. Asus V500CA-DB51T Speaker Replacement, Battery: adım 1, 2 resimden 2.
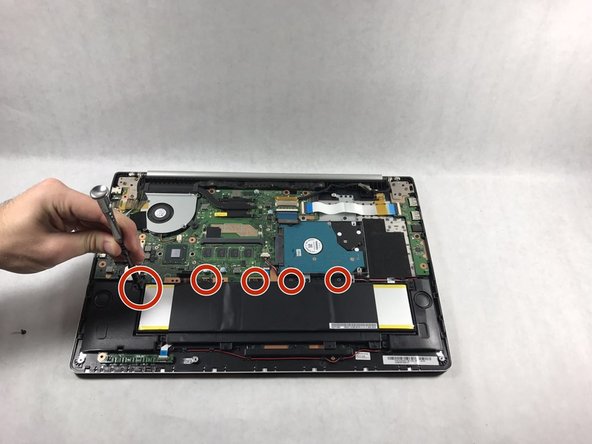
    • Remove the following ten screws securing the lower case to the upper case:

    • The top left and right corners have .7 cm screws.

    • The two top-middle and four bottom are .4 cm screws.

    • The middle left and right are .8 cm screws.

    • Remove the screws using the Phillips #00 screwdriver.

  2. Asus V500CA-DB51T Speaker Replacement: adım 2, 2 resimden 1. Asus V500CA-DB51T Speaker Replacement: adım 2, 2 resimden 2.
    • Wedge your fingers between the upper case and the lower case.

    • Gently pull the lower case away from the upper case.

    • Remove the lower case and set it aside.

  3. Asus V500CA-DB51T Speaker Replacement: adım 3, 1 resimden 1.
    • Use the flat end of the blue plastic opening tool to lift the battery connector up out of its socket on the motherboard.

  4. Asus V500CA-DB51T Speaker Replacement: adım 4, 2 resimden 1. Asus V500CA-DB51T Speaker Replacement: adım 4, 2 resimden 2.
    • Remove the tri-point screws that secure the battery to the casing.

    • All screws securing the battery in place are .5 cm tri-point screws.

  5. Asus V500CA-DB51T Speaker Replacement: adım 5, 3 resimden 1. Asus V500CA-DB51T Speaker Replacement: adım 5, 3 resimden 2. Asus V500CA-DB51T Speaker Replacement: adım 5, 3 resimden 3.
    • Use the opening tool to pop up the battery away from the casing.

  6. Asus V500CA-DB51T Speaker Replacement, Hard Drive: adım 6, 3 resimden 1. Asus V500CA-DB51T Speaker Replacement, Hard Drive: adım 6, 3 resimden 2. Asus V500CA-DB51T Speaker Replacement, Hard Drive: adım 6, 3 resimden 3.
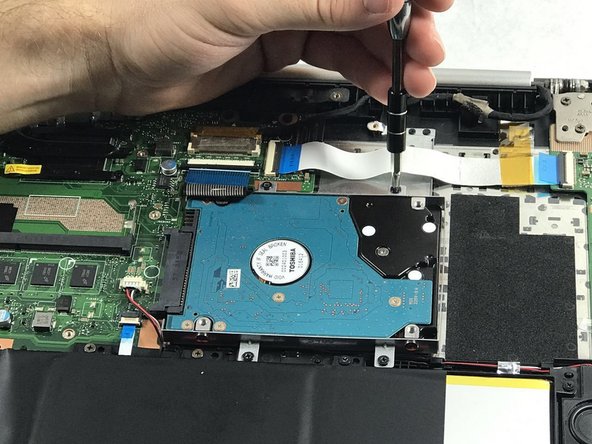
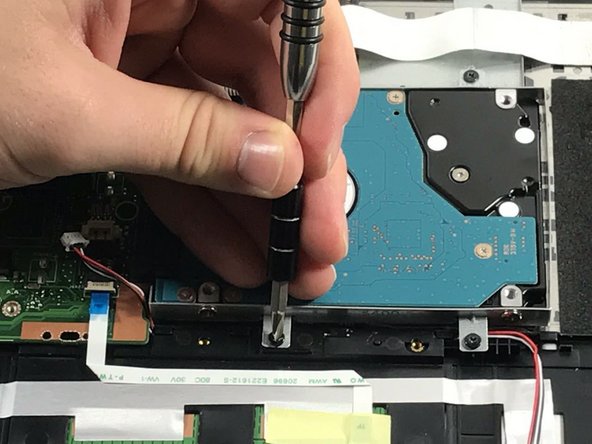
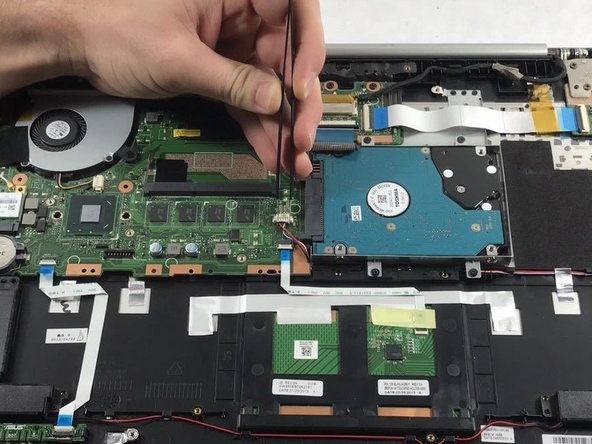
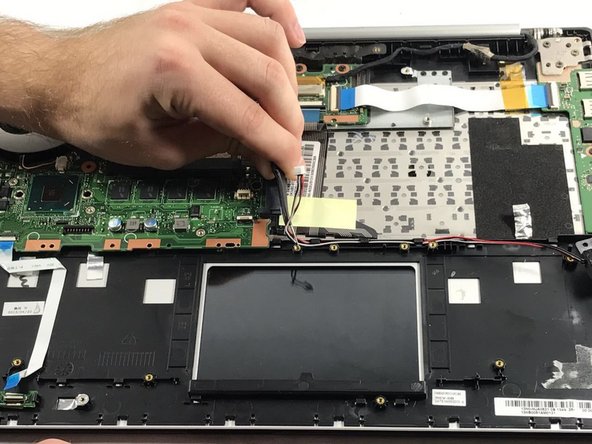
    • Remove the following screws securing the battery connector board to the logic board:

    • The red screws are size 2.3 cm T6 Torx

    • The orange screws are size 2.4 cm T6 Torx

  7. Asus V500CA-DB51T Speaker Replacement: adım 7, 2 resimden 1. Asus V500CA-DB51T Speaker Replacement: adım 7, 2 resimden 2.
    • Remove the SSD (Solid State Drive) assembly from the upper case.

  8. Asus V500CA-DB51T Speaker Replacement, Speaker: adım 8, 3 resimden 1. Asus V500CA-DB51T Speaker Replacement, Speaker: adım 8, 3 resimden 2. Asus V500CA-DB51T Speaker Replacement, Speaker: adım 8, 3 resimden 3.
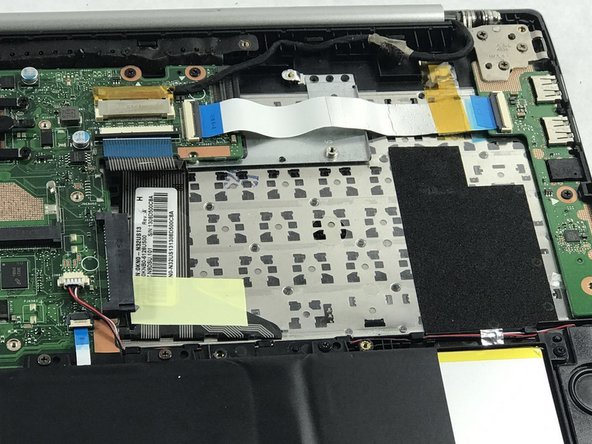
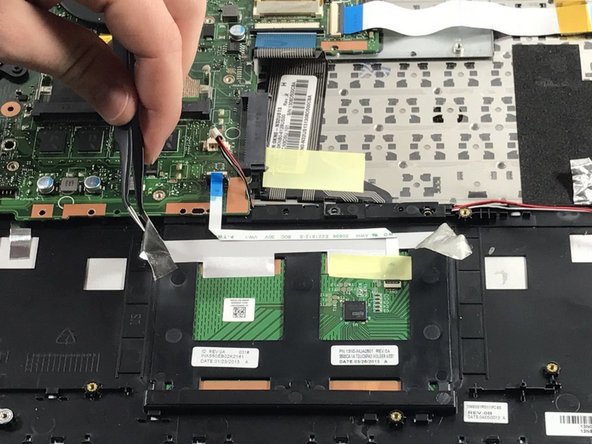
    • Using the tweezers gently remove the ribbon cable.

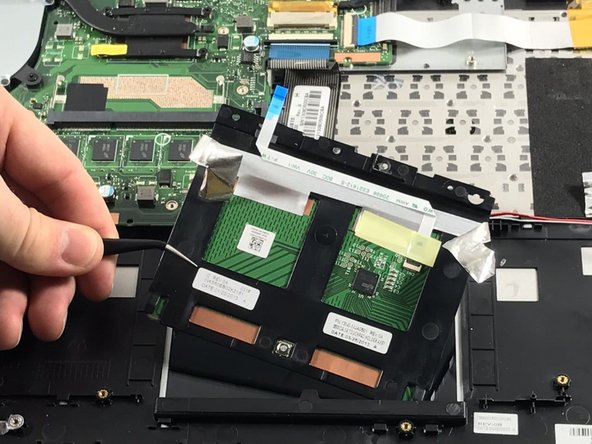
    • Also using the tweezers pry off the metallic tape on both sides of the mouse pad.

    • Remove the mouse pad from the main assembly.

  9. Asus V500CA-DB51T Speaker Replacement: adım 9, 3 resimden 1. Asus V500CA-DB51T Speaker Replacement: adım 9, 3 resimden 2. Asus V500CA-DB51T Speaker Replacement: adım 9, 3 resimden 3.
    • Remove the ribbon cable for the LED lights.

    • Remove the speaker wire cable from the main board.

    • Slowly pull the speaker wire from the assembly.

  10. Asus V500CA-DB51T Speaker Replacement: adım 10, 3 resimden 1. Asus V500CA-DB51T Speaker Replacement: adım 10, 3 resimden 2. Asus V500CA-DB51T Speaker Replacement: adım 10, 3 resimden 3.
    • Gently pry the left speaker from the assembly.

    • Then pry the right speaker from the assembly.

Sonuç

To reassemble your device, follow these instructions in reverse order.

Galen P Garofalo

Üyelik tarihi: 10/17/17

670 İtibar

6 adet Kılavuz yazıldı

Ekip

UMass Dartmouth, Team S6-G2, Rockett Fall 2017 UMass Dartmouth, Team S6-G2, Rockett Fall 2017 üyesi

UMASSD-ROCKETT-F17S6G2

3 Üyeler

6 adet Kılavuz yazıldı

0 Yorum

Yorum Ekle

İstatistikleri Görüntüle:

Son 24 Saat: 1

Son 7 gün: 5

Son 30 gün: 8

Her zaman: 137