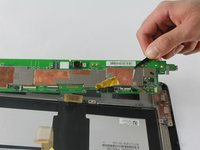
Ana içeriğe geç

Asus VivoTab Smart Motherboard Replacement

Neye ihtiyacın var

  1. Asus VivoTab Smart Motherboard Replacement, Motherboard: adım 1, 3 resimden 1. Asus VivoTab Smart Motherboard Replacement, Motherboard: adım 1, 3 resimden 2. Asus VivoTab Smart Motherboard Replacement, Motherboard: adım 1, 3 resimden 3.
    • Power off the device before you begin disassembly.

    • Place the device face down on a flat surface.

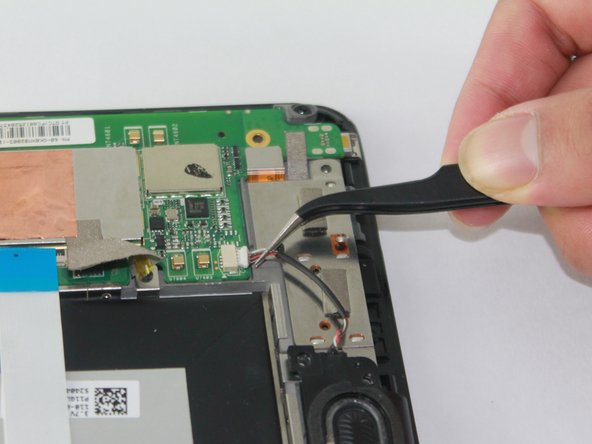
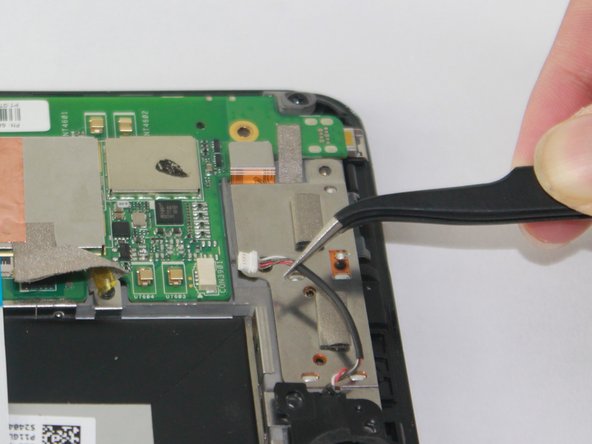
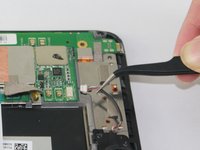
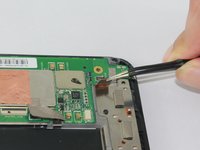
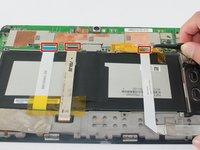
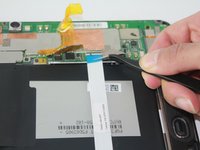
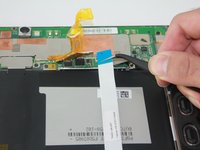
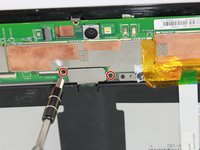
    • Remove the back panel with the plastic opening tool by sliding the tool around the edge of the panel.

  2. Asus VivoTab Smart Motherboard Replacement: adım 2, 3 resimden 1. Asus VivoTab Smart Motherboard Replacement: adım 2, 3 resimden 2. Asus VivoTab Smart Motherboard Replacement: adım 2, 3 resimden 3.
    • Unplug the ribbon that connects to the camera by pulling outward on it with tweezers.

    • Remove the silver plate that sits on top of the camera lens.

  3. Asus VivoTab Smart Motherboard Replacement: adım 3, 3 resimden 1. Asus VivoTab Smart Motherboard Replacement: adım 3, 3 resimden 2. Asus VivoTab Smart Motherboard Replacement: adım 3, 3 resimden 3.
    • Use tweezers to grab the speaker cable near the white plug and pull to disconnect it.

  4. Asus VivoTab Smart Motherboard Replacement: adım 4, 2 resimden 1. Asus VivoTab Smart Motherboard Replacement: adım 4, 2 resimden 2.
    • Gently pull outward on the ribbon to with tweezers to disconnect it.

  5. Asus VivoTab Smart Motherboard Replacement: adım 5, 3 resimden 1. Asus VivoTab Smart Motherboard Replacement: adım 5, 3 resimden 2. Asus VivoTab Smart Motherboard Replacement: adım 5, 3 resimden 3.
    • Peel back the tape covering the ribbons.

  6. Asus VivoTab Smart Motherboard Replacement: adım 6, 3 resimden 1. Asus VivoTab Smart Motherboard Replacement: adım 6, 3 resimden 2. Asus VivoTab Smart Motherboard Replacement: adım 6, 3 resimden 3.
    • Unplug the 3 ribbons by pulling outward on them with a pair of tweezers.

  7. Asus VivoTab Smart Motherboard Replacement: adım 7, 3 resimden 1. Asus VivoTab Smart Motherboard Replacement: adım 7, 3 resimden 2. Asus VivoTab Smart Motherboard Replacement: adım 7, 3 resimden 3.
    • Remove two 2.7 mm Phillips #00 screws holding down the pressure plate.

    • Use tweezers to lift back the battery connector, which is located directly under the pressure plate.

  8. Asus VivoTab Smart Motherboard Replacement: adım 8, 2 resimden 1. Asus VivoTab Smart Motherboard Replacement: adım 8, 2 resimden 2.
    • Remove seven 3.7 mm Phillips #00 screws.

    • Remove one 2.7 mm Phillips #00 screw.

  9. Asus VivoTab Smart Motherboard Replacement: adım 9, 2 resimden 1. Asus VivoTab Smart Motherboard Replacement: adım 9, 2 resimden 2.
    • Slide the tweezers under the motherboard and lift up to remove the motherboard.

Sonuç

To reassemble your device, follow these instructions in reverse order.

Bir başkası bu kılavuzu tamamladı.

Les Clarke

Üyelik tarihi: 10/06/16

285 İtibar

1 Kılavuz yazıldı

Ekip

USF Tampa, Team 2-4, Sullivan Fall 2016 USF Tampa, Team 2-4, Sullivan Fall 2016 üyesi

USFT-SULLIVAN-F16S2G4

4 Üyeler

5 adet Kılavuz yazıldı

0 Yorum

Yorum Ekle

İstatistikleri Görüntüle:

Son 24 Saat: 0

Son 7 gün: 1

Son 30 gün: 12

Her zaman: 1,260