Bu sürüm, hatalı düzenlemeler içerebilir. En son doğrulanmış bellek kopyası dönün.
Neye ihtiyacın var
-
Bu adım çevrilmemiş. Çevrilmesine yardım edin
-
Make sure the device is turned off and disconnected from the battery charger.
-
-
Bu adım çevrilmemiş. Çevrilmesine yardım edin
-
Remove all nine screws from the bottom of the device using a T5 screwdriver.
-
Carefully remove the bottom cover.
-
-
Bu adım çevrilmemiş. Çevrilmesine yardım edin
-
Unhook the red, black, and white coiled switch.
-
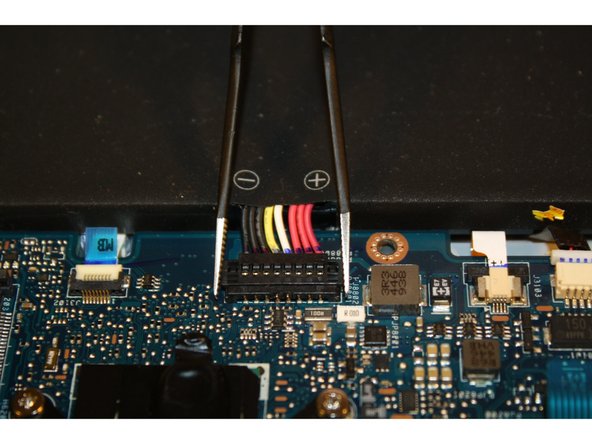
Detach the positive and negative red, black, yellow, and white switch from the motherboard.
-
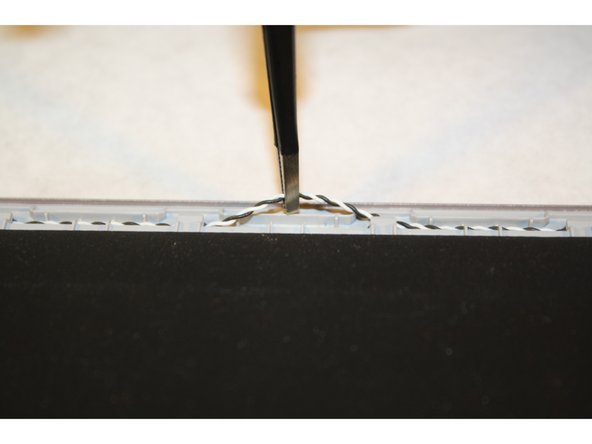
Unhook the black and white coiled wire from the top of the battery pack.
-
-
-
Bu adım çevrilmemiş. Çevrilmesine yardım edin
-
Remove the three screws connecting the SSD to the motherboard.
-
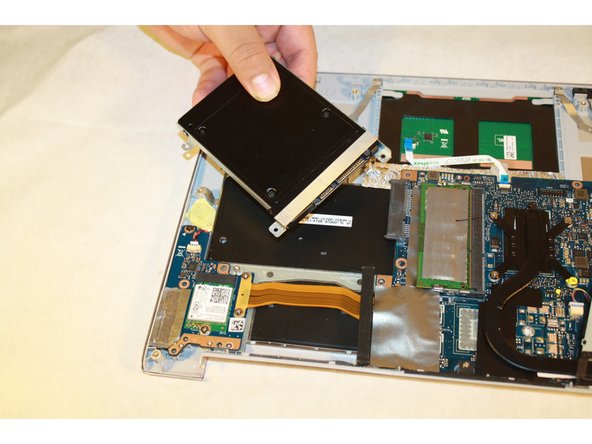
Gently lift and pull out the SSD.
-
-
Bu adım çevrilmemiş. Çevrilmesine yardım edin
-
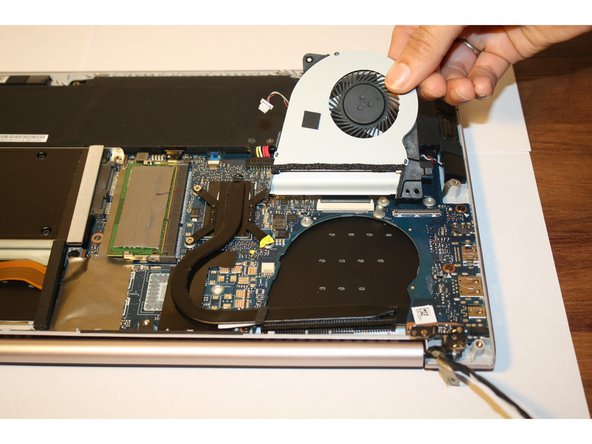
Remove the screw attaching the cooling fan to the motherboard.
-
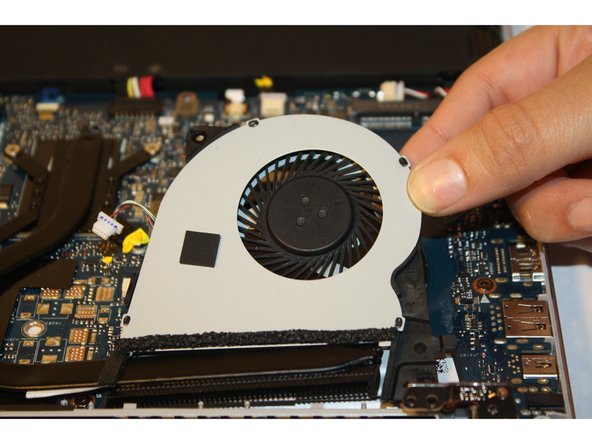
Lift and remove the cooling fan.
-
-
Bu adım çevrilmemiş. Çevrilmesine yardım edin
-
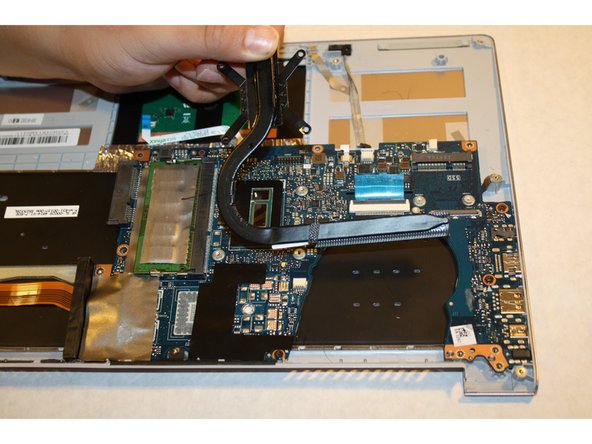
Remove the four Phillips #1 screws attached to the black covered copper bar next to the cooling fan.
-
Gently lift and remove the copper bar.
-
-
Bu adım çevrilmemiş. Çevrilmesine yardım edin
-
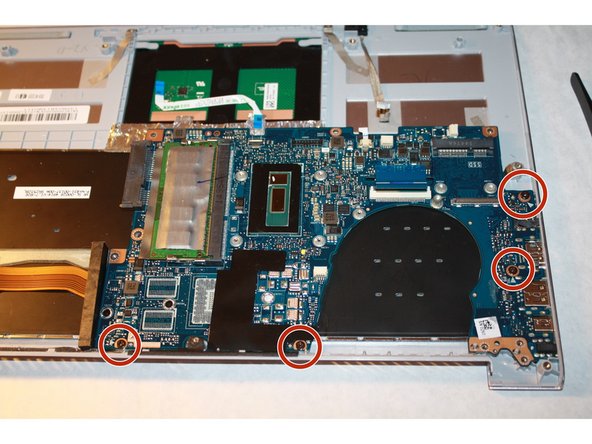
Remove the silver tape to reveal the fourth screw on the motherboard.
-
Detach the motherboard by removing the four Phillips #1 screws.
-
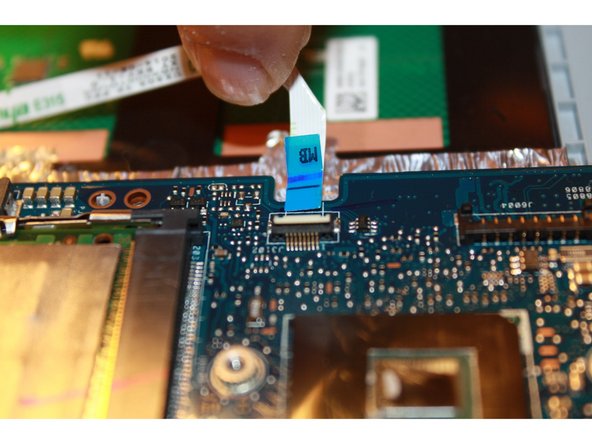
Detach the white wire connecting the motherboard by lifting the black flap and pulling it out.
-
-
Bu adım çevrilmemiş. Çevrilmesine yardım edin
-
By using ESD-safe tweezers, remove the gray colored wire.
-
Remove the white wire using tweezers.
-
Remove the blue colored wire by lifting the black flap and pulling the blue flap out.
-
-
Bu adım çevrilmemiş. Çevrilmesine yardım edin
-
Remove the white wire with the blue ends by lifting the black flap with tweezers and gently pulling out.
-
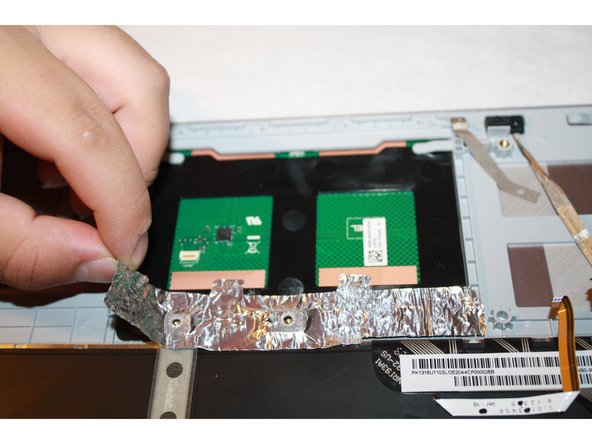
Gently remove the silver tape using tweezers.
-
Remove the Phillips #1 screws.
-
-
Bu adım çevrilmemiş. Çevrilmesine yardım edin
-
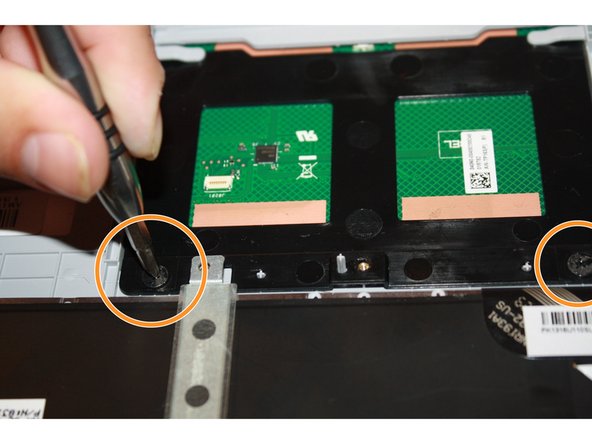
Place the plastic opening tools under the trackpad.
-
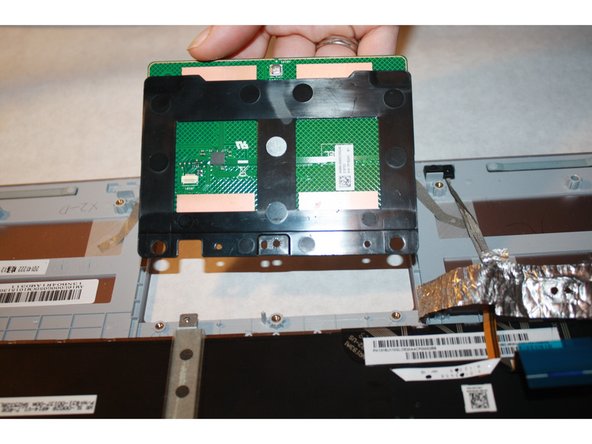
Gently pull out and remove the trackpad.
-


İptal et: Bu kılavuzu tamamlamadım.
3 farklı kişi bu kılavuzu tamamladı.
Ekip

Sam Houston State, Team 1-3, Blackburne Fall 2015 Sam Houston State, Team 1-3, Blackburne Fall 2015 üyesi
SHSU-BLACKBURNE-F15S1G3
3 Üyeler
4 adet Kılavuz yazıldı