Bu sürüm, hatalı düzenlemeler içerebilir. En son doğrulanmış bellek kopyası dönün.
Neye ihtiyacın var
-
Bu adım çevrilmemiş. Çevrilmesine yardım edin
-
Use the metal spudger to peel back the rubber from the bottom of the auxiliary charging base to reveal the screw.
-
-
Bu adım çevrilmemiş. Çevrilmesine yardım edin
-
Use the screwdriver with the J0 bit attatched to detach all four 10 mm screws from the charging base.
-
-
-
Bu adım çevrilmemiş. Çevrilmesine yardım edin
-
Pull the top cover off of the charging base to reveal the internal chip.
-
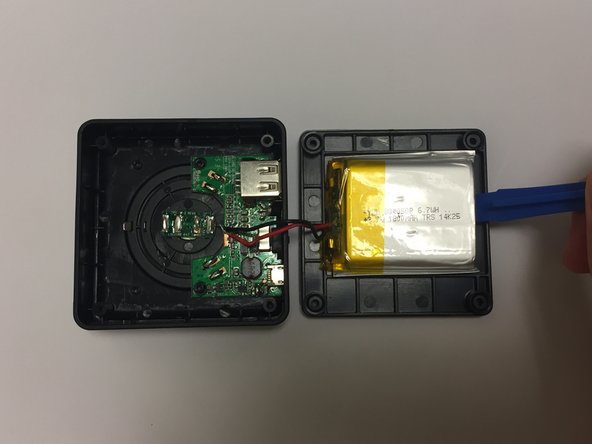
Use the plastic opening tool to pry the battery from the top cover.
-
-
Bu adım çevrilmemiş. Çevrilmesine yardım edin
-
Use the tweezers to carefully detach the wires from the internal chip.
-
-
Bu adım çevrilmemiş. Çevrilmesine yardım edin
-
Use the tweezers to remove the red wire attached to the motherboard.
-
-
Bu adım çevrilmemiş. Çevrilmesine yardım edin
-
Use the plastic opening tool to carefully lift and remove the motherboard from the charging base.
-


İptal et: Bu kılavuzu tamamlamadım.
Bir başkası bu kılavuzu tamamladı.
Ekip

Baylor, Team S1-G1, Johnson Spring 2018 Baylor, Team S1-G1, Johnson Spring 2018 üyesi
BU-JOHNSON-S18S1G1
3 Üyeler
5 adet Kılavuz yazıldı