Bu sürüm, hatalı düzenlemeler içerebilir. En son doğrulanmış bellek kopyası dönün.
Neye ihtiyacın var
-
Bu adım çevrilmemiş. Çevrilmesine yardım edin
-
Turn the device off by holding down the power button for up to 5 seconds and then tapping the "Power off" button on the screen.
-
Remove the rear cover using your hands at the lip on the device back cover. No tools required.
-
Remove the battery by lifting the lower edge of the battery up first.
-
-
Bu adım çevrilmemiş. Çevrilmesine yardım edin
-
Remove the 12x3mm screws from the rear plate using the Phillips#000 screwdriver.
-
-
-
Bu adım çevrilmemiş. Çevrilmesine yardım edin
-
Insert the plastic prying tool in between the plastic frame and the device.
-
Keep the phone on the surface with its screen down.
-
-
Bu adım çevrilmemiş. Çevrilmesine yardım edin
-
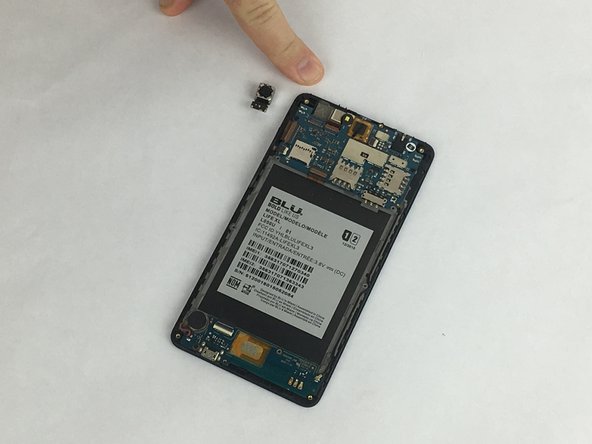
Use the plastic prying tool to gently push the rear camera out from its socket.
-
Take the camera out and set it aside.
-
-
Bu adım çevrilmemiş. Çevrilmesine yardım edin
-
Carefully place the new camera in the camera socket.
-
Apply a little force on the top of the camera to slide it in the socket.
-
Pop the camera in the socket and make sure its stable.
-


Ekip

USF Tampa, Team S2-G5, Eyestone Spring 2018 USF Tampa, Team S2-G5, Eyestone Spring 2018 üyesi
USFT-EYESTONE-S18S2G5
3 Üyeler
5 adet Kılavuz yazıldı