Ana içeriğe geç
Onarım Topluluğuna Katılın - Hesap Oluşturun

BRCK v1 Battery Replacement

Neye ihtiyacın var

    1. BRCK v1 Battery Replacement, Antenna: adım 1, 1 resimden 1.
      • Stand the device on its side so the antenna is sitting on the top.

      FixBot'a Sor
      Yorum Ekle

    2. BRCK v1 Battery Replacement: adım 2, 2 resimden 1. BRCK v1 Battery Replacement: adım 2, 2 resimden 2.
      Bu adımda kullanılan alet:
      Tweezers
      $4.99
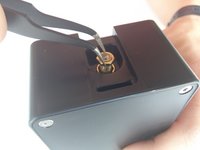
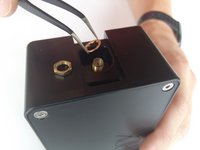
      • Use the tweezers to grip the neck of the antenna(the part closest to the device).

      • Use opposite hand to twist off the body of the antenna.

      FixBot'a Sor
      Yorum Ekle

    1. BRCK v1 Battery Replacement, Top Cover: adım 3, 1 resimden 1.
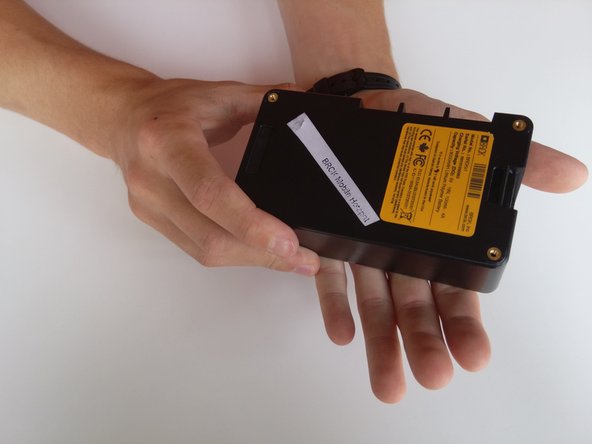
      • Place the face of the device showing BRCK face up.

      FixBot'a Sor
      Yorum Ekle

    2. BRCK v1 Battery Replacement: adım 4, 1 resimden 1.
      • Remove the four screws(4mm hex head) on the corners of the device with a Hex 2.0 Screwdriver.

      FixBot'a Sor

      Yorum Ekle

    3. BRCK v1 Battery Replacement: adım 5, 1 resimden 1.
      • Remove the top cover.

      FixBot'a Sor
      Yorum Ekle

    1. BRCK v1 Battery Replacement, Motherboard: adım 6, 2 resimden 1. BRCK v1 Battery Replacement, Motherboard: adım 6, 2 resimden 2.
      • Remove the nut and washer from the RF connector, located where the antenna was connected.

      FixBot'a Sor
      Yorum Ekle

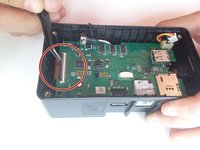
    2. BRCK v1 Battery Replacement: adım 7, 2 resimden 1. BRCK v1 Battery Replacement: adım 7, 2 resimden 2.
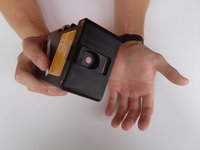
      • Unplug the red, black, and yellow wire connection by lifting up.

      FixBot'a Sor
      Yorum Ekle

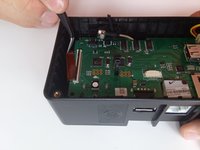
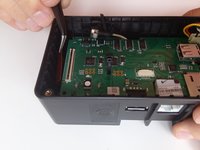
    3. BRCK v1 Battery Replacement: adım 8, 3 resimden 1. BRCK v1 Battery Replacement: adım 8, 3 resimden 2. BRCK v1 Battery Replacement: adım 8, 3 resimden 3.
      Bu adımda kullanılan alet:
      Tweezers
      $4.99
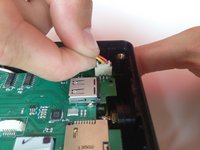
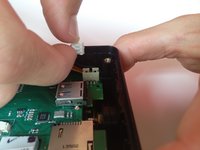
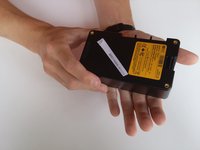
      • Carefully insert tweezers under the black tab, and lift to release the clip.

      • Slide the ribbon out from under the clip to free the motherboard.

      FixBot'a Sor
      Yorum Ekle

    4. BRCK v1 Battery Replacement: adım 9, 1 resimden 1.
      • Remove outside rubber covers by lifting them out of place.

      FixBot'a Sor
      Yorum Ekle

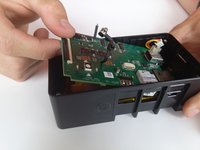
    5. BRCK v1 Battery Replacement: adım 10, 3 resimden 1. BRCK v1 Battery Replacement: adım 10, 3 resimden 2. BRCK v1 Battery Replacement: adım 10, 3 resimden 3.
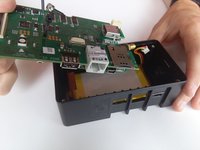
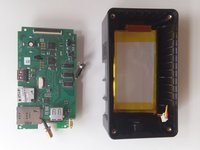
      • Slowly lift the motherboard out from the device by lifting it from the end next to the ribbon connection.

      • Lift and pull out of place.

      FixBot'a Sor

      Yorum Ekle

    1. BRCK v1 Battery Replacement, Battery: adım 11, 3 resimden 1. BRCK v1 Battery Replacement, Battery: adım 11, 3 resimden 2. BRCK v1 Battery Replacement, Battery: adım 11, 3 resimden 3.
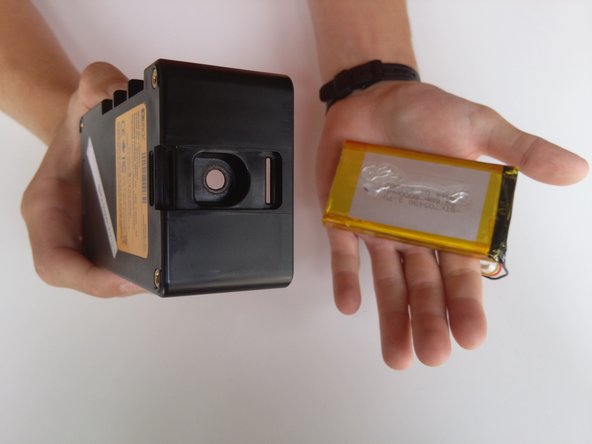
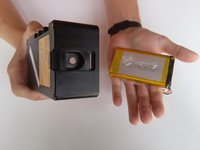
      • Flip device upside down. Hold the device and tap into your other hand with varying force to remove battery.

      • This may take a few tries to remove the battery.

      FixBot'a Sor

      Yorum Ekle

Sonuç

To reassemble your device, follow these instructions in reverse order.

İptal et: Bu kılavuzu tamamlamadım.

Jeret Buerger

Üyelik tarihi: 04/01/15

501 İtibar

5 adet Kılavuz yazıldı

Ekip

Cal Poly, Team 12-3, Lancaster Spring 2015 Cal Poly, Team 12-3, Lancaster Spring 2015 üyesi

CPSU-LANCASTER-S15S12G3

3 Üyeler

14 adet Kılavuz yazıldı

0Kılavuz Yorumları

Yorum Ekle

İstatistikleri Görüntüle:

Son 24 Saat: 0

Son 7 gün: 4

Son 30 gün: 16

Her zaman: 471