Ana içeriğe geç

Bu sürüm, hatalı düzenlemeler içerebilir. En son doğrulanmış bellek kopyası dönün.

Neye ihtiyacın var

  1. Bu adım çevrilmemiş. Çevrilmesine yardım edin

    : adım 1, 2 resimden 1. : adım 1, 2 resimden 2.
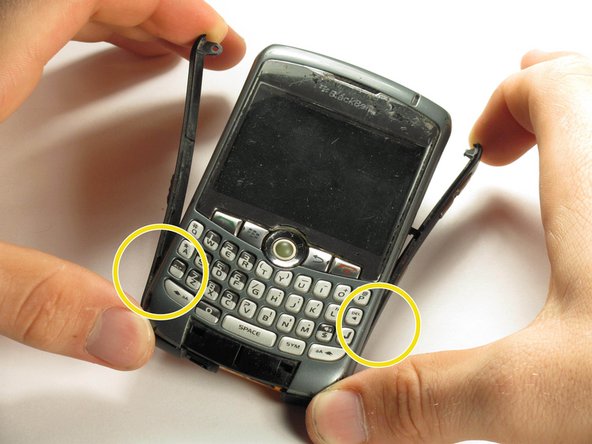
    • Hold the phone with the back facing you.

    • Press the silver tab down and remove the cover.

  2. Bu adım çevrilmemiş. Çevrilmesine yardım edin

    : adım 2, 1 resimden 1.
    • Pull up on the top edge of the battery to remove it.

  3. Bu adım çevrilmemiş. Çevrilmesine yardım edin

    : adım 3, 3 resimden 1. : adım 3, 3 resimden 2. : adım 3, 3 resimden 3.
    • Use a plastic opening tool to gently pry the bottom cover loose.

    • Do not use excessive force at risk of damaging the antenna, which is under this casing.

    • Pull the cover from the front of the phone after the back is loose.

  4. Bu adım çevrilmemiş. Çevrilmesine yardım edin

    : adım 4, 2 resimden 1. : adım 4, 2 resimden 2.
    • Remove the two top screws with a T5 Torx screwdriver.

    • The screws are 8mm long.

  5. Bu adım çevrilmemiş. Çevrilmesine yardım edin

    : adım 5, 2 resimden 1. : adım 5, 2 resimden 2.
    • Gently pry off the side casings from the top.

    • The side casings cannot be fully removed yet because they are screwed on at the bottom.

    • You will not need to remove the sides on the bottom.

  6. Bu adım çevrilmemiş. Çevrilmesine yardım edin

    : adım 6, 1 resimden 1.
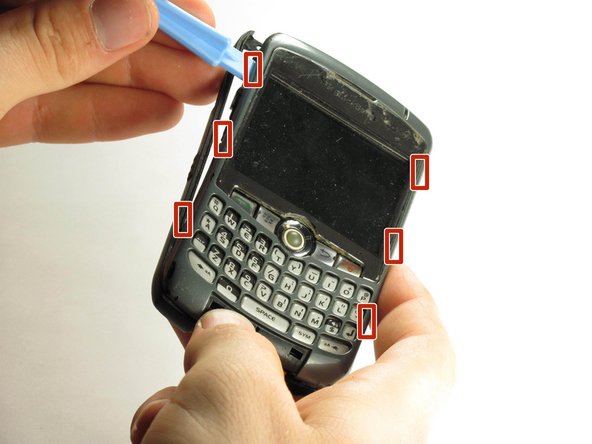
    • Use a plastic opening tool to detach the securing clips holding the the front panel in place.

    • There are six securing clips total.

  7. Bu adım çevrilmemiş. Çevrilmesine yardım edin

    : adım 7, 1 resimden 1.
    • Carefully remove the front panel.

    • You may need to apply some force in removing because the front panel is attached to the rest of the device with adhesive.

  8. Bu adım çevrilmemiş. Çevrilmesine yardım edin

    : adım 8, 3 resimden 1. : adım 8, 3 resimden 2. : adım 8, 3 resimden 3.
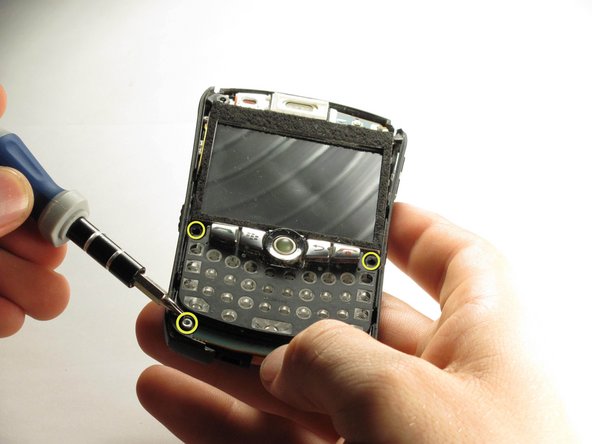
    • Use a T6 Torx screwdriver to remove the four screws located on the corners of the keyboard frame.

    • The screws are 6mm long.

  9. Bu adım çevrilmemiş. Çevrilmesine yardım edin

    : adım 9, 2 resimden 1. : adım 9, 2 resimden 2.
    • After the bottom two screws have been removed the side casings can be removed.

  10. Bu adım çevrilmemiş. Çevrilmesine yardım edin

    : adım 10, 3 resimden 1. : adım 10, 3 resimden 2. : adım 10, 3 resimden 3.
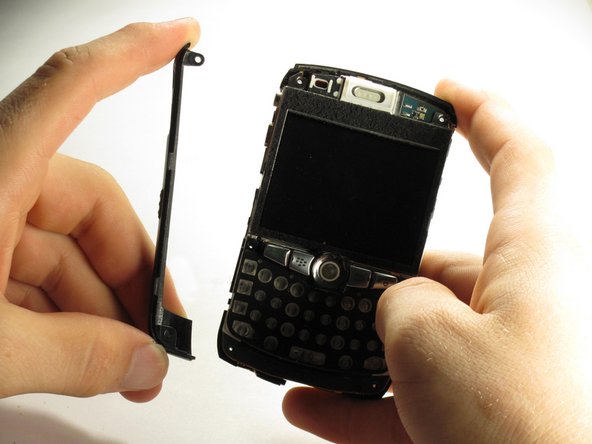
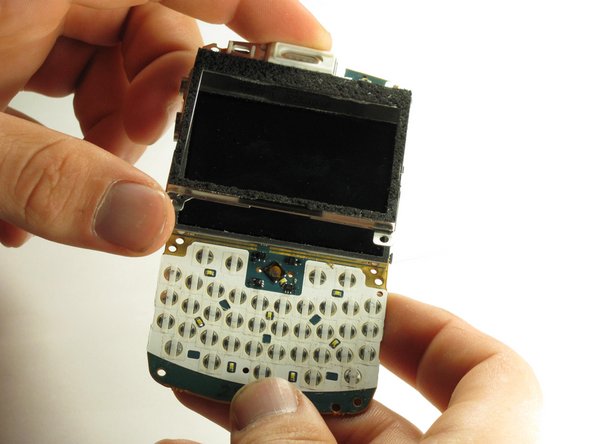
    • When all four screws are removed, the keyboard frame, screen housing, screen, and back casing can be separated.

    • The screen frame hooks on to the top of the motherboard with a small tab on the motherboard.

  11. Bu adım çevrilmemiş. Çevrilmesine yardım edin

    : adım 11, 1 resimden 1.
    • Place the motherboard on a flat surface with the LCD screen face up.

  12. Bu adım çevrilmemiş. Çevrilmesine yardım edin

    : adım 12, 3 resimden 1. : adım 12, 3 resimden 2. : adım 12, 3 resimden 3.
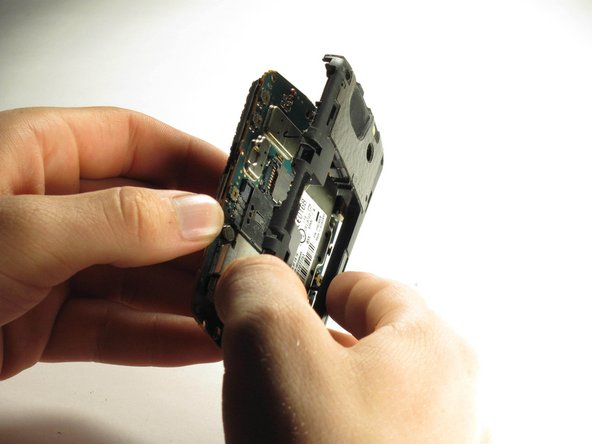
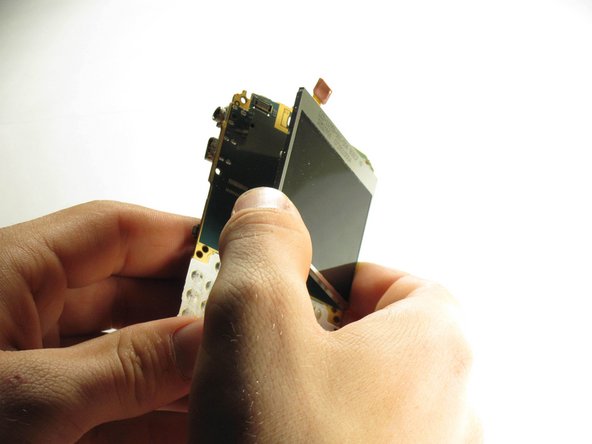
    • Using a plastic opening tool, gently pull the connector directly up from the motherboard.

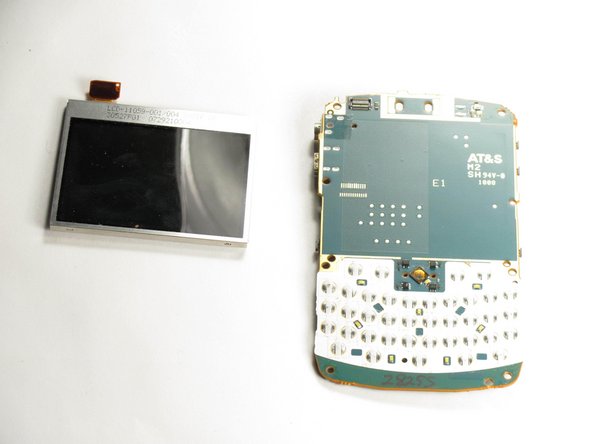
    • Remove the LCD screen from the motherboard.

    • The screen is attached to the motherboard with adhesive.

Bitiş Çizgisi

Christopher Aiello

Üyelik tarihi: 10/12/11

89 İtibar

5 adet Kılavuz yazıldı

Ekip

Cal Poly, Team 3-6, Regan Fall 2011 Cal Poly, Team 3-6, Regan Fall 2011 üyesi

CPSU-REGAN-F11S3G6

5 Üyeler

9 adet Kılavuz yazıldı

0 Yorum

Yorum Ekle

İstatistikleri Görüntüle:

Son 24 Saat: 2

Son 7 gün: 4

Son 30 gün: 6

Her zaman: 2,395