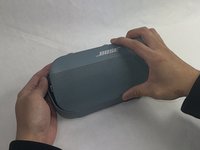
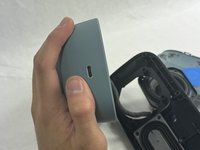
Ana içeriğe geç

Bose Soundlink Flex Charging Port Replacement

Neye ihtiyacın var

  1. Bose Soundlink Flex Charging Port Replacement, Grille: adım 1, 1 resimden 1.
    • Use a heat gun to warm up the device.

    • This will allow for an easier removal of the grille and prevent damage to the device during the replacement. If you do not have access to a heat gun, a hair dryer works as well.

  2. Bose Soundlink Flex Charging Port Replacement: adım 2, 1 resimden 1.
    • Use an iFixit opening tool to pop off the eight clips on the grille.

    • Be patient and do not rush this process as you may otherwise damage the device.

  3. Bose Soundlink Flex Charging Port Replacement: adım 3, 2 resimden 1. Bose Soundlink Flex Charging Port Replacement: adım 3, 2 resimden 2.
    • Once the clips have been released, the only thing holding the grille on is glue.

    • Apply minimal force and the grille should pop right off the device.

    • Reheat the device to warm up the glue if there is difficulty in removing.

  4. Bose Soundlink Flex Charging Port Replacement, Charging Port: adım 4, 3 resimden 1. Bose Soundlink Flex Charging Port Replacement, Charging Port: adım 4, 3 resimden 2. Bose Soundlink Flex Charging Port Replacement, Charging Port: adım 4, 3 resimden 3.
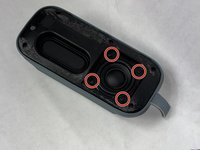
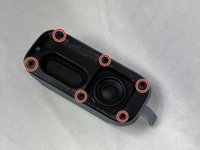
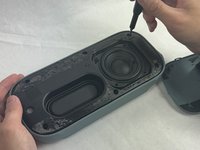
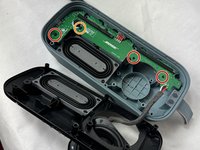
    • Remove the four 2.3 mm screws holding the driver in place using a TR8 Torx screwdriver.

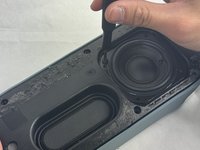
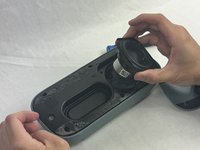
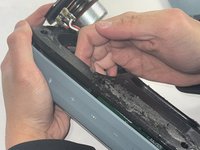
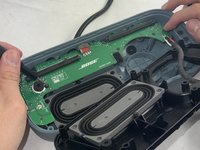
    • Lift the driver out, being cautious of the wires still connected to the device.

  5. Bose Soundlink Flex Charging Port Replacement: adım 5, 3 resimden 1. Bose Soundlink Flex Charging Port Replacement: adım 5, 3 resimden 2. Bose Soundlink Flex Charging Port Replacement: adım 5, 3 resimden 3.
    • Remove the six 2.3 mm screws around the edge with a TR8 Torx screwdriver.

    • Pull the back panel off exposing the motherboard.

  6. Bose Soundlink Flex Charging Port Replacement: adım 6, 2 resimden 1. Bose Soundlink Flex Charging Port Replacement: adım 6, 2 resimden 2.
    • Remove the three 1.7 mm screws from the motherboard using a TR6 Torx screwdriver.

    • Remove the single 1.4 mm screw from the motherboard using a TR5 Torx screwdriver.

  7. Bose Soundlink Flex Charging Port Replacement: adım 7, 2 resimden 1. Bose Soundlink Flex Charging Port Replacement: adım 7, 2 resimden 2.
    • Remove the motherboard by sliding the charging port out of the case.

Sonuç

To reassemble your device, follow these instructions in reverse order.

5 farklı kişi bu kılavuzu tamamladı.

Kalvin Lee

Üyelik tarihi: 03/19/24

567 İtibar

3 adet Kılavuz yazıldı

Ekip

UMass Dartmouth, Team 4-1, Shaddix Spring 2024 UMass Dartmouth, Team 4-1, Shaddix Spring 2024 üyesi

UMASSD-SHADDIX-S24S4G1

3 Üyeler

10 adet Kılavuz yazıldı

5Kılavuz Yorumları

Where did you get the port from ?

asdrubalaburto - Yanıt

Can we get the link to the charging port so I can purchase one? Mine fell and broke while charging. Appreciate the instructions.Thanks in advance for the link

Wins - Yanıt

Rather than replacing the port on the motherboard, I will use a Female USB-C to wire power cable, run it through the hole, and seal it with hot glue, so I will not have to repeat this process. But many thanks for the "way in." so to speak.

James - Yanıt

Where is Step 8 and/or other steps?

Jaimie Santiago - Yanıt

Does anyone have a source for the port? Is replacing the m/b the only way other than directly soldering a charging cable?

Adam Yavner - Yanıt

Yorum Ekle

İstatistikleri Görüntüle:

Son 24 Saat: 8

Son 7 gün: 51

Son 30 gün: 195

Her zaman: 2,393