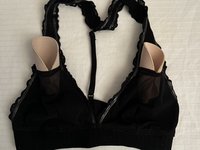
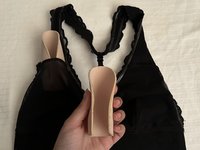
Ana içeriğe geç

Bralette Foam Insert Replacement

Neye ihtiyacın var

  1. Bralette Foam Insert Replacement, Foam Inserts: adım 1, 1 resimden 1.
    • Lay out the bralette in a clean and flat place.

  2. Bralette Foam Insert Replacement: adım 2, 1 resimden 1.
    • Find the foam insert pockets.

    • These are usually found in the cups or sides of the bralette.

  3. Bralette Foam Insert Replacement: adım 3, 1 resimden 1.
    • Take out the existing foam inserts by carefully pulling them from their pockets.

  4. Bralette Foam Insert Replacement: adım 4, 1 resimden 1.
    • Use a lint roller to remove lint or dirt in the pockets.

  5. Bralette Foam Insert Replacement: adım 5, 1 resimden 1.
    • Select the right roam inserts that have the perfect size and thickness for the bralette.

  6. Bralette Foam Insert Replacement: adım 6, 2 resimden 1. Bralette Foam Insert Replacement: adım 6, 2 resimden 2.
    • Slide the replacement foam insert into the pocket of the bralette.

    • Make sure no bumps are present.

  7. Bralette Foam Insert Replacement: adım 7, 1 resimden 1.
    • Once inserted, make sure the foam inserts are in the correct place and give the ideal shape and support.

  8. Bralette Foam Insert Replacement: adım 8, 1 resimden 1.
    • Put the bralette on to check the shape and support of the replacement foam inserts.

    • Make any improvements if required.

Sonuç

You did it! You have replaced your old foam inserts to revamp your favourite bralette.

Tasnuva Bushra

Üyelik tarihi: 07/04/24

157 İtibar

1 Kılavuz yazıldı

Ekip

0Kılavuz Yorumları

Yorum Ekle

İstatistikleri Görüntüle:

Son 24 Saat: 1

Son 7 gün: 2

Son 30 gün: 13

Her zaman: 185