Ana içeriğe geç

Braven BRV-HD Motherboard Replacement

Neye ihtiyacın var

  1. Braven BRV-HD Motherboard Replacement, Battery: adım 1, 2 resimden 1. Braven BRV-HD Motherboard Replacement, Battery: adım 1, 2 resimden 2.
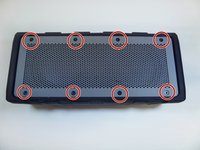
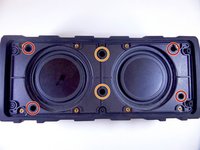
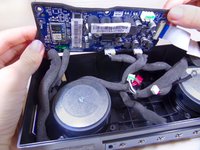
    • Placing the device on its back with the BRV-HD logo facing up, remove the eight 5mm hexagon 2.0 screws on the front panel.

    • Make sure the device is turned off before starting.

  2. Braven BRV-HD Motherboard Replacement: adım 2, 1 resimden 1.
    • Lift the front panel off of the speaker using a plastic opening tool.

  3. Braven BRV-HD Motherboard Replacement: adım 3, 2 resimden 1. Braven BRV-HD Motherboard Replacement: adım 3, 2 resimden 2.
    • Placing the device with the back panel facing up, remove the eight 5mm hexagon 2.0 screws from the back panel.

  4. Braven BRV-HD Motherboard Replacement: adım 4, 1 resimden 1.
    • Lift the back panel off of the device with a plastic opening tool.

  5. Braven BRV-HD Motherboard Replacement: adım 5, 2 resimden 1. Braven BRV-HD Motherboard Replacement: adım 5, 2 resimden 2.
    • Turning the device on its side, unscrew the four 15mm hexagon 2.0 screws on the charging port panel.

  6. Braven BRV-HD Motherboard Replacement: adım 6, 1 resimden 1.
    • Remove the outer rubber flap and the plastic side port panel.

  7. Braven BRV-HD Motherboard Replacement: adım 7, 2 resimden 1. Braven BRV-HD Motherboard Replacement: adım 7, 2 resimden 2.
    • Place the device on its front.

    • Loosen the four 12mm Phillips screws in the four corners with a J1 screwdriver.

    • Loosen the two 8mm Phillips screws in the center with a J1 screwdriver.

    • These screws are difficult to reach and will require a screwdriver extension piece.

  8. Braven BRV-HD Motherboard Replacement: adım 8, 1 resimden 1.
    • Pull off the rubber sleeve surrounding the speaker using your hands.

    • There is adhesive binding the sleeve to the speaker and force will be required to remove the sleeve.

  9. Braven BRV-HD Motherboard Replacement: adım 9, 1 resimden 1.
    • Lift the black covering off of the speaker using both hands.

    • Loose screws that you were unable to remove with the screwdriver will be removed when you lift off the black covering.

  10. Braven BRV-HD Motherboard Replacement: adım 10, 1 resimden 1.
    • Remove the four 12mm Phillips screws securing the two battery brackets with a J1 screwdriver.

    • Move any wires aside to have better access to the screws securing the battery.

  11. Braven BRV-HD Motherboard Replacement: adım 11, 1 resimden 1.
    • Remove the two brackets that hold down the battery using your hands.

  12. Braven BRV-HD Motherboard Replacement: adım 12, 2 resimden 1. Braven BRV-HD Motherboard Replacement: adım 12, 2 resimden 2.
    • Use the plastic opening tool to lift up the battery.

    • Remove the battery using your hands.

    • The wires connecting the battery to the motherboard are still plugged in. Avoid pulling on the battery or these wires may break.

  13. Braven BRV-HD Motherboard Replacement: adım 13, 1 resimden 1.
    • Disconnect the wire attaching the battery to the motherboard.

    • There is green glue on the wire ports preventing the wires from falling out. Peel and remove this glue as necessary.

    • Be careful when pulling out the wires from their ports. The metal stems attached to the ports can break. A spudger or tweezers may help.

  14. Braven BRV-HD Motherboard Replacement, Motherboard: adım 14, 3 resimden 1. Braven BRV-HD Motherboard Replacement, Motherboard: adım 14, 3 resimden 2. Braven BRV-HD Motherboard Replacement, Motherboard: adım 14, 3 resimden 3.
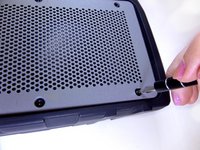
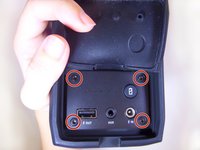
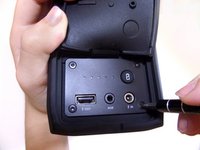
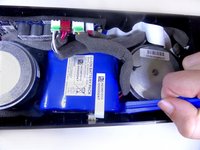
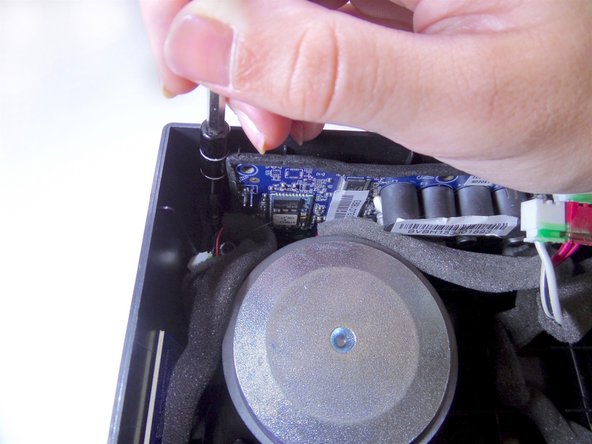
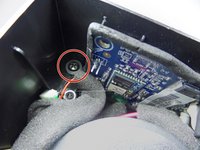
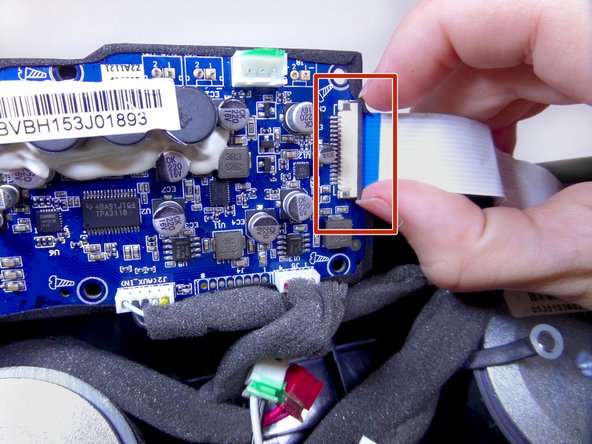
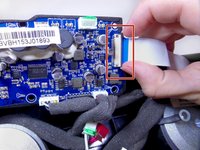
    • Locating the two screws on either side of the motherboard, unscrew the two 8 mm Phillips head screws using a J1 Phillips head screw driver.

  15. Braven BRV-HD Motherboard Replacement: adım 15, 3 resimden 1. Braven BRV-HD Motherboard Replacement: adım 15, 3 resimden 2. Braven BRV-HD Motherboard Replacement: adım 15, 3 resimden 3.
    • Slide out the motherboard using your hands.

    • Unplug all the wires attaching the motherboard to the device.

    • Remove and replace motherboard.

    • Some wires are glued to the motherboard with a green glue. Remove the glue before removing the wires.

Sonuç

To reassemble your device, follow these instructions in reverse order.

Bir başkası bu kılavuzu tamamladı.

Courtney Van Buren

Üyelik tarihi: 09/15/16

330 İtibar

2 adet Kılavuz yazıldı

Ekip

CSU Fullerton, Team 1-5, Bruce Fall 2016 CSU Fullerton, Team 1-5, Bruce Fall 2016 üyesi

CSUF-BRUCE-F16S1G5

5 Üyeler

5 adet Kılavuz yazıldı

0 Yorum

Yorum Ekle

İstatistikleri Görüntüle:

Son 24 Saat: 0

Son 7 gün: 0

Son 30 gün: 3

Her zaman: 889