Bu sürüm, hatalı düzenlemeler içerebilir. En son doğrulanmış bellek kopyası dönün.
Neye ihtiyacın var
-
Bu adım çevrilmemiş. Çevrilmesine yardım edin
-
Placing the device on its back with the BRV-HD logo facing up, remove the eight 5mm hexagon 2.0 screws on the front panel.
-
-
Bu adım çevrilmemiş. Çevrilmesine yardım edin
-
Lift the front panel off of the speaker using a plastic opening tool.
-
-
Bu adım çevrilmemiş. Çevrilmesine yardım edin
-
Placing the device with the back panel facing up, remove the eight 5mm hexagon 2.0 screws from the back panel.
-
-
Bu adım çevrilmemiş. Çevrilmesine yardım edin
-
Lift the back panel off of the device with a plastic opening tool.
-
-
Bu adım çevrilmemiş. Çevrilmesine yardım edin
-
Turning the device on its side, unscrew the four 15mm hexagon 2.0 screws on the charging port panel.
-
-
Bu adım çevrilmemiş. Çevrilmesine yardım edin
-
Remove the outer rubber flap and the plastic side port panel.
-
-
-
Bu adım çevrilmemiş. Çevrilmesine yardım edin
-
Place the device on its front.
-
Loosen the four 12mm Phillips screws in the four corners with a J1 screwdriver.
-
Loosen the two 8mm Phillips screws in the center with a J1 screwdriver.
-
-
Bu adım çevrilmemiş. Çevrilmesine yardım edin
-
Pull off the rubber sleeve surrounding the speaker using your hands.
-
-
Bu adım çevrilmemiş. Çevrilmesine yardım edin
-
Lift the black covering off of the speaker using both hands.
-
-
Bu adım çevrilmemiş. Çevrilmesine yardım edin
-
Remove the four 12mm Phillips screws securing the two battery brackets with a J1 screwdriver.
-
-
Bu adım çevrilmemiş. Çevrilmesine yardım edin
-
Remove the two brackets that hold down the battery using your hands.
-
-
Bu adım çevrilmemiş. Çevrilmesine yardım edin
-
Use the plastic opening tool to lift up the battery.
-
Remove the battery using your hands.
-
-
Bu adım çevrilmemiş. Çevrilmesine yardım edin
-
Disconnect the wire attaching the battery to the motherboard.
-
-
Bu adım çevrilmemiş. Çevrilmesine yardım edin
-
Place the device so the blue button panel is facing up, and use a J00 Phillips J1 head screw driver to remove the two 7mm Phillips head screws on either side of the button panel.
-
-
Bu adım çevrilmemiş. Çevrilmesine yardım edin
-
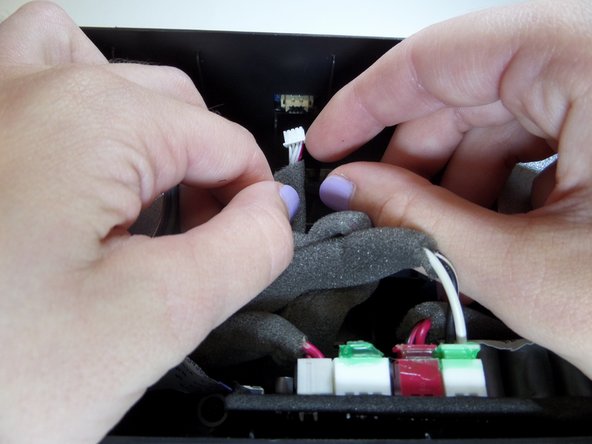
Unplug the wire on the inside of the device that connect to the button panel.
-
-
Bu adım çevrilmemiş. Çevrilmesine yardım edin
-
Pry the button panel off of the speaker using a nylon spudger.
-


Ekip

CSU Fullerton, Team 1-5, Bruce Fall 2016 CSU Fullerton, Team 1-5, Bruce Fall 2016 üyesi
CSUF-BRUCE-F16S1G5
5 Üyeler
5 adet Kılavuz yazıldı