Giriş
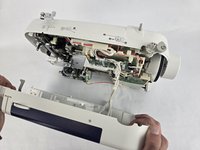
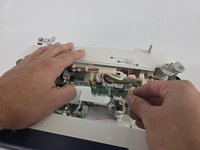
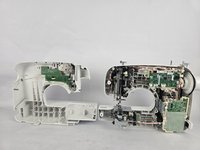
If your Brother CS6000i sewing machine is having any issues internally, it requires the body of the machine to be removed to repair any issue. This guide provides all the information on what screws to remove in order to open up the sewing machine.
This guide will act as a prerequisite to the majority of the Brother CS6000i guides.
Before beginning on this replacement guide, make sure that the Brother CS6000i is completely disconnected from any power source.
Neye ihtiyacın var
-
-
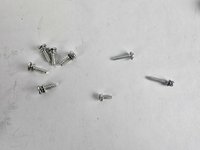
Remove the five 20 mm Phillips #2 screws on the back of the device.
-
Remove the single 28 mm Phillips #2 screw on the back of the device.
-
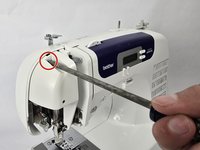
Remove the single 23 mm Phillips #2 screw on the back of the device.
-
-


To reassemble your device, follow these instructions in reverse order.
To reassemble your device, follow these instructions in reverse order.

Ekip

Cuesta, Team 20-1, Krynen Fall 2024 Cuesta, Team 20-1, Krynen Fall 2024 üyesi
CUESTA-KRYNEN-F24S20G1
5 Üyeler
8 adet Kılavuz yazıldı