Ana içeriğe geç

Canon EOS 30 Top Panel Replacement

Neye ihtiyacın var

  1. Canon EOS 30 Top Panel Replacement, Front Panel: adım 1, 1 resimden 1.
    • Remove the two 4.8 mm black screws above the lens on the front of the camera.

  2. Canon EOS 30 Top Panel Replacement: adım 2, 1 resimden 1.
    • Remove the 4.3 mm black screw under the lens ring, and the 4.8 mm black screw under the camera.

  3. Canon EOS 30 Top Panel Replacement: adım 3, 1 resimden 1.
    • Remove the 4.8 mm black screw on the left side of the camera.

  4. Canon EOS 30 Top Panel Replacement: adım 4, 1 resimden 1.
    • Remove the front panel by lifting it away from the camera's body.

  5. Canon EOS 30 Top Panel Replacement, Top Panel: adım 5, 1 resimden 1.
    • Slide the outer eyepiece upward to remove it.

  6. Canon EOS 30 Top Panel Replacement: adım 6, 1 resimden 1.
    • Remove the two 4.75 mm black screws located on the top of the camera.

  7. Canon EOS 30 Top Panel Replacement: adım 7, 1 resimden 1.
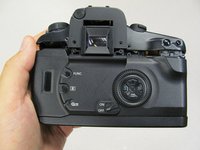
    • Remove the four 4.3 mm black screws near the bottom corners of the eyepiece at the back of the camera.

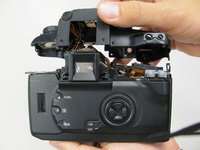
  8. Canon EOS 30 Top Panel Replacement: adım 8, 2 resimden 1. Canon EOS 30 Top Panel Replacement: adım 8, 2 resimden 2.
    • Slowly separate the top panel from the camera by pushing it upward.

    • Separating the top panel too far or quickly can damage the ribbon cable and connecting wires that are still attached to the top panel of the camera.

Sonuç

To reassemble your device, follow these instructions in reverse order.

Bir başkası bu kılavuzu tamamladı.

Sterling Vinson

Üyelik tarihi: 04/17/11

259 İtibar

5 adet Kılavuz yazıldı

Ekip

Cal Poly, Team 8-8, Regan Spring 2011 Cal Poly, Team 8-8, Regan Spring 2011 üyesi

CPSU-REGAN-S11S8G8

5 Üyeler

22 adet Kılavuz yazıldı

0 Yorum

Yorum Ekle

İstatistikleri Görüntüle:

Son 24 Saat: 3

Son 7 gün: 5

Son 30 gün: 17

Her zaman: 2,718