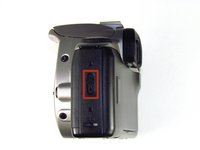
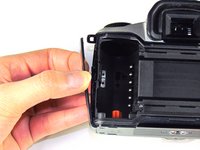
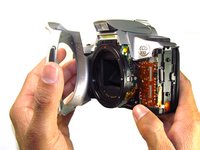
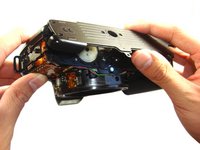
Ana içeriğe geç

Canon EOS 300 Bottom Panel Replacement

Neye ihtiyacın var

  1. Canon EOS 300 Bottom Panel Replacement, Batteries: adım 1, 3 resimden 1. Canon EOS 300 Bottom Panel Replacement, Batteries: adım 1, 3 resimden 2. Canon EOS 300 Bottom Panel Replacement, Batteries: adım 1, 3 resimden 3.
    • Open up the battery door.

  2. Canon EOS 300 Bottom Panel Replacement: adım 2, 2 resimden 1. Canon EOS 300 Bottom Panel Replacement: adım 2, 2 resimden 2.
    • Remove the batteries from the camera by sliding them out into your palm.

  3. Canon EOS 300 Bottom Panel Replacement, Side Panel with Lever: adım 3, 2 resimden 1. Canon EOS 300 Bottom Panel Replacement, Side Panel with Lever: adım 3, 2 resimden 2.
    • Release the side latch to open the back panel.

  4. Canon EOS 300 Bottom Panel Replacement: adım 4, 2 resimden 1. Canon EOS 300 Bottom Panel Replacement: adım 4, 2 resimden 2.
    • Remove the two black 4.5mm screws above and below the latch.

  5. Canon EOS 300 Bottom Panel Replacement: adım 5, 2 resimden 1. Canon EOS 300 Bottom Panel Replacement: adım 5, 2 resimden 2.
    • Using your finger, carefully pry open the side panel from the top of camera.

    • Pull panel downwards to remove.

    • Make sure to keep track of the small black piece of rubber under the latch.

  6. Canon EOS 300 Bottom Panel Replacement, Front Panel: adım 6, 2 resimden 1. Canon EOS 300 Bottom Panel Replacement, Front Panel: adım 6, 2 resimden 2.
    • Remove the two silver 6mm Phillips #1 screws.

  7. Canon EOS 300 Bottom Panel Replacement: adım 7, 2 resimden 1. Canon EOS 300 Bottom Panel Replacement: adım 7, 2 resimden 2.
    • Flip camera over to the bottom.

    • Remove the one 5mm Phillips #1 silver screw.

  8. Canon EOS 300 Bottom Panel Replacement: adım 8, 2 resimden 1. Canon EOS 300 Bottom Panel Replacement: adım 8, 2 resimden 2.
    • Remove the front panel by pulling away from the side with the lever.

  9. Canon EOS 300 Bottom Panel Replacement, Bottom Panel: adım 9, 2 resimden 1. Canon EOS 300 Bottom Panel Replacement, Bottom Panel: adım 9, 2 resimden 2.
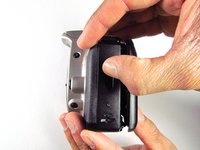
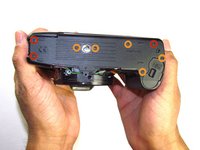
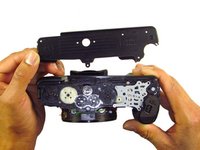
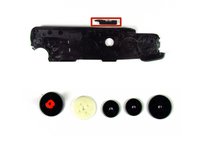
    • Remove three black 7.3mm Phillips #1 screws located on the corners of the camera.

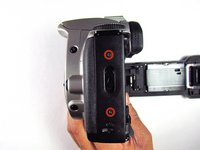
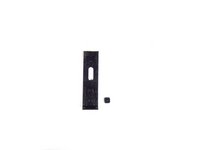
    • Remove five black 4.8mm Phillips #1 screws.

  10. Canon EOS 300 Bottom Panel Replacement: adım 10, 3 resimden 1. Canon EOS 300 Bottom Panel Replacement: adım 10, 3 resimden 2. Canon EOS 300 Bottom Panel Replacement: adım 10, 3 resimden 3.
    • Simply remove the bottom panel by prying it off with your finger.

    • When removing the panel, be sure the bottom of the camera is facing upright. There are loose gears that may fall out.

    • Be wary of a loose piece of foam attached to the bottom panel.

Sonuç

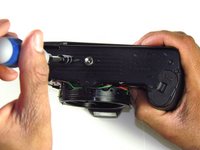
To reassemble your device, follow these instructions in reverse order.

Bir başkası bu kılavuzu tamamladı.

Tammy Kong

Üyelik tarihi: 01/23/14

771 İtibar

6 adet Kılavuz yazıldı

Ekip

Cal Poly, Team 6-20, Maness Winter 2014 Cal Poly, Team 6-20, Maness Winter 2014 üyesi

CPSU-MANESS-W14S6G20

4 Üyeler

32 adet Kılavuz yazıldı

Bir Yorum

muy buena la explicacion de como desmontar la maquina. Te has gadano los 30 puntos

Ricardo Alonso Gurrea - Yanıt

Yorum Ekle

İstatistikleri Görüntüle:

Son 24 Saat: 0

Son 7 gün: 0

Son 30 gün: 7

Her zaman: 649