Ana içeriğe geç

Bu kılavuzda güncel değişiklikler var. En son onaylanmamış sürüme geçin.

Canon EOS Rebel XS Strap Loops Replacement

Neye ihtiyacın var

  1. Canon EOS Rebel XS Strap Loops Replacement, Latch Side Cover: adım 1, 1 resimden 1.
    • Remove the two 3mm (1/8") black screws from the side cover using a #00 Phillips screwdriver.

  2. Canon EOS Rebel XS Strap Loops Replacement: adım 2, 1 resimden 1.
    • On the bottom, remove the 6mm (13/64") screw with the #00 Phillips Screwdriver.

    • Pry up the panel; starting from the front/bottom corner, as indicated.

    • There's a concealed lip, under the opposite edge.

  3. Canon EOS Rebel XS Strap Loops Replacement, Disassembling Canon EOS Rebel XS Front Cover: adım 3, 1 resimden 1.
    • Remove three medium length screws from the bottom of the camera

  4. Canon EOS Rebel XS Strap Loops Replacement: adım 4, 1 resimden 1.
    • Remove the two medium length screws on the front panel of the camera above the lens mount.

    • Once you done, you may use the Spudger to panel from non-grip side.

    • If you start on the grip side, it will be more challenging to loosen the panel.

  5. Canon EOS Rebel XS Strap Loops Replacement, Back Cover: adım 5, 1 resimden 1.
    • Remove the three long black screws from the bottom using a #00 Phillips screwdriver.

    • Use tweezers to lift the panel.

  6. Canon EOS Rebel XS Strap Loops Replacement: adım 6, 1 resimden 1.
    • Once you have detached the back cover, use a pair of tweezers to lightly pull on strap found connecting the back cover to the camera.

  7. Canon EOS Rebel XS Strap Loops Replacement, Grip: adım 7, 1 resimden 1.
    • Remove the two 4.5mm (.18in) long black screws from the camera grip using a #00 Phillips screwdriver.

  8. Canon EOS Rebel XS Strap Loops Replacement: adım 8, 1 resimden 1.
    • Use your fingertip to pry off the external shutter port cover.

  9. Canon EOS Rebel XS Strap Loops Replacement: adım 9, 1 resimden 1.
    • Remove the two 5mm (.20in) long silver screws securing the grip to the camera using a #00 Phillips screwdriver.

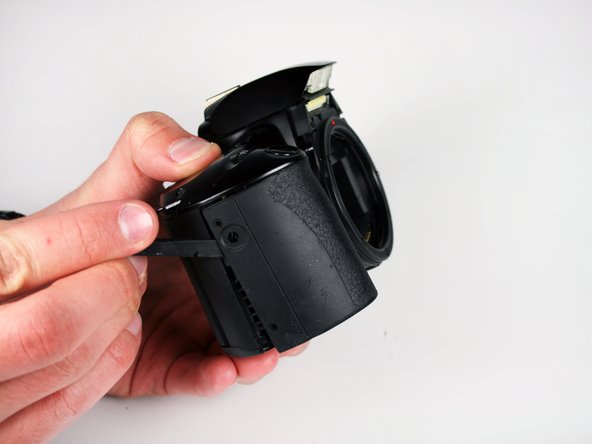
  10. Canon EOS Rebel XS Strap Loops Replacement: adım 10, 3 resimden 1. Canon EOS Rebel XS Strap Loops Replacement: adım 10, 3 resimden 2. Canon EOS Rebel XS Strap Loops Replacement: adım 10, 3 resimden 3.
    • Use the spudger tool to carefully pry the grip from the rest of the camera.

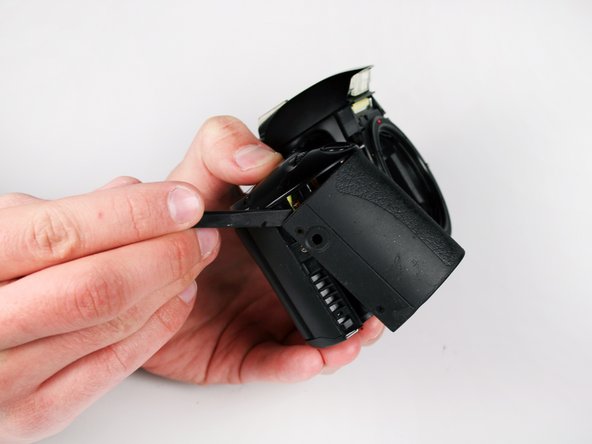
  11. Canon EOS Rebel XS Strap Loops Replacement: adım 11, 1 resimden 1.
    • Once the grip is loose, use your fingers to remove it from the camera.

  12. Canon EOS Rebel XS Strap Loops Replacement, Eyepiece: adım 12, 2 resimden 1. Canon EOS Rebel XS Strap Loops Replacement, Eyepiece: adım 12, 2 resimden 2.
    • Grasp the eyepiece with your fingers and slide upwards to remove it.

  13. Canon EOS Rebel XS Strap Loops Replacement, Top Panel: adım 13, 1 resimden 1.
    • Remove the following ribbons with the tweezers by gently pulling on them.

    • Remove the three black screws, near the eye piece, using the Phillips Screwdriver.

  14. Canon EOS Rebel XS Strap Loops Replacement: adım 14, 1 resimden 1.
    • Remove the cable heads attached on the front side of the camera next to the lens mount.

    • Be gentle when puling wires lose, use the tweezers to remove the wires.

  15. Canon EOS Rebel XS Strap Loops Replacement: adım 15, 1 resimden 1.
    • You can use your fingers to pull the top panel of the camera.

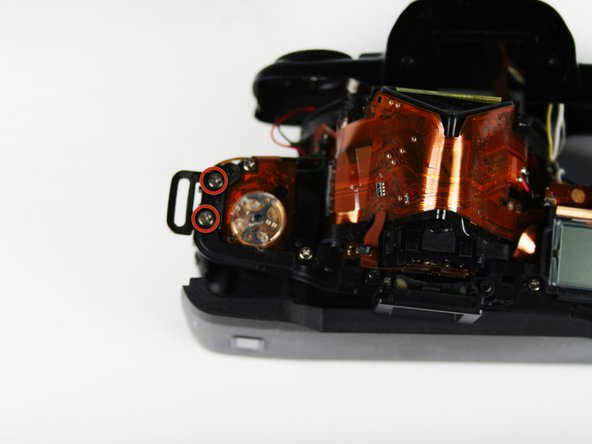
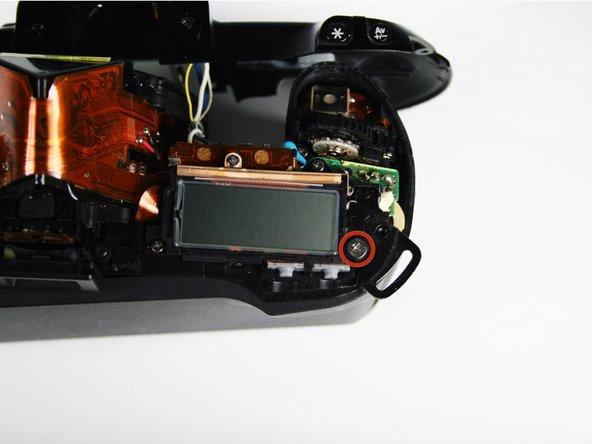
  16. Canon EOS Rebel XS Strap Loops Replacement, Strap Loops: adım 16, 3 resimden 1. Canon EOS Rebel XS Strap Loops Replacement, Strap Loops: adım 16, 3 resimden 2. Canon EOS Rebel XS Strap Loops Replacement, Strap Loops: adım 16, 3 resimden 3.
    • Remove the two 5.0mm (.20in) silver screws from the first loop hole using a #00 Phillips screwdriver (Picture Two).

    • Remove the 6.8mm (.27in) wide head silver screw from the second loop hole using a #00 Phillips screwdriver (Picture Three).

  17. Canon EOS Rebel XS Strap Loops Replacement: adım 17, 2 resimden 1. Canon EOS Rebel XS Strap Loops Replacement: adım 17, 2 resimden 2.
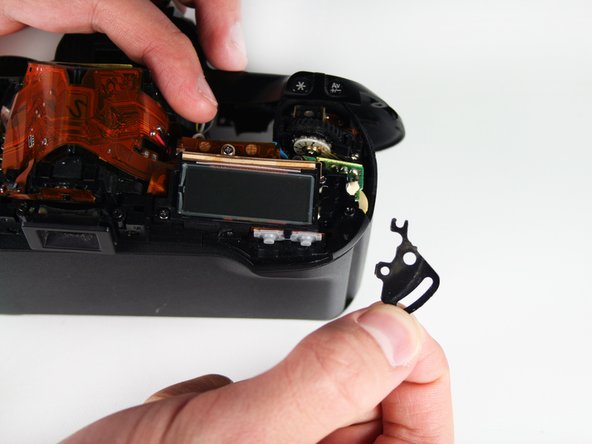
    • Use your fingers to remove the loop holes.

Sonuç

To reassemble your device, follow these instructions in reverse order.

Daniel Bussone

Üyelik tarihi: 01/28/11

1.251 İtibar

11 adet Kılavuz yazıldı

Ekip

Cal Poly, Team 3-41, Regan Winter 2011 Cal Poly, Team 3-41, Regan Winter 2011 üyesi

CPSU-REGAN-W11S3G41

2 Üyeler

21 adet Kılavuz yazıldı

0 Yorum

Yorum Ekle

İstatistikleri Görüntüle:

Son 24 Saat: 0

Son 7 gün: 0

Son 30 gün: 1

Her zaman: 875