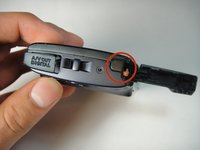
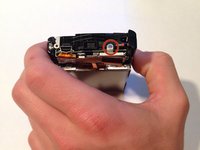
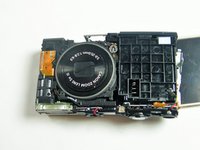
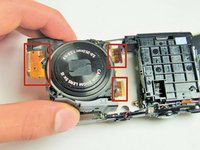
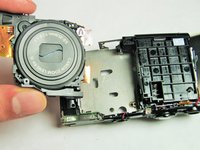
Ana içeriğe geç

Canon PowerShot A3400 IS Lens Replacement

Neye ihtiyacın var

  1. Canon PowerShot A3400 IS Lens  Replacement, Battery: adım 1, 1 resimden 1.
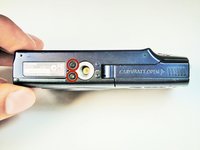
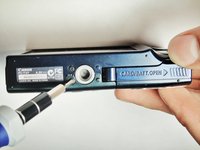
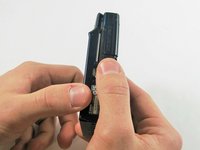
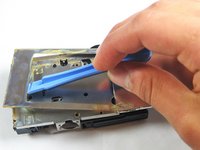
    • Place thumb on area right next to where it says open and slide to the right to open.

  2. Canon PowerShot A3400 IS Lens  Replacement: adım 2, 1 resimden 1.
    • Remove the battery by pushing the orange object outwards; the battery will spring up and out.

  3. Canon PowerShot A3400 IS Lens  Replacement, Plastic Case: adım 3, 2 resimden 1. Canon PowerShot A3400 IS Lens  Replacement, Plastic Case: adım 3, 2 resimden 2.
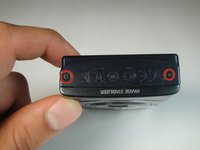
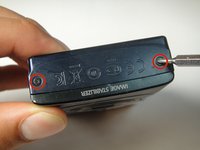
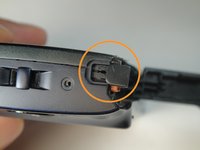
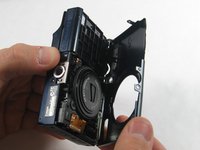
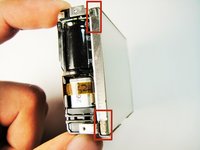
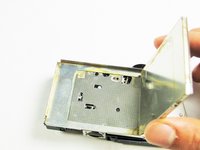
    • Remove the two 5.00 mm screws in the bottom of the casing with a Philips #000 screwdriver

  4. Canon PowerShot A3400 IS Lens  Replacement: adım 4, 2 resimden 1. Canon PowerShot A3400 IS Lens  Replacement: adım 4, 2 resimden 2.
    • Place the camera on to the side that has the image stabilizer label.

    • Remove the 5.00 mm screws that are on this side using the screwdriver.

  5. Canon PowerShot A3400 IS Lens  Replacement: adım 5, 1 resimden 1.
    • Place camera on to the side with the A/V Out Digital Cover facing up.

    • Remove this visible 5.00 mm screw.

    • Pull the A/V Out Digital cover back to uncover the next step.

  6. Canon PowerShot A3400 IS Lens  Replacement: adım 6, 1 resimden 1.
    • Remove the 5.00 mm screw from behind the cover.

  7. Canon PowerShot A3400 IS Lens  Replacement: adım 7, 1 resimden 1.
    • Make sure the battery cover is open.

  8. Canon PowerShot A3400 IS Lens  Replacement: adım 8, 2 resimden 1. Canon PowerShot A3400 IS Lens  Replacement: adım 8, 2 resimden 2.
    • Turn the camera onto the side with the A/V out Digital cover.

    • Use your finger to pull this tab to the right.

  9. Canon PowerShot A3400 IS Lens  Replacement: adım 9, 3 resimden 1. Canon PowerShot A3400 IS Lens  Replacement: adım 9, 3 resimden 2. Canon PowerShot A3400 IS Lens  Replacement: adım 9, 3 resimden 3.
    • Remove the lens side by using your fingers or a spudger to pry it gently open.

    • Try to pry it loose all around that side so that it is easier to pull off.

  10. Canon PowerShot A3400 IS Lens  Replacement: adım 10, 3 resimden 1. Canon PowerShot A3400 IS Lens  Replacement: adım 10, 3 resimden 2. Canon PowerShot A3400 IS Lens  Replacement: adım 10, 3 resimden 3.
    • Using your fingers, pull the screen side gently off.

    • Try to loosen it all around that side so that it is easier to try and pull it off.

  11. Canon PowerShot A3400 IS Lens  Replacement, Lens: adım 11, 3 resimden 1. Canon PowerShot A3400 IS Lens  Replacement, Lens: adım 11, 3 resimden 2. Canon PowerShot A3400 IS Lens  Replacement, Lens: adım 11, 3 resimden 3.
    • Remove the three 5 mm screws

  12. Canon PowerShot A3400 IS Lens  Replacement: adım 12, 3 resimden 1. Canon PowerShot A3400 IS Lens  Replacement: adım 12, 3 resimden 2. Canon PowerShot A3400 IS Lens  Replacement: adım 12, 3 resimden 3.
    • Pull the screen away from the main components.

    • Do not pull hard as there are some ribbons still attached to the motherboard that could be damaged if you use too much force.

  13. Canon PowerShot A3400 IS Lens  Replacement: adım 13, 2 resimden 1. Canon PowerShot A3400 IS Lens  Replacement: adım 13, 2 resimden 2.
    • Lift the metal plate with the plastic opening tool.

  14. Canon PowerShot A3400 IS Lens  Replacement: adım 14, 1 resimden 1.
    • Remove all of these 5 mm screws

  15. Canon PowerShot A3400 IS Lens  Replacement: adım 15, 3 resimden 1. Canon PowerShot A3400 IS Lens  Replacement: adım 15, 3 resimden 2. Canon PowerShot A3400 IS Lens  Replacement: adım 15, 3 resimden 3.
    • Gently remove the lens componenet.

    • The orange flex cables are connected to ZIF connectors. Be sure to disconnect and reconnect them properly by first unlocking the retaining flap on each connector.

Sonuç

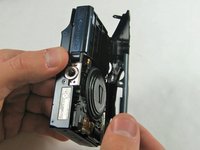
To reassemble your device, follow these instructions in reverse order.

Bir başkası bu kılavuzu tamamladı.

tariq

Üyelik tarihi: 01/13/15

131 İtibar

1 Kılavuz yazıldı

Ekip

USF Tampa, Team 1-1, Sullivan Winter 2015 USF Tampa, Team 1-1, Sullivan Winter 2015 üyesi

USFT-SULLIVAN-W15S1G1

3 Üyeler

8 adet Kılavuz yazıldı

2 Yorum

SOOOO! How do you plug those oranges wires back?? Ive been wasting my time trying to plug it but i have no clue how.. It's too short and its hard to secure it..

The Heat - Yanıt

I don’t own this camera but that does look like an oversight in this guide. Those are flex cables secured by ZIF connectors and it’s not enough to just “pull them slowly” as originally stated in this guide. I’ve tried to update the instructions accordingly, but some additional pictures would be helpful.

Jeff Suovanen -

Yorum Ekle

İstatistikleri Görüntüle:

Son 24 Saat: 0

Son 7 gün: 2

Son 30 gün: 8

Her zaman: 848